Change Data Capture with Gathr
Change Data Capture (CDC) comprises of a source, which is the Online transactional database that has to be replicated to a data store dedicated for BI and analytics.
Often the OLTP (Online Transactional Processing) systems have commercial databases, which write and store data in proprietary format that is hard to read and replicate. The sooner the data is replicated on the target system, the faster it is available for analytics with the help of CDC.
Using Gathr, organizations can now ensure that high volumes of data are not just moved but processed before getting delivered.
CDC Application
Databases supported by Gathr for CDC applications – MSSQL, MYSQL, POSTGRES, ORACLE, and Teradata.
To configure each of the supported databases, refer to the below topics.
Enable CDC for Oracle - Please contact Gathr Support for more details.
Enable CDC for MSSQL
The database operator must enable CDC for the table(s) that should be captured by the connector.
For more details, refer to:
Debezium connector for SQL Server
MSSQL Configuration
Before using the Debezium SQL Server connector to monitor the changes committed on SQL Server, first enable CDC on a monitored database.
-- ====
-- Enable Database for CDC template
-- ====
USE MyDB
GO
EXEC sys.sp\_cdc\_enable_db
GO
Then enable CDC for each table that you plan to monitor.
-- ========= -- Enable a Table Specifying Filegroup Option Template -- ========= USE MyDB
GO
EXEC sys.sp_cdc_enable_table
@source_schema = N'dbo',
@source_name = N'MyTable',
@role_name = N'MyRole',
@filegroup_name = N'MyDB_CT',
@supports_net_changes = 1
GO
Start the job to capture the data.
>EXEC sys.sp_cdc_start_job @job_type = N'capture'
Verify that the user has access to the CDC table.
Verify the user of the connector have access, this query should not have empty result.
EXEC sys.sp_cdc_help_change_data_capture GO
If the result is empty, then please make sure that the user has privileges to access both the capture instance and CDC tables.
SELECT [name],is_tracked_by_cdc FROM sys.tables
The inserts/update/ deletes should be reflected in the CDC table

Connector Setup
Download the connectors plugin archives for the required version.
Refer to: https://debezium.io/releases
Check the compatibility with your MSSQL DB and KAFKA version.
Extract the JARs into your Kafka environment and add the directory with the JARs to Kafka Connect’s classpath.
Restart your Kafka Connect process to pick up the new JARs.
Below are the steps:
SSH to one of the node where Kafka broker is configured.
Create folder “MSSQLconnect” in kafka home directory.
Download the debezium cdc release for MSSQL DB from its website. Below is direct link for Debezium connector v1.0.3 (supports MSSQL 2017,2019).
wget https://repo1.maven.org/maven2/io/debezium/debezium-connector-sqlserver/1.0.3.Final/debezium-connector-sqlserver-1.0.3.Final-plugin.tar.gz
Untar the file:
tar -xvf debezium-connector-sqlserver-1.0.3.Final-plugin.tar.gzNow copy all the jar files under “debezium-connector-sqlserver-1.0.3” folder to Kafka_home/libs
To configure the connect details. Edit the file connect-standlone.properties under kafka config:
Vi <kafka_home> / config/connect-standalone.propertiesNow edit below properties:
bootstrap.servers=<kafka_Broker1>:6667,<kafka_Broker2>:6667, ,<kafka_Broker3>:6667
plugin.path= <kafka_home> /libs
rest.port= <6669, check availability of port>
Connector Configuration Files
Configure the connect-standalone.properties or connect-distributed.properties depending on the cluster setup.
Make below settings in /usr/hdp/3.1.0.0-78/kafka /config
plugin.path=/usr/hdp/3.1.0.0-78/kafka/libs
rest.port=6669
You also need to create a new connector properties file, which will have all the information related to the MSSQL server database configuration. There are more metrices available which can be enabled as per the requirements.
Below are minimum required details:
Example: /usr/hdp/3.1.0.0-78/kafka /config/connector.propertie
name=<Mention any Name for connector>
connector.class= io.debezium.connector.sqlserver.SqlServerConnector
database.user=<name of the SQL user that has the required privileges>
database.dbname=< provide any logical name of the MSSQL server/cluster>
database.port=<MSSQL port ie.1433>
database.hostname=< The address of the MSSQL server.>
database.password=< The password for the MSSQL user>
database.whitelist=< A list of all tables whose changes Debezium should capture>
database.history.kafka.bootstrap.servers= <List of Kafka brokers that this connector:PORT>
database.history.kafka.topic= <name of the DB history topic>
Start Connector and Verify the Setup
Start the Kafka connect process for MSSQL:
From the Kafka home directory, run below command:
nohup bin/connect-standalone.sh config/connect-standalone.properties config/mssql_connector.properties &
Verify from the nohup.out log, if the process successfully started or for any ERRORS.
Now, as Kafka connect process has been started and CDC is enabled on MSSQL DB tables, the changes on the Gathr application can be verified.
Also, you can verify the DB row level changes on the Kafka topic:
The SQL Server connector writes events for all insert, update and delete operations on a single table to a single Kafka topic.
The name of the Kafka topics would be serverName.schemaName.tableName, where:
serverName is the logical name of the connector as specified with the database.server.name configuration property.
schemaName is the name of the schema where the operation occurred.
tableName is the name of the database table on which the operation occurred.
Enable CDC for MYSQL
Before the Debezium MySQL connector can be used to monitor the changes committed on a MySQL server, the server should be set up to use row-level binary logging and have a database user with appropriate privileges.
Enable MYSQL Bin Log
Stop the mysqld service
Modify the /etc/my.cnf file with following parameters to enable MySQL bin logging:
Save the changes by clicking on Save.
log-bin=mysql-bin
server-id=1
binlog_format=row
expire_logs_days=10
Start the mysqld service after above changes are done.
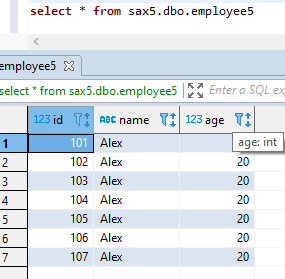
For test purpose, we have created the database “test” with table as “books”. Grant all permission to the user.
GRANT SELECT, RELOAD, SHOW DATABASES, REPLICATION SLAVE, REPLICATION CLIENT ON *.* TO 'test' IDENTIFIED BY ‘password';
Connector Setup/Download
Debezium MySQL jars and detailed documentation are available on:
https://debezium.io/docs/connectors/mysql/
Make sure Zookeeper, Kafka and Kafka Connect are already installed.
Download the connector’s plug-in archive, extract the JARs into your Kafka Connect environment and add the directory with the JARs to Kafka Connect’s classpath.
Restart your Kafka Connect process to pick up the new JARs.
An example of installation on HDP 3.1.0 is shown below:
Check the compatibility of Debezium MYSQL CDC packages with the installed Kafka version.
Extract the package to a directory and then copy the Debezium jar files under:
/usr/hdp/3.1.0.0-78/kafka/libs
Connector Configuration Files
Configure the connect-standalone.properties or connect-distributed.properties depending on the cluster setup.
Make below settings in /usr/hdp/3.1.0.0-78/kafka /config
plugin.path=/usr/hdp/3.1.0.0-78/kafka/libs
rest.port=6669
You also need to create a new connector properties file, which will have all the information related to the MySQL server database configuration. There are more metrices available which can be enabled as per the requirements.
Below are minimum required details:
Example: /usr/hdp/3.1.0.0-78/kafka /config/connector.properties
name=<Mention any Name for connector>
connector.class=io.debezium.connector.mysql.MySqlConnector
database.user=<name of the MySQL user that has the required privileges>
database.history.kafka.bootstrap.servers= <List of Kafka brokers that this connector:PORT>
database.history.kafka.topic= <name of the DB history topic>
database.server.name=< provide any logical name of the MySQL server/cluster>
database.port=<MySQL DB port ie.3306>
database.hostname=< The address of the MySQL server.>
database.password=< The password for the MySQL user>
database.whitelist=< list of all databases hosted by this server that this connector will monitor. This is optional>
Start the Connector
Once all the previous settings are done correctly, start the Debezium Connector.
Use below command to start:
nohup /usr/hdp/3.1.0.0-78/kafka/bin/connect-standalone.sh config/connect-standalone.properties config/connector.properties &
You can further monitor the nohup.log for its start-up or ERRORS while starting the connector.
Once the connector is started successfully, it is now ready to record the data changes.
MYSQL Connector Test
The MySQL connector writes events for all insert, update and delete operations on a single table to a single Kafka topic.
The name of the Kafka topics would be serverName.databaseName.tableName, where:
serverName is the logical name of the connector as specified with the database.server.name configuration property.
databaseName is the name of the database where the operation occurred.
-tableName is the name of the database table on which the operation occurred.
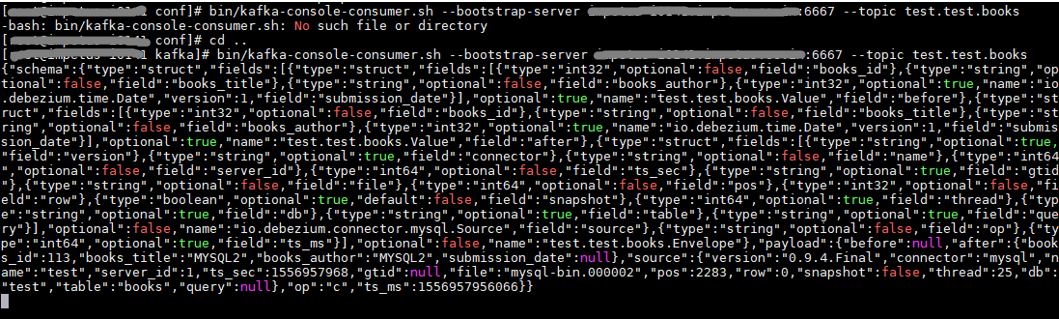
For verification, make any changes into the MySQL DB, the changes should be reflected in the Kafka topic.

bin/kafka-console-consumer.sh --bootstrap-server <kafka bootstrapserver>:6667 --topic test.test.books
Enable CDC for PostgreSQL
To enable CDC for PostgreSQL, a logical decoding output plugin needs to be installed and configured.
For Gathr, the wal2json plugin is used.
Plugin Installation Steps
The installation process requires the PostgreSQL utility pg_config.
Make sure that the PATH environment variable is set correctly to point to PostgreSQL home bin directory.
If not, update the PATH environment variable as follows:
PATH=/< postgresql_home_dir >/bin:$PATH
Steps to install and configure the wal2json plugin
Install GIT using the below command:
yum install gitClone wal2json GIT repo using the below command:
git clone https://github.com/eulerto/wal2json.gitRun below commands to install the wal2json plugin.
cd wal2json
make
make install
To configure the wal2json plugin, the following parameters must be configured in the /<postgresql_home_dir>/data/postgresql.conf file.
listen_addresses = '*'          # what IP address(es) to listen on;
shared_preload_libraries = 'wal2json'

# Add extension settings after this line

wal_level=logical
max_wal_senders=3
max_replication_slots=10
Create a Role for Gathr in PostgreSQL Database
A role is required for Gathr to read the source database events for CDC.
Create a role for Gathr using the below command:
CREATE ROLE <name> with REPLICATION LOGIN PASSWORD '<password>';Grant privileges to the role created for Gathr using the below command:
GRANT CONNECT ON DATABASE <Database_Name> to <Role>;

GRANT USAGE ON SCHEMA <Schema_Name> TO <Role>;

GRANT SELECT ON ALL TABLES IN SCHEMA <Schema_Name> TO <role>;

ALTER DEFAULT privileges IN SCHEMA <Schema_Name> GRANT SELECT ON TABLES TO <role>;
Allow role access from Gathr’s IP(s)
Add the below line in the /<postgresql_home_dir>/data/pg_hba.conf file.
host replication <role> < IP_ADDRESS > md5Repeat the above step for the Gathr IPs:
3.13.24.114/32
3.128.81.146/32
Restart the PostgreSQL Database server.
Setting for Tables Without Primary Key
A table must have a replica identity configured to be able to replicate UPDATE and DELETE operations so that appropriate rows to update or delete can be identified on the replica table.
By default, this is the primary key, if there is one. If the table does not have a primary key, it can be set to replica identity full meaning the entire row becomes the key.
However, this is inefficient and should only be used as a fallback if no other solution is possible.
Run the below query for each table in source DB configured for CDC:
ALTER TABLE <table_name> REPLICA IDENTITY FULL;
If you have any feedback on Gathr documentation, please email us!