Amazon Athena ETL Target
See the Connector Marketplace topic. Please request your administrator to start a trial or subscribe to the Premium Amazon Athena connector.
Amazon Athena ETL Target allows you to emit the transformed data into your Amazon Athena accounts.
Target Configuration
Configure the data emitter parameters as explained below.
Connection Name
Connections are the service identifiers. A connection name can be selected from the list if you have created and saved connection details for Amazon Athena earlier. Or create one as explained in the topic - Amazon Athena Connection →
Use the Test Connection option to ensure that the connection with the Amazon Athena channel is established successfully.
A success message states that the connection is available. In case of any error in test connection, edit the connection to resolve the issue before proceeding further.
Data Source
Data Sources will list as per the configured connection. Select the entity to write data into.
Database
Databases will list as per the configured connection. Select the entity to write data into.
Table Name
The tables will list as per the configured connection. Select the entity in which the data needs to be emitted.
Batch Processing
If TRUE, batches multiple messages while emitting data and improves the write performance.
Batch Size
Batch Size determines the number of rows to insert per request. The maximum value allowed is 10.
More Configurations
This section contains additional configuration parameters.
Write Options
Clean Query Results
Amazon Athena produces cache files with every query, in the folder specified in S3StagingDirectory.
Clean Query Results specifies whether these files should be deleted once the connection is closed.
Query Passthrough
This option passes the query to the Amazon Athena server without changing it.
Add Configuration: Additional properties can be added using this option as key-value pairs.
Schema Mapping
In this schema, you can define the source and target column mappings.
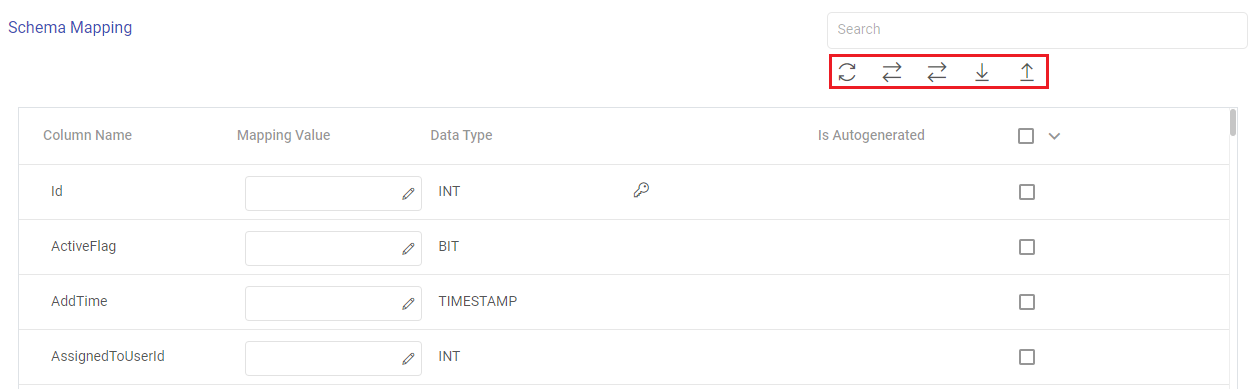
The actions available for the schema mapping section are explained below:
Search: Search the Column Name values to get a specific target column.
Refresh Schema: Use this option to refresh the entire schema mapping section.
Auto Fill: Use this option to match the source and target column names, and automatically fill the source column mapping values to the corresponding target columns.
Auto Fill Sequentially: Use this option to sequentially fill the incoming source column mapping values to the corresponding target columns.
Download Mapping: Use this option to download a sample schema file. Update mapping values in the downloaded file.
In case if Gathr application does not have access to a target table, you can choose the option download schema mapping option to map the target table columns with the source columns during the design time and confirm the data type for each column.
In such cases you can run the application in a registered environment, that has access to all the required resources. During run-time, the application will run on the registered cluster of your choice picking up the configuration values as provided during application design.
Upload Mapping: Use this option to upload the sample schema file with updated mapping values to provide the schema mapping.
The fields visible in the schema mapping section are explained below:
Column Name: The column names as per the target entity selected will get populated in the Schema Mapping section.
Mapping Value: The source column should be mapped for each target column listed in the Schema Mapping section. This operation can be done individually or in bulk using the auto fill action.
Data Type: The data type of each target column is listed, for example, INT, TIMESTAMP, BIT, VARCHAR and so on.
Is Autogenerated: Specifies if any target column(s) are autogenerated, for example, ID column may have autogenerated values.
Ignore None/All/Unmapped: The target columns selected here will be ignored while emitting the data. There are bulk actions available to ignore none of the columns, all the columns or only the unmapped columns.
Post Action
To understand how to provide SQL queries or Stored Procedures that will be executed during pipeline run, see Post-Actions →
Notes
Optionally, enter notes in the Notes → tab and save the configuration.
If you have any feedback on Gathr documentation, please email us!