Dynamics CRM Connection
See the Connector Marketplace topic. Please request your administrator to start a trial or subscribe to the Premium Dynamics CRM connector.
Dynamics CRM is a customer relationship management tool.
This topic describes how to authenticate to Dynamics CRM and configure any necessary connection properties in the Dynamics CRM connection connector.
Connection Prerequisites
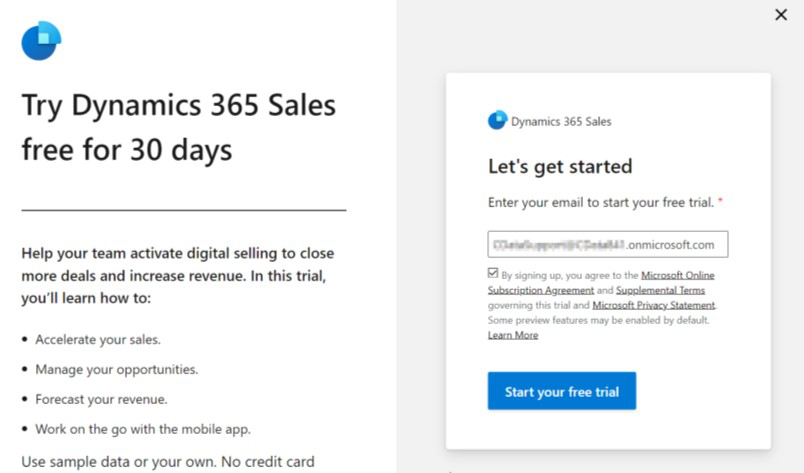
Starting a new Dynamics CRM Trial
Sign up for a Dynamics CE trial and create a Microsoft account: Sign up page link.
Using the account from the Dynamics CE trial, sign up for a Dynamics 365 Sales trial.
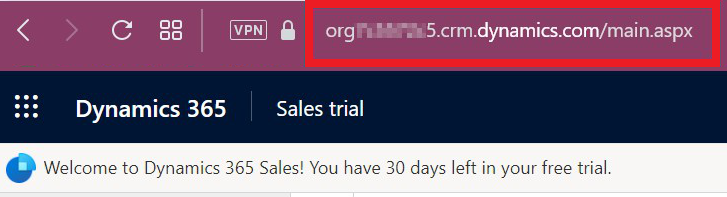
The Dynamics Organization Id will be in the browser URL.
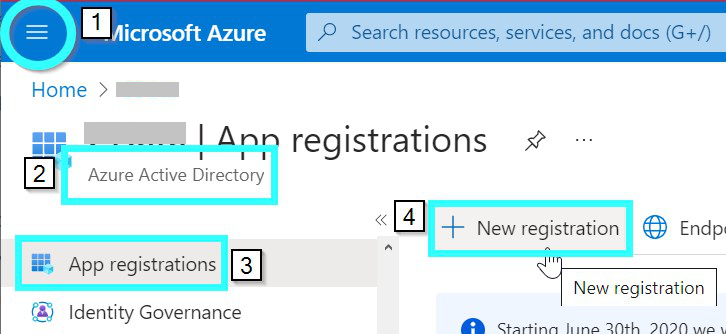
Create an AzureAD OAuth Application (Delegated Permissions)
Using the Microsoft account associated with your Dynamics instance, navigate to https://portal.azure.com.
From the navigation menu on the left-side of the page (1), open Azure Active Directory (2). Then, open App registrations (3) > New registration (4).
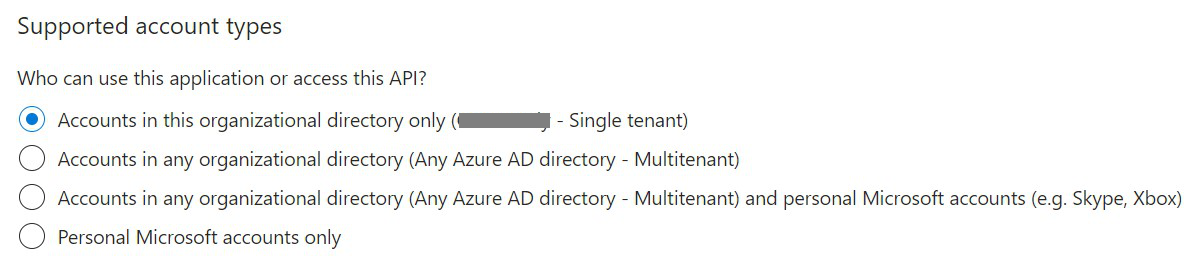
Provide a Name, Supported account types, and Redirect URI to register the application.
a. For Supported account types, if your application is for private use only, “Accounts in this organization directory only” should be sufficient. Otherwise, if you want to distribute your application, choose one of the multi-tenant options.
b. Set the Redirect URI to either the connector’s default value of http://localhost:33333 or the exact value provided in the CallbackURL connection property. Select the appropriate type from the drop-down menu.
After registering the app, you will be redirected to the Application Management page. From here, you can retrieve the OAuthClientId (Application (client) ID) and AzureTenant (Directory (tenant) ID) connection string values.
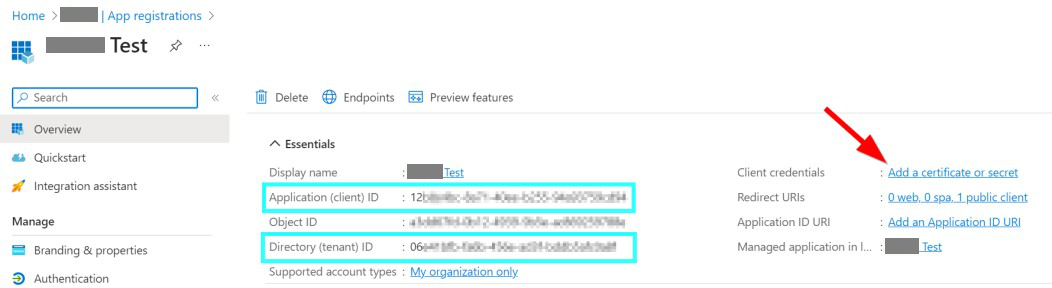
From the Application Management page, click ‘Add a certificate or secret’. From this page, you can either upload a certificate from your computer, or generate a new client secret by clicking New client secret.
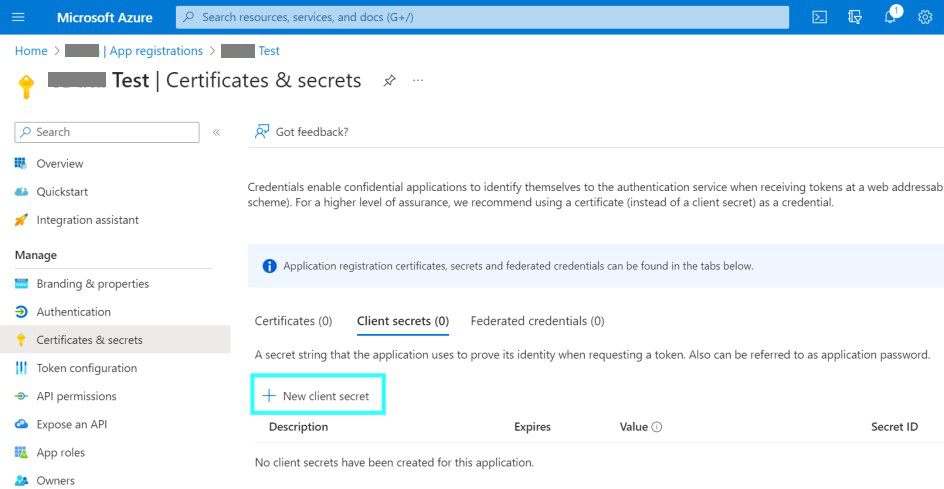
a. To add a new client secret, click New client secret, then add a description and set how long the secret will be valid.
b. Copy the client secret value as it will only be displayed this time.

Add necessary API Permissions by going to API permissions > Add a permission.
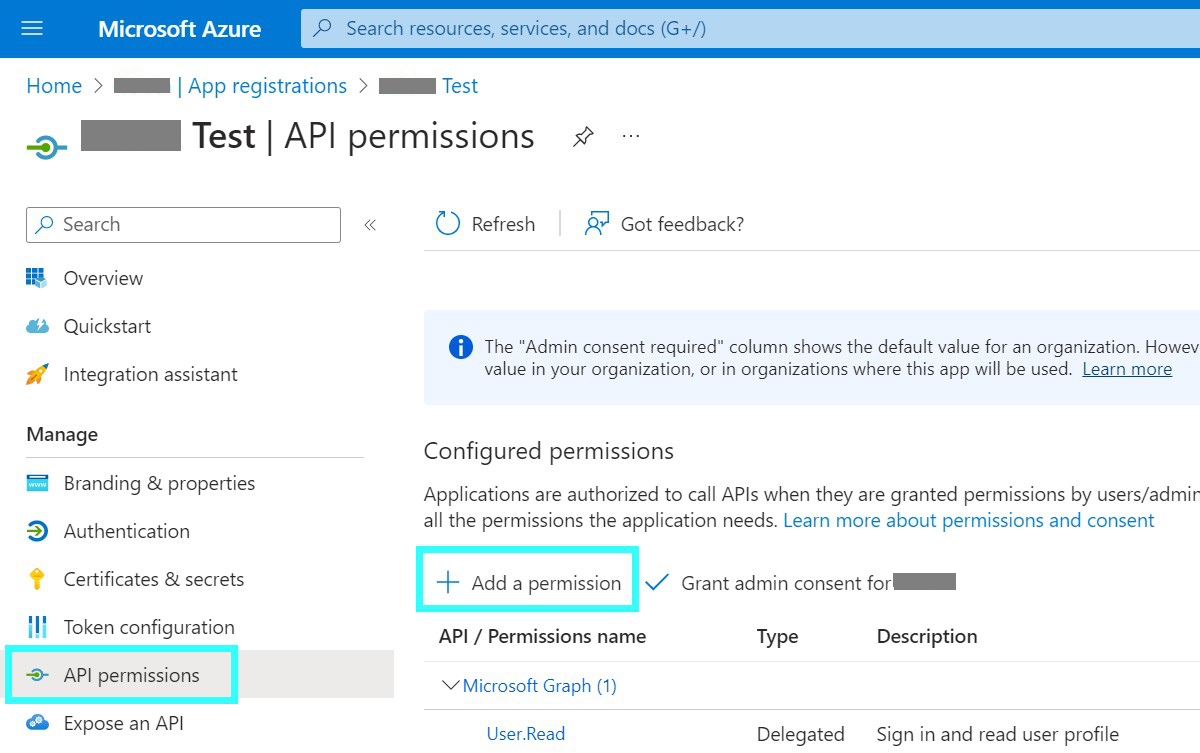

a. To connect with user context (AuthScheme=AzureAD), add Delegated Permissions.
b. To connect without user context (AuthScheme= AzureServicePrincipal), add Application Permissions.
c. Select and add the necessary permissions (varies depending on permission type).

If you have selected to use permissions that require admin consent, you can grant them from the current tenant on the API Permissions page.
Using an Azure Service Principals (Application Permissions)
Follow the OAuth flow steps above but select Application permissions for step 6.
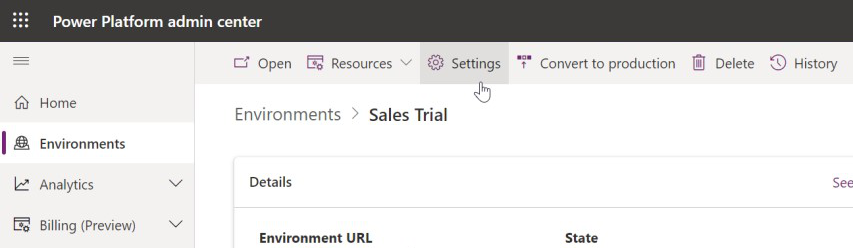
Open the Power Platform admin center as the system admin to create an application user.
a. Open Environments > Sales environment.
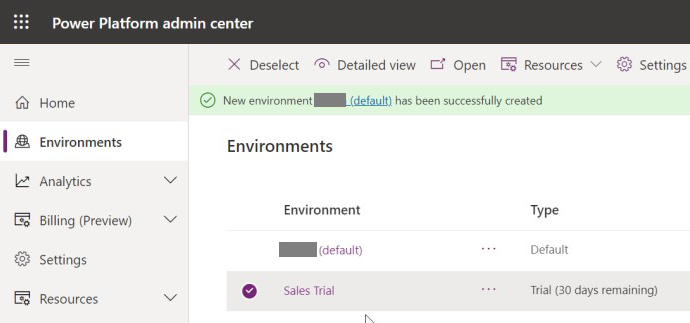
b. Within the Sales environment, click on Settings.
c. Expand Users + permissions and select Application users and click on New app user at the top.

d. Select the App created in Step 3 and the Business unit of the Dynamics CRM instance. Add the appropriate security roles for the user.
Connecting to Dynamics CRM using Gathr
For either Azure AD OAuth (Delegated Permission) or Azure Service Principal (Application Permission), set the following connection properties.
a. URL=<URL of Dynamics CRM, created in step 3>
b. CRMVersion=CRMOnline
c. InitiateOAuth=GETANDREFRESH
d. AzureTenant=<Directory (tenant) ID from step 7>
e. OAuthClientId=<Application (client) ID from step 7>
f. Either a Client Secret or Certificate (depending on step 8)
i. For Client Secret, set OAuthClientSecret=<secret value from step 8>
ii. For Certificate, set OAuthJWTCert=(JWT Certificate store containing the certificate uploaded) and OAuthJWTCertType=(Type of certificate store).
g. CallbackURL=(Redirect URI from 6b).
For Azure AD OAuth only,
a. AuthScheme=AzureAD
For Azure Service Principal only,
a. AuthScheme= AzureServicePrincipal
Connection Configuration
Each connection property available in the Dynamics CRM connector is explained below.
Connection Name
The name of the connection to be created should be provided. This is the name that will display on the list of available connections.
Client ID
The client Id assigned when you register your application with an OAuth authorization server.
Client Secret
The client secret assigned when you register your application with an OAuth authorization server.
URL
The root URL of the organization.
For example, a CRM 4.0 or CRM 2011 URL will resemble http://MySite/MyOrganization.
For CRM Online, the URL will resemble https://myOrg.crm.dynamics.com/.
CRM Version
The type of Dynamics CRM server to which you are connecting.
Accepted entries are CRM2011+ or CRMOnline.
A value of CRMOnline is required to connect using the Office 365 STS.
AzureTenant
The name of the organization. In Dynamics CRM 4.0 without IFD, the organization is specified in the URL; for example, http://website/organizationname.
After entering all the details, click on the TEST button.
If the connection service identification and authentication details are provided correctly, a success message stating “connection available” is generated.
Click on the CREATE button to save the changes.
If the details are incorrect or the server is down, you will get a message “Connection unavailable”.
If you have any feedback on Gathr documentation, please email us!