Custom JDBC Ingestion Target
Custom JDBC Target supports Presto, ES and other databases that have JDBC connection. You can configure and test the connection with JDBC. This component will allow you to emit the data into Relational DB targets after configuring JDBC Custom target.
Target Configuration
Fetch From Target/Upload Schema File
The data source records needs to be emitted to a Custom JDBC Database target table.
In case if the Gathr application has access to a target table in the Custom JDBC Database, choose the option Fetch From Target.
In case if Gathr application does not have access to a Custom JDBC Database target table, you can choose the option Upload Schema File in order to map the Custom JDBC Database table columns with the source columns during design-time and confirm the data type for each column. In such cases you can run the application in a registered environment, that has access to all the required resources. During run-time, the application will run on the registered cluster of your choice picking up the configuration values as provided during application design.
When you select the Upload Schema File option, a Schema Results section will get displayed at the bottom of the configuration page.
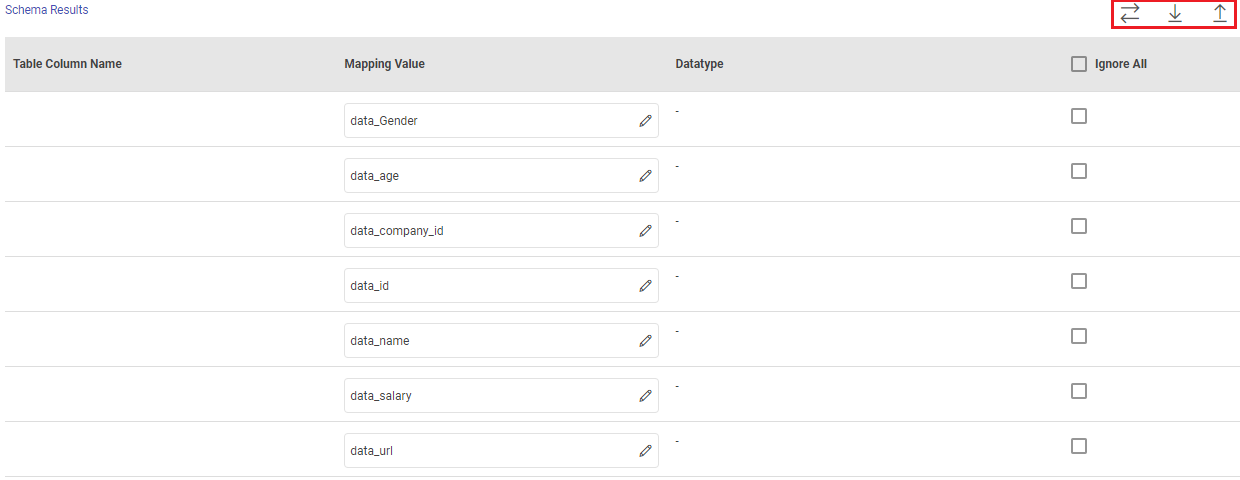
You can then download the sample schema, provide Custom JDBC Database - Table Column Name against mapping values and verify the data type.
Once it is updated, you can upload the saved file to see a sample of how the records from a source column will be written into the corresponding mapped Custom JDBC Database column.
Save as Data Asset: Select checkbox to save the schema as a data asset in Gathr.
Data Asset Name: Provide a name for the data asset to be saved.
Connection Name
Connections are the service identifiers. A connection name can be selected from the list if you have created and saved connection details for the required JDBC Database earlier. Or create one as explained in the topic - JDBC Connection →
Use the Test Connection option to make sure that the connection with Custom JDBC Database target is established successfully.
A success message states that the connection is available. In case of any error in test connection, edit the connection to resolve issue before proceeding further.
Schema Name: Existing database schema name whose tables are fetched.
Table Name: Existing table name of the specified database.
Create Table: This field gets displayed if Upload Schema File option is used to provide column mapping. Check this field if you want to create a new table in the JDBC database. If unchecked, ensure the provided table name matches an existing table in the database.
Create Table Query: Enter the SQL query for creating the table. This is required if the Create Table option is checked.
An example showing the length of the Varchar2 datatype:
CREATE TABLE example_table (column1_name VARCHAR2(50),column2_name numeric,column3_name timestamp)
In this example, column1_name is defined with a Varchar2 datatype with a length of 50 characters. Adjust the length as needed for your specific requirements.
Add Configuration: Additional properties can be added using this option as key-value pairs.
Example: key=createTableOptions value=<whitespace>
The value for this configuration property will depend upon the type of JDBC database target that you have connected.
If you are connected to the Clickhouse DB and want to create a new table or if the save mode is set to Overwrite, then the configuration property can be given as follows:
key=createTableOptions value=ENGINE=Log()
More Configurations
Enable Batch: Enable parameter to process batch multiple messages and improve write performance.
If Enable Batch field is selected as True, additional field will be displayed as given below:
Batch Size: Batch Size determines how many rows to insert per round trip. This helps the performance on JDBC drivers. This option applies only to writing. The default value is 1000.
If Enable Batch field is selected as False, then proceed by updating the following fields.
Save Mode: Save Mode is used to specify the expected behavior of saving data to the target MSSQL database table.
Append: When persisting data, if data/table already exists, contents of the Schema are expected to be appended to existing data.
Overwrite: When persisting data, if data/table already exists, existing data is expected to be overwritten by the contents of the Data.
Upsert: When persisting data, if the data already exists, the operation combines existing data with the new data, updating records when there are conflicts and adding new records when necessary. This mode is suitable for merging data and ensuring data consistency by applying a combination of inserts and updates as needed.
Update: The existing data in the designated target table will be updated, and any new data will be inserted.
If you have any feedback on Gathr documentation, please email us!