Kinesis Connection
Connection Configuration
Connection Name: Name of the connection to be created.
Connect Using: Connect using AWS keys, Role ARN or Instance Profile.
AWS Keys: Uses the provided AWS account access key ID and secret key for connecting to Kinesis.
Role ARN: Uses the auto generated, user specific Role ARN (Gathr Role ARN) to access Kinesis.
Ensure that the Role ARN you are providing has Kinesis access and has Gathr Role ARN as the trusted entity.
See the sub-topic Generate Role ARN for Kinesis to know the steps required for generating Customer Role ARN.
When Customer Role ARN is provided, the AWS instance will be used to authenticate the connection.
During Gathr’s Free Trial, use AWS Keys instead of the Role ARN method to authenticate the connection.
Not applicable for pipelines designed to run on Registered Clusters. Use Instance profile instead.
Instance Profile: Uses Instance profile to access Kinesis.
On the schema type page, make sure to upload file for fetching schema during design time, as the instance profile option will not work if the configuration is set to fetch from the source.
Not applicable for pipelines designed to run on Gathr Cluster. Gathr provides an option for the applications created by you to run on Registered Clusters in the preferred region and AWS account of your choice by setting up an AWS PrivateLink. To know more, see Compute Setup →
For Registered Clusters, ensure that you select the IAM role with Kinesis access while configuring the cluster.
After entering all the details, click on the TEST button.
If the connection service identification and authentication details are provided correctly, a success message stating “connection available” is generated. Click on the CREATE button to save the changes.
If the details are incorrect or the server is down, you will get a message “Connection unavailable”.
Generate Role ARN for Kinesis
These steps will be performed in the AWS console.
Steps to create a role with Kinesis Access
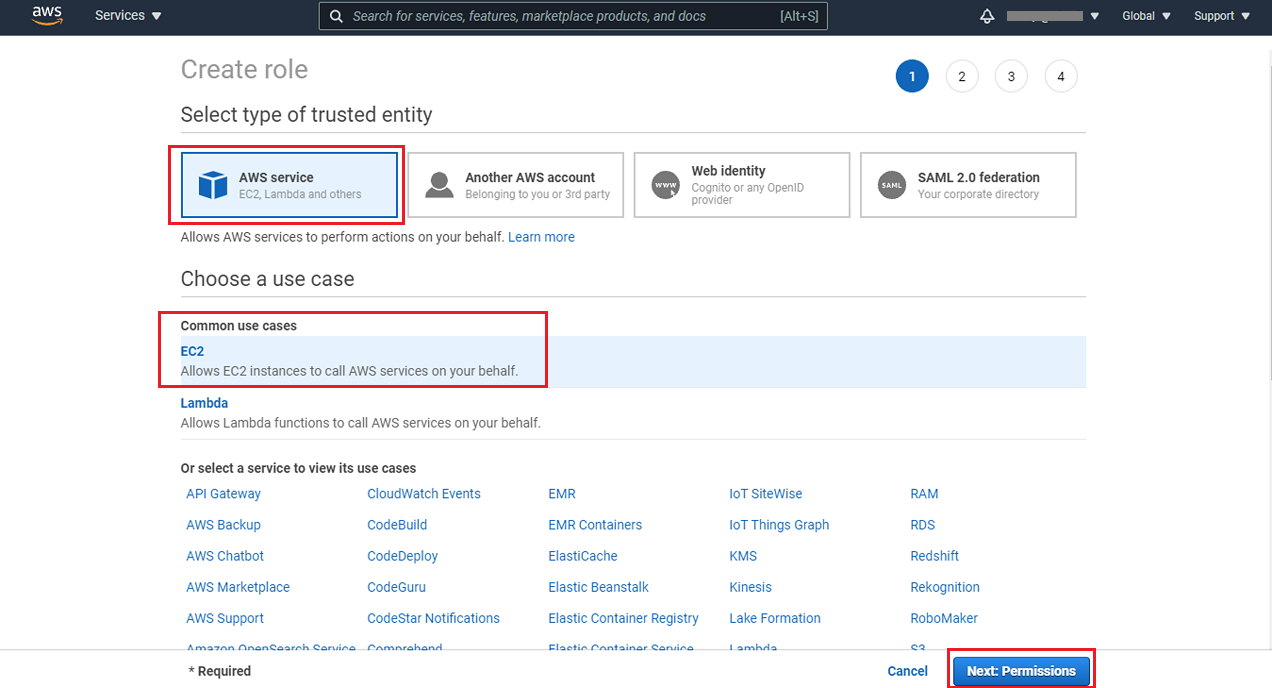
Login to your AWS account, navigate to the Access Management > Roles option and click on Create role.

On AWS service tab select the EC2 option and click on Next.
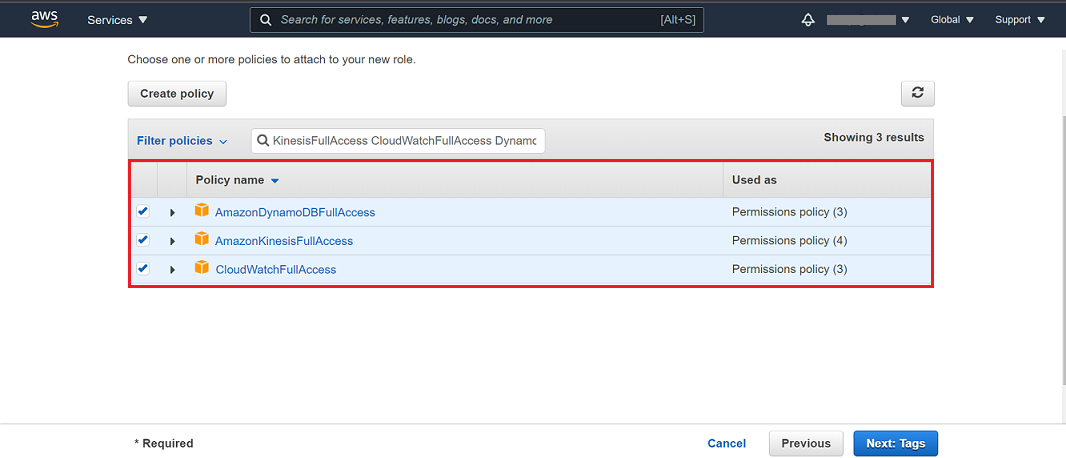
Search and attach the AmazonDynamoDBFullAccess, AmazonKinesisFullAccess and CloudWatchFullAccess policies to this role and proceed with the role creation steps.
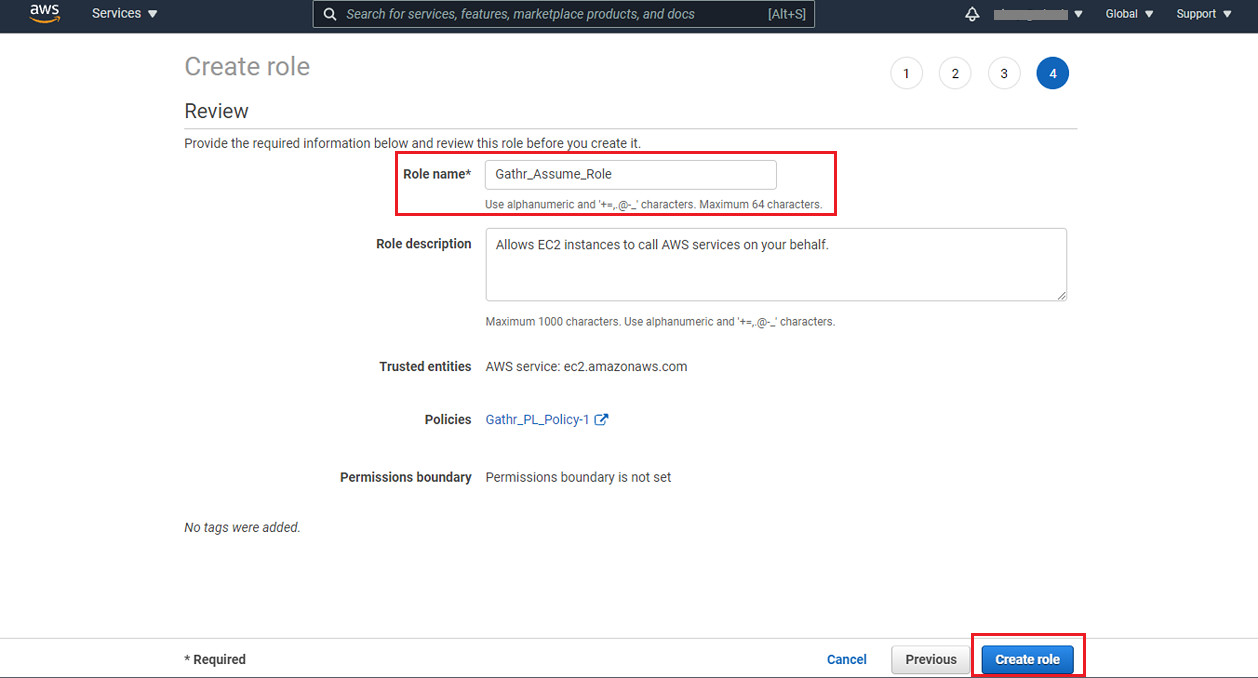
Provide a role name and click on the Create role button.
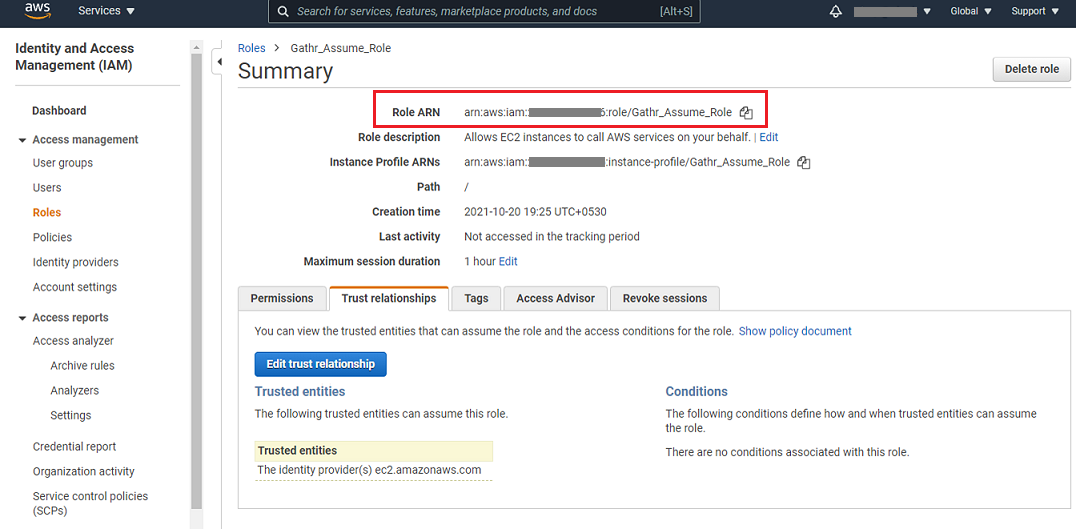
A role for Gathr gets created and you can copy and provide the Role ARN details for Customer Role ARN field in Gathr application.
Add Gathr tenant ARN as a Trusted Entity
The last step in AWS console is to add the Gathr tenant ARN details as a trusted entity to the role created.
From Gathr application, copy the Tenant ARN from the User Profile as shown below:

For the role created in AWS console, on the Trust relationships tab, click on Edit trust relationship and use the Tenant ARN that you copied from Gathr User Profile, to replace the Principal details as shown below:
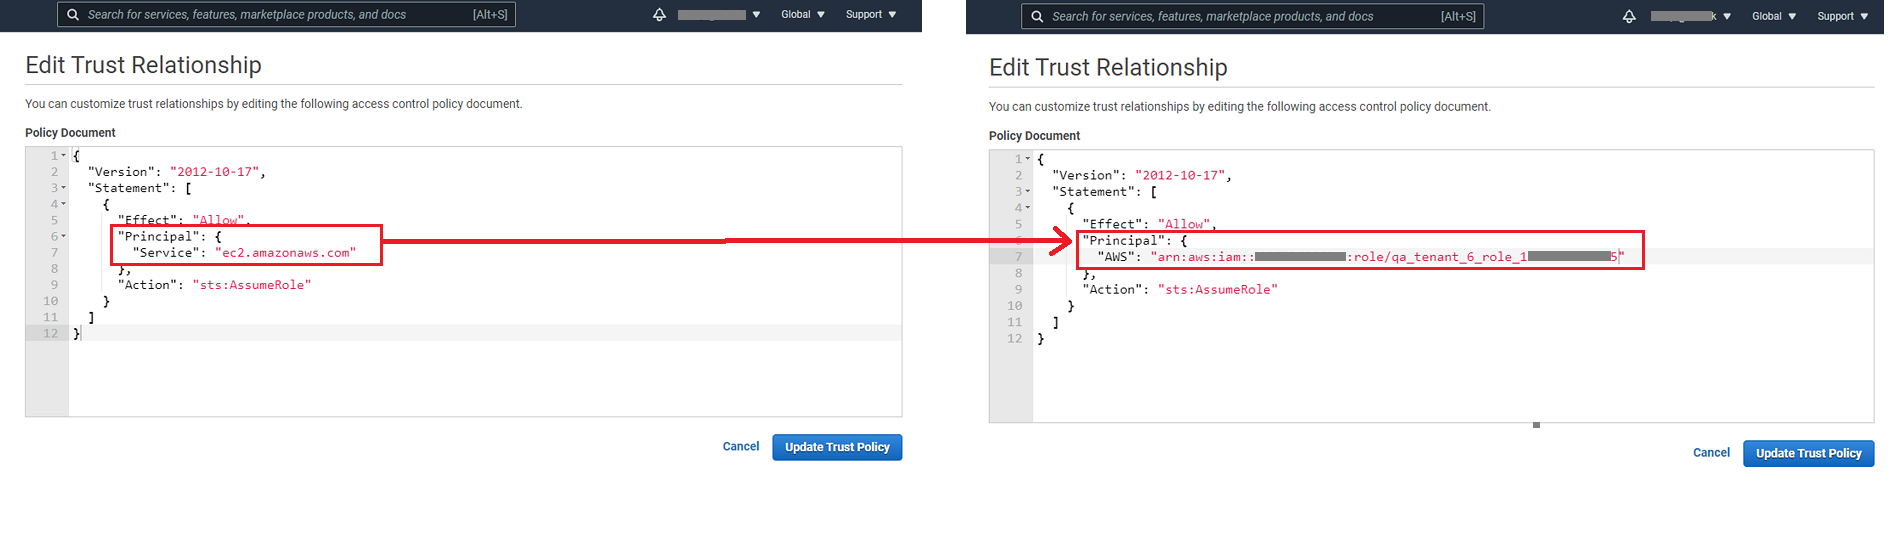
Click on Update Trust Policy.
If you have any feedback on Gathr documentation, please email us!