Snowflake Connection
Connection Configuration
Connection Name: Name of the connection to be created.
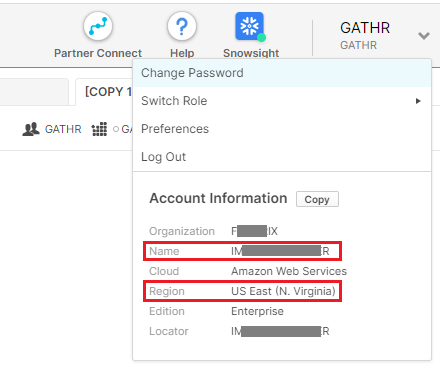
Account Name: Option to enter the Snowflake account name. After entering the account name, the connection URL will get auto-filled. The account name should be provided in the following format:
<account_name>.<account_region>
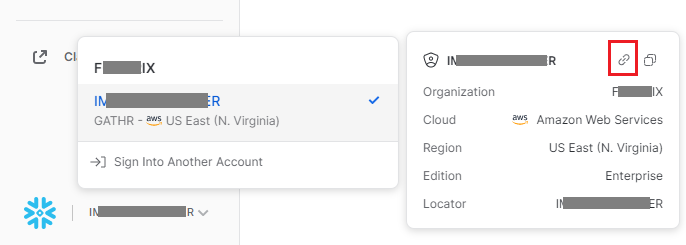
Copy the account URL, it will appear like shown in the example below:
https://<account_name>.<account_region>.snowflakecomputing.com
Provide the details for the Account Name field in the format specified below:
<account_name>.<account_region>
Connection URL: The connection URL will be used to establish a connection with the Snowflake account. It will get auto-filled once you provide your account name.
Example: jdbc:snowflake://account_name.snowflakecomputing.com
Database Name: Database name should be provided to access the data.
Username: Username of the Snowflake account should be provided.
Password: Password of the Snowflake account should be provided.
Keystore Select Option: Option to upload the keystore file is selected by default.
Note: To know about how to generate the Keystore File and Keystore Passsword, see Configuring Key Pair Authentication.
Upload Keystore File: Option to upload the private keystore file.
Keystore Password: The password to access the uploaded private keystore file should be provided.
After entering all the details, click on the TEST button.
If the connection service identification and authentication details are provided correctly, a success message stating “connection available” is generated. Click on the CREATE button to save the changes.
If the details are incorrect or the server is down, you will get a message “Connection unavailable”.
If you have any feedback on Gathr documentation, please email us!