Step 2. Add Compute Environment
Quick Steps for adding Compute Environment
The process of setting up an AWS PrivateLink connection is split between AWS and Gathr. These are the high-level steps:
| Gathr Application | Your AWS Account Console |
|---|---|
| Step 2.1: Select the AWS Region from where the compute environments i.e., the EMR Clusters will be managed. | |
| Step 2.2: Set up the VPC Endpoints to Gathr Cloud PrivateLink Service in your AWS account using the AWS portal. Set up Availability Zone mapped DNS records to use AWS VPC Endpoints using the AWS portal. | |
| Step 2.3: Download EMR Assume Role Policy Template from Gathr Console and create role for Gathr service with help of the downloaded policy template using the AWS portal. | |
| Step 2.4: Add Gathr tenant ARN details as a trusted entity in the assume Role that is created for Gathr using AWS Console. | |
| Step 2.5: Collect and add Gathr tenant ARNs of the users who will be responsible for running pipelines as a trusted entity in the assume Role that is created for Gathr using AWS Console. Note: With this step, the organization users can run applications on compute environments that are linked with users projects. | |
| Step 2.6: Provide an environment name and other optional details in Gathr Console and validate connectivity to Gathr Cloud. |
Each of these steps are described further.
2.1 Create an Endpoint for Gathr
The section Select a Region contains information about the regions that support Gathr service endpoints and using this info, you can create an endpoint for Gathr.
To know more about how to setup an endpoint for Gathr application, click here.
Steps to create an endpoint for Gathr
Select an AWS region from where you want to manage the compute environments, i.e., the EMR clusters.
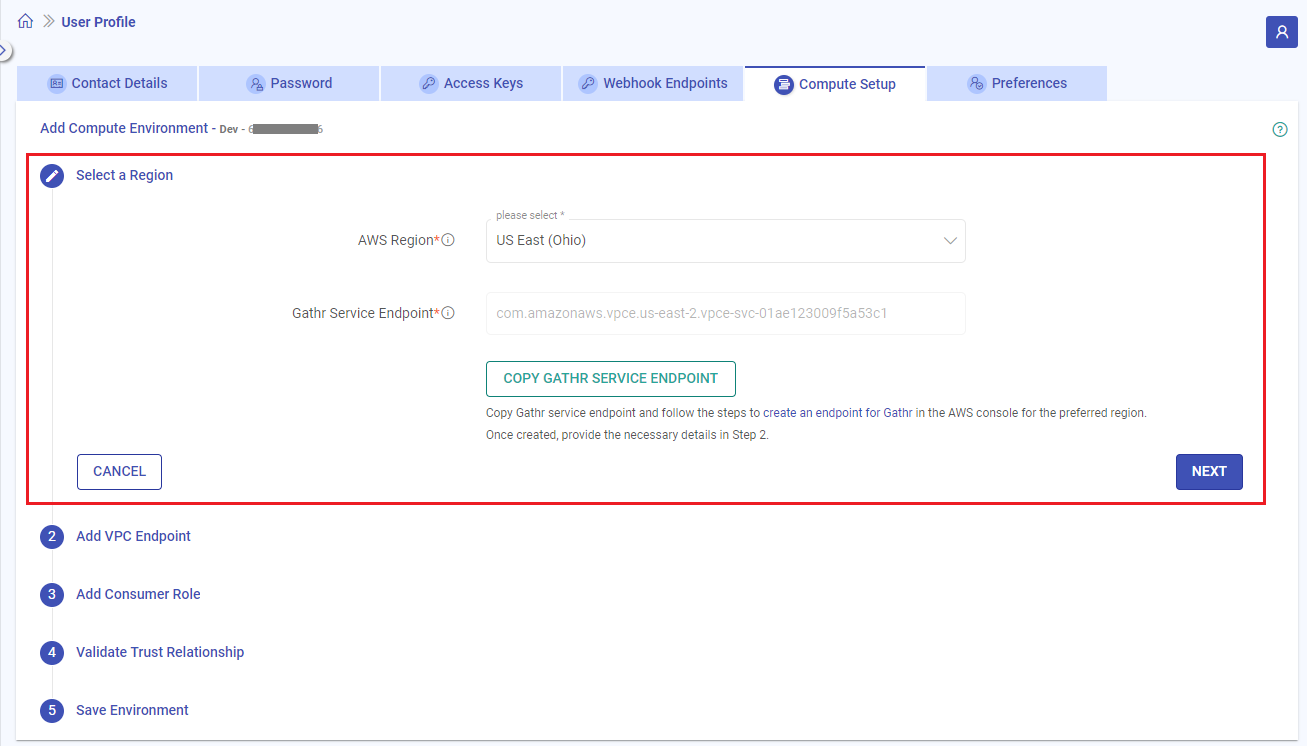
Gathr Service Endpoint will appear for the region that is selected.
List of Regions supporting Gathr Service Endpoints
AWS Region Gathr Service Endpoint Supported Availability Zones us-east-1 com.amazonaws.vpce.us-east-1.vpce-svc-0b10577a09dab0fb6 use1-az1
use2-az2
use3-az3
use4-az4
use5-az5
use6-az6us-east-2 com.amazonaws.vpce.us-east-2.vpce-svc-09dcfd0e3b3b7d7d7 use2-az1
use2-az2
use2-az3us-west-1 com.amazonaws.vpce.us-west-1.vpce-svc-034f9362c6c20c4aa usw1-az1
usw1-az3us-west-2 com.amazonaws.vpce.us-west-2.vpce-svc-01289eb80078c2898 usw2-az1
usw2-az2
usw2-az3
usw2-az4Asia Pacific (Mumbai) com.amazonaws.vpce.ap-south-1.vpce-svc-0aec534c33ae091ca ap-south-1a
ap-south-1b
ap-south-1cAsia Pacific (Singapore) com.amazonaws.vpce.ap-southeast-1.vpce-svc-0e74fe6cc48c2e178 ap-southeast-1a
ap-southeast-1b
ap-southeast-1cYour AWS account will be added in the allowed principals.
Make sure you have the Gathr Endpoint copied with you as it will be required in AWS console.
Login to AWS using the same account that you had registered with Gathr and navigate to Your AWS Console.
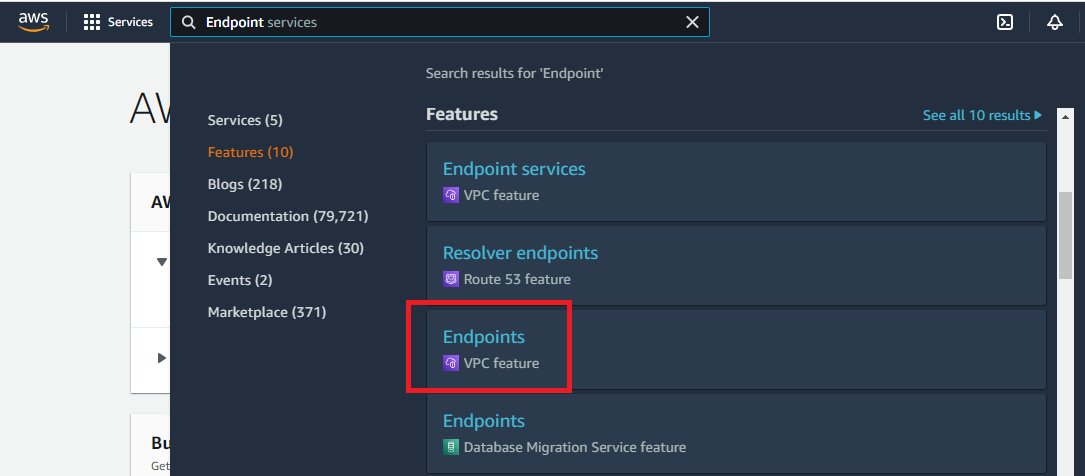
On your AWS Management Console, search for keyword “Endpoint” and select Endpoints which is under Features section.
Click on Create Endpoint option and a new page will appear as follows:
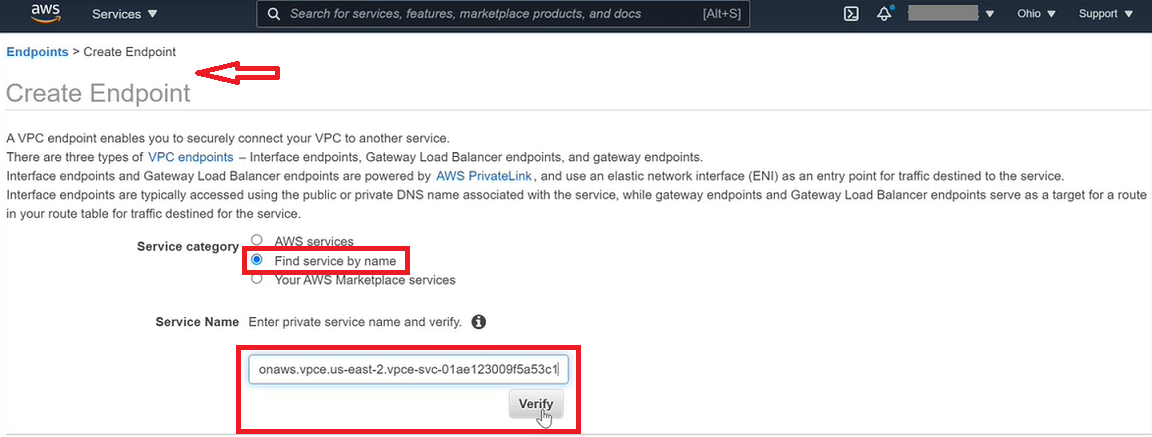
On Create Endpoint page, select Find service by name. Provide the Gathr endpoint as Service Name that you had copied earlier and click Verify.
Once the service name is found, choose the VPC, Subnets and Security Group details and click on Create endpoint.

As soon as the endpoint is created, Gathr support team will receive a notification about the endpoint connection request.
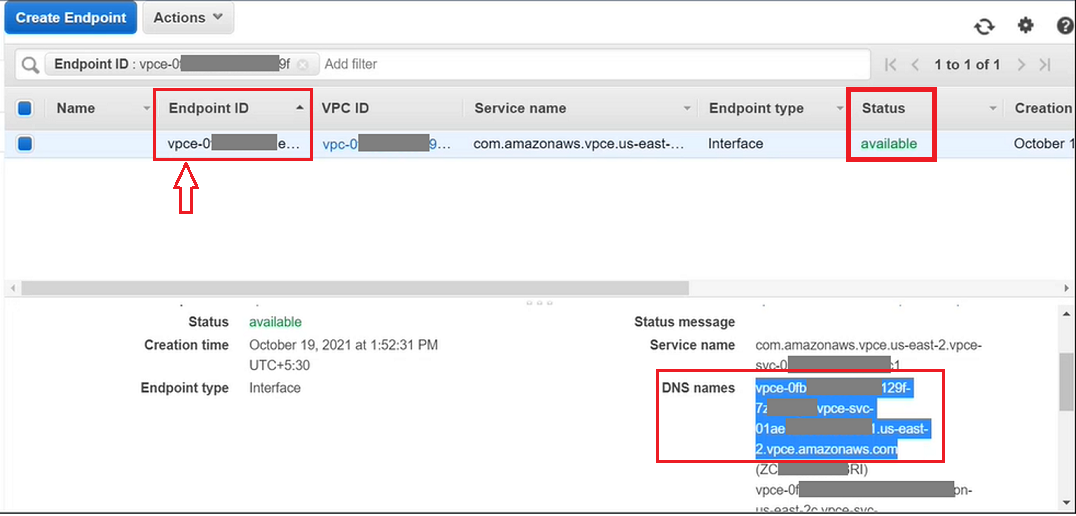
Once the request is accepted, the endpoint’s status will change to available.
Once you have created the endpoint for Gathr, switch back to Gathr console and click NEXT.
2.2 Add VPC Endpoint
Steps to add the VPC Endpoint details in Gathr
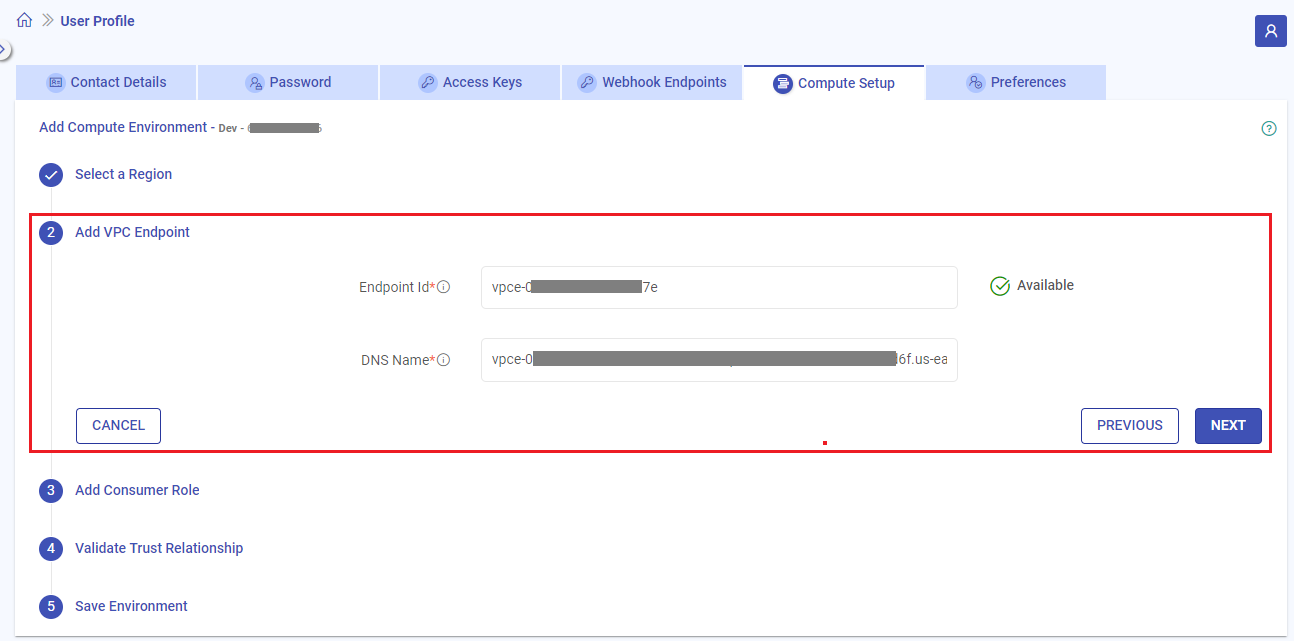
- On Gathr console, provide the details for VPC endpoint that you had copied referring to the table given below:
Field Name Description Endpoint ID The endpoint created for Gathr service in the selected AWS account should be provided. DNS Name The DNS name linked to the endpoint should be provided.
- Click NEXT. A success message stating that “Endpoint added successfully” will get displayed.
2.3 Add Consumer Role
A role needs to be created for Gathr service in AWS that it can assume to launch the EMR clusters.
The permissions that are necessary for creating the role are defined in a policy document that can be downloaded in JSON format from this section in Gathr’s console.
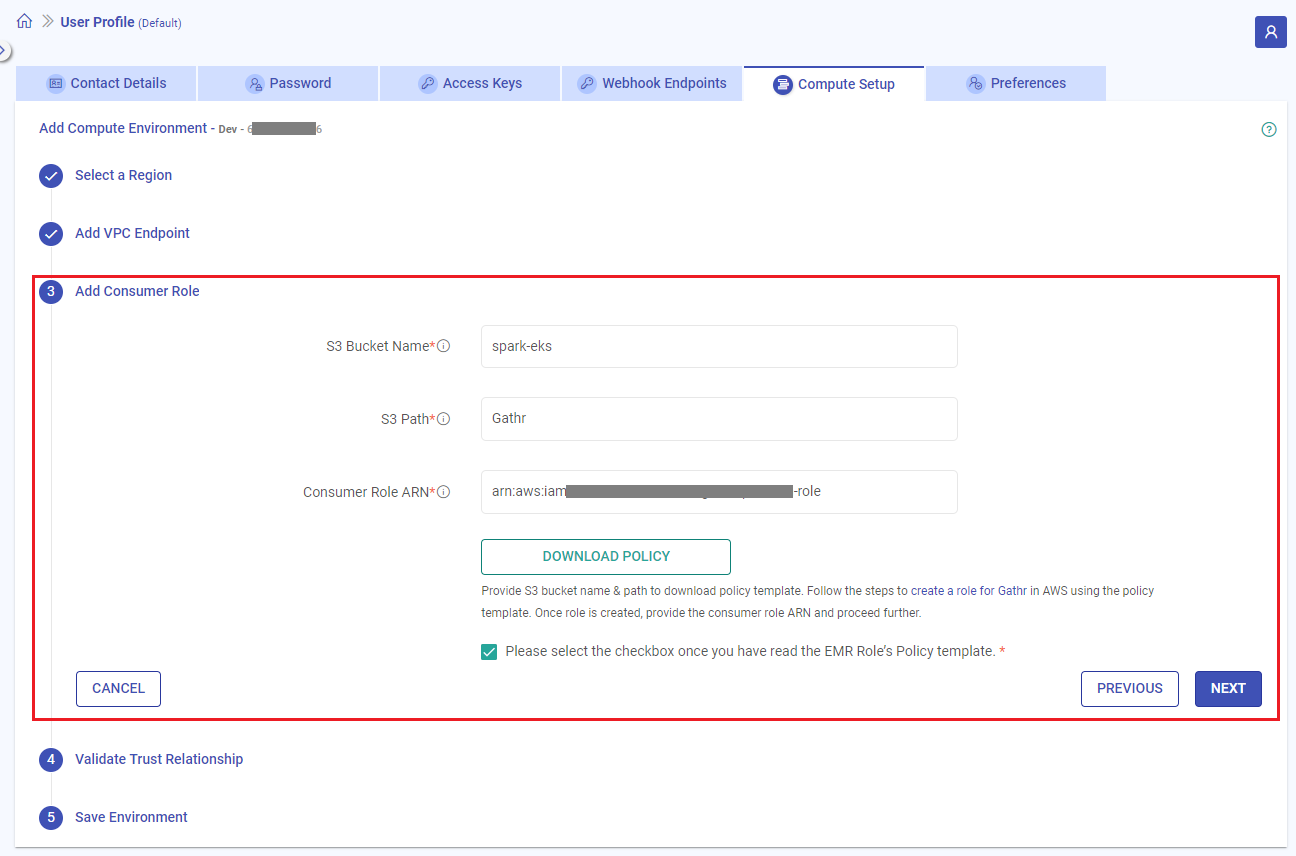
The policy document can only be downloaded after providing the S3 Bucket name.
Refer to the table given below and provide the necessary information:
| Field Name | Description |
|---|---|
| S3 Bucket Name | The S3 Bucket name that you provide here will be added in the policy document that you download. The policy contains certain permissions for this bucket and will be used to store Gathr Artifacts & EMR Logs in the S3 path that you provide in the next field. |
| S3 Path | The path where EMR cluster logs and Gathr application related artifacts will be stored. |
| Consumer Role ARN | A consumer role needs to be created for Gathr service in the AWS console, which it will assume to launch the associated EMR cluster(s). The EMR role’s policy template can be downloaded and used to create a policy in AWS for assigning it to the consumer role. Once a role is created, the role ARN should be provided. |
Steps to save the consumer role ARN
Click on DOWNLOAD POLICY option after providing the S3 Bucket name and a JSON file will get downloaded. Follow the steps given in Create a Role for Gathr.
After providing all the details, read the EMR Role’s Policy template and click on the checkbox to confirm the same.
Click NEXT. A success message stating that “Consumer role ARN has been saved successfully” will get displayed.
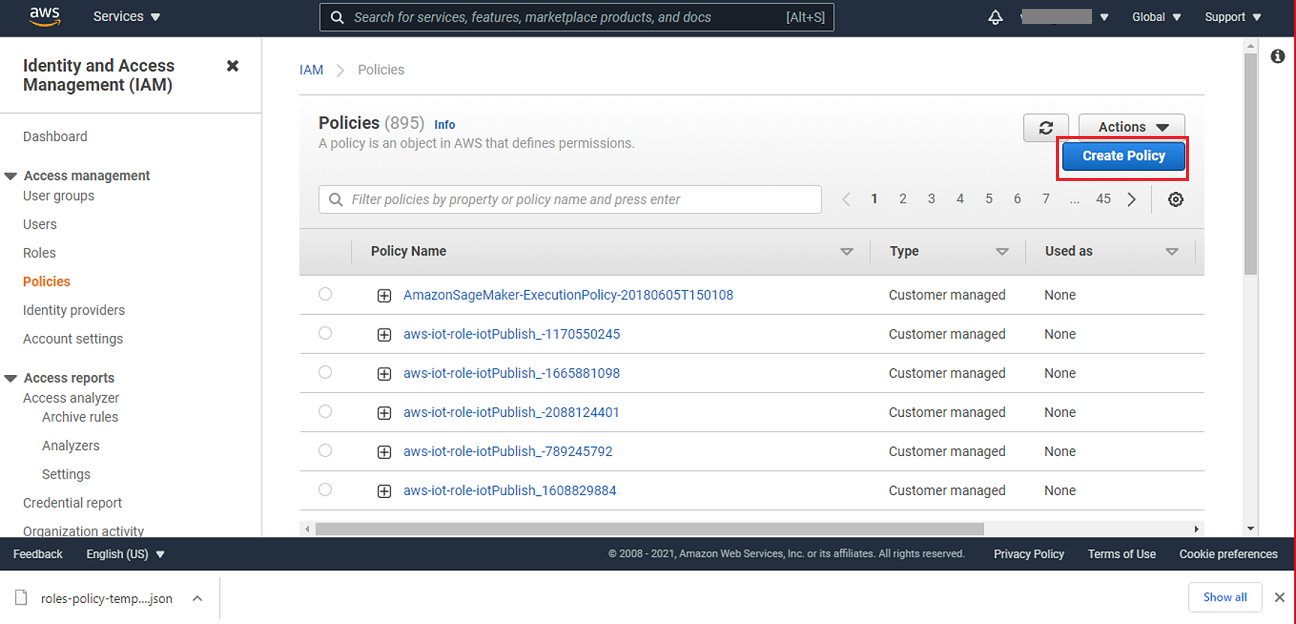
2.3.1 Create a Role for Gathr
Steps to create a role for Gathr
In AWS console, using the same account and region that you used to create the endpoint, navigate to IAM service and under Access management > Policies, click on Create Policy option.
Open the Policy template JSON file that you downloaded from Gathr application and copy all its content. On the JSON tab of the Create policy option, replace existing content with the one that you had copied. Click Next to proceed further.
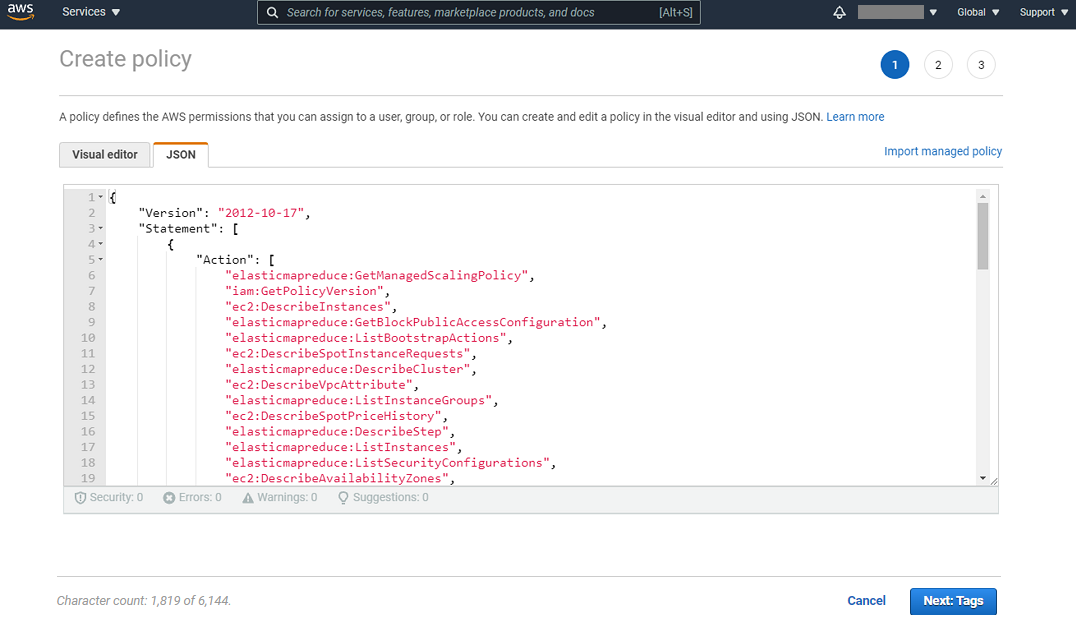
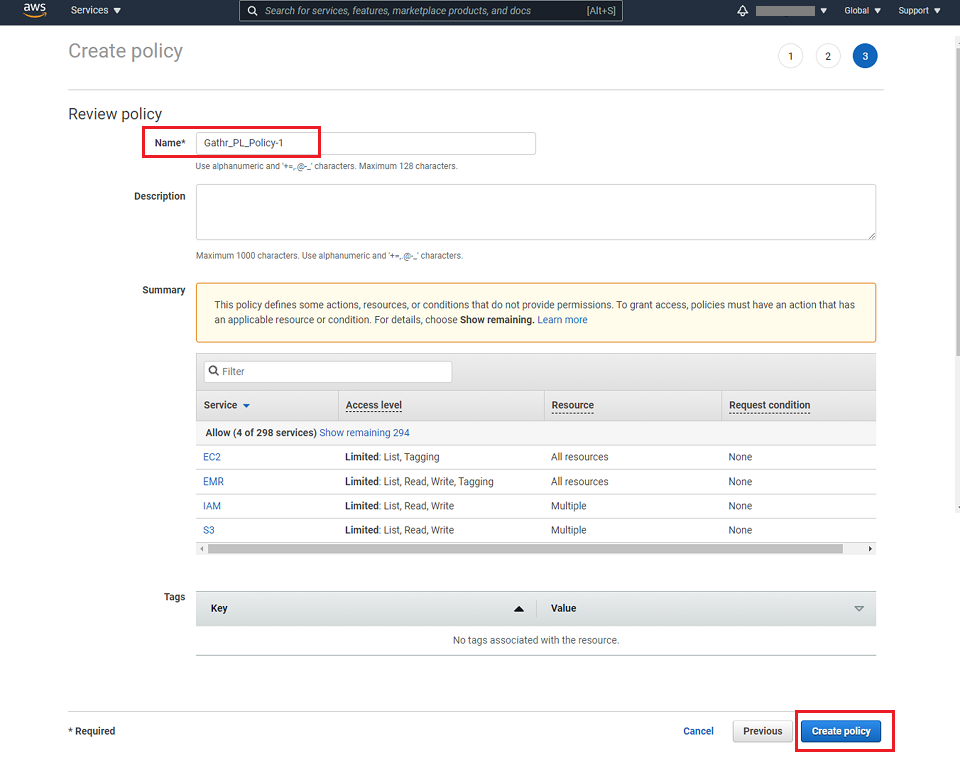
Provide a name for the policy and click on Create policy option.
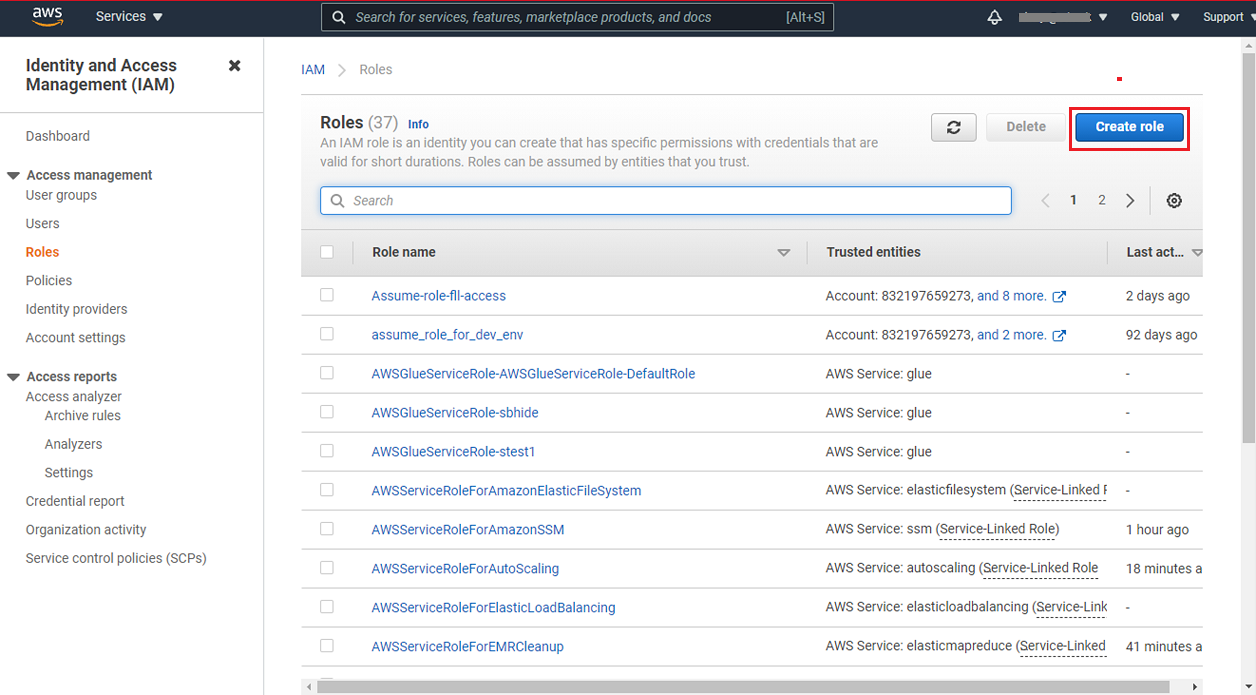
Now, navigate to the Access Management > Roles option for creating a new role for Gathr and click on Create role.
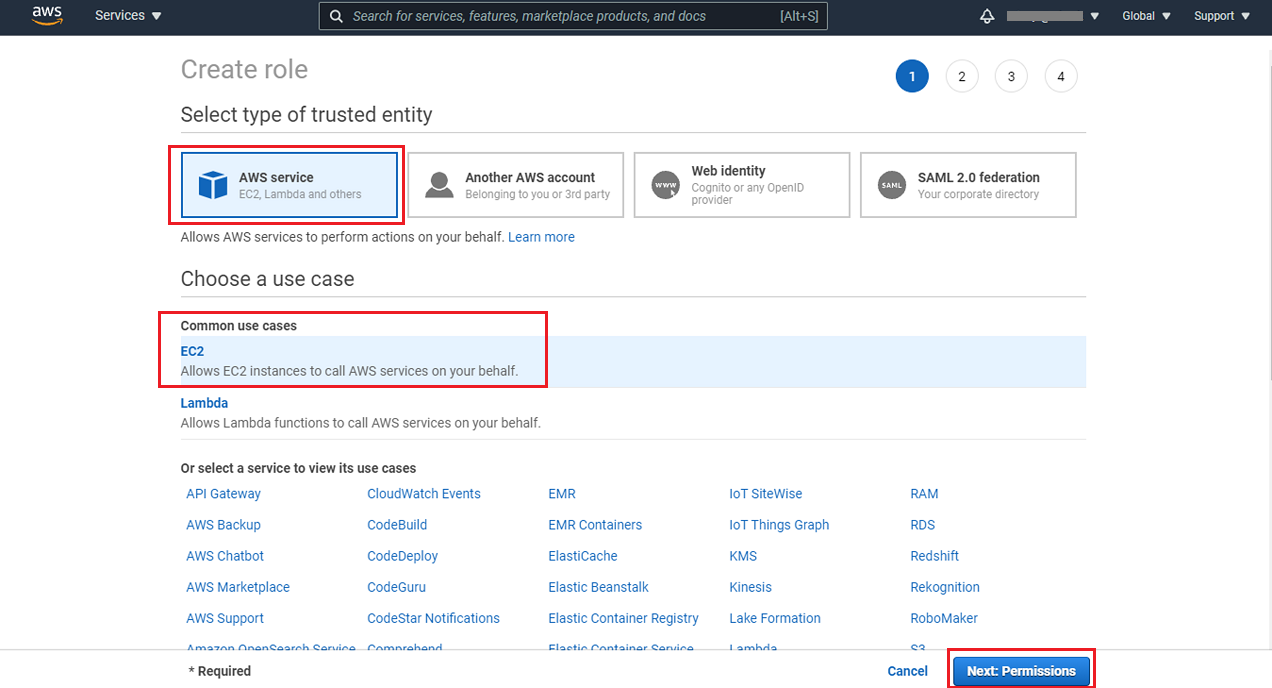
On AWS service tab select the EC2 option and click on Next.
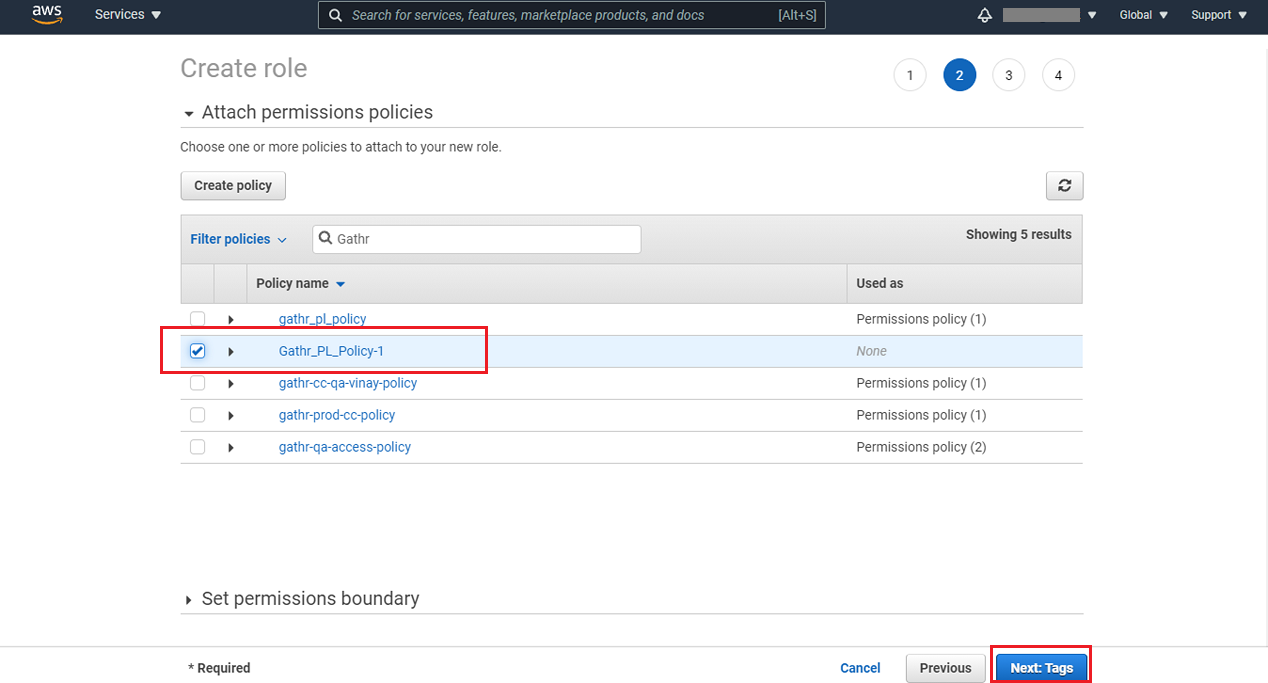
Attach the permission that you recently created to this role and proceed with the role creation steps.
Provide a role name and click on the Create role button.
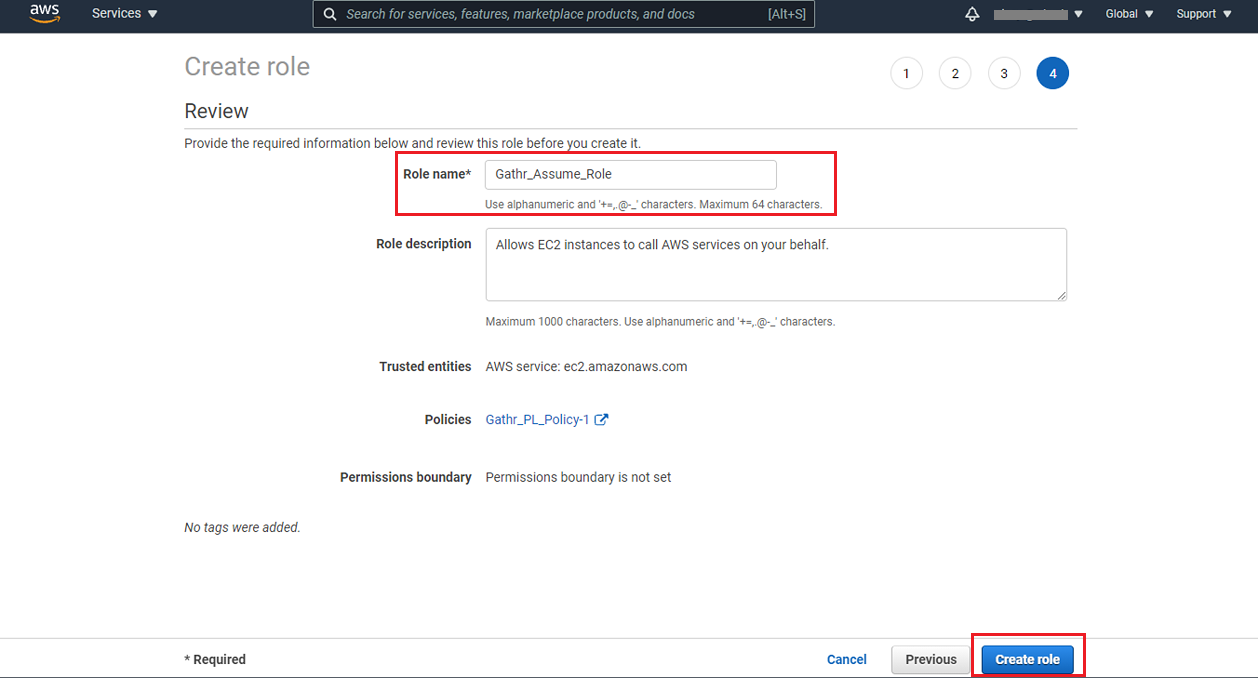
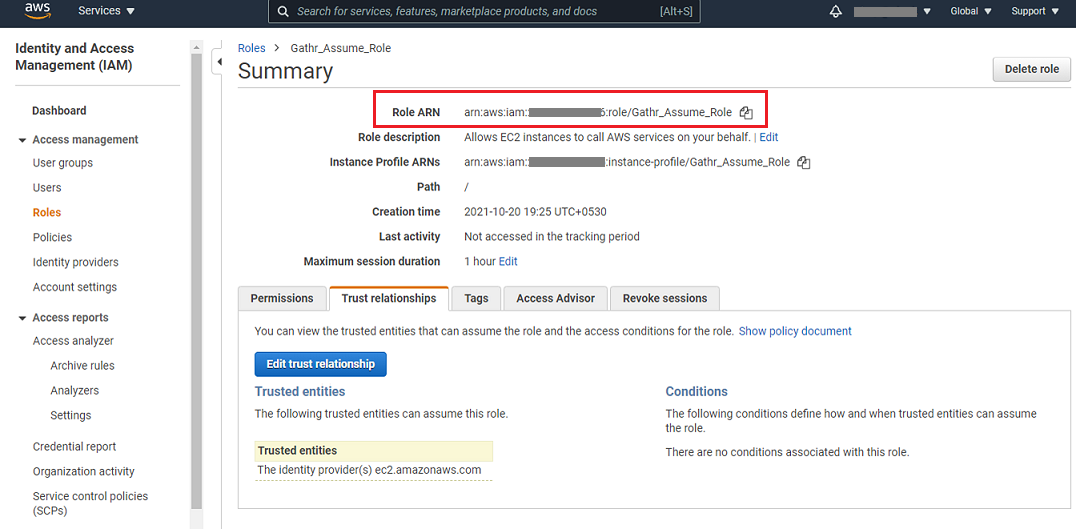
A role for Gathr gets created and you can copy the Role ARN details that needs to be provided in Gathr application.
2.4 Validate Trust Relationship
In order to provide access control to the Gathr tenant, the Gathr principal needs to be added as a trusted entity in the role created for Gathr.
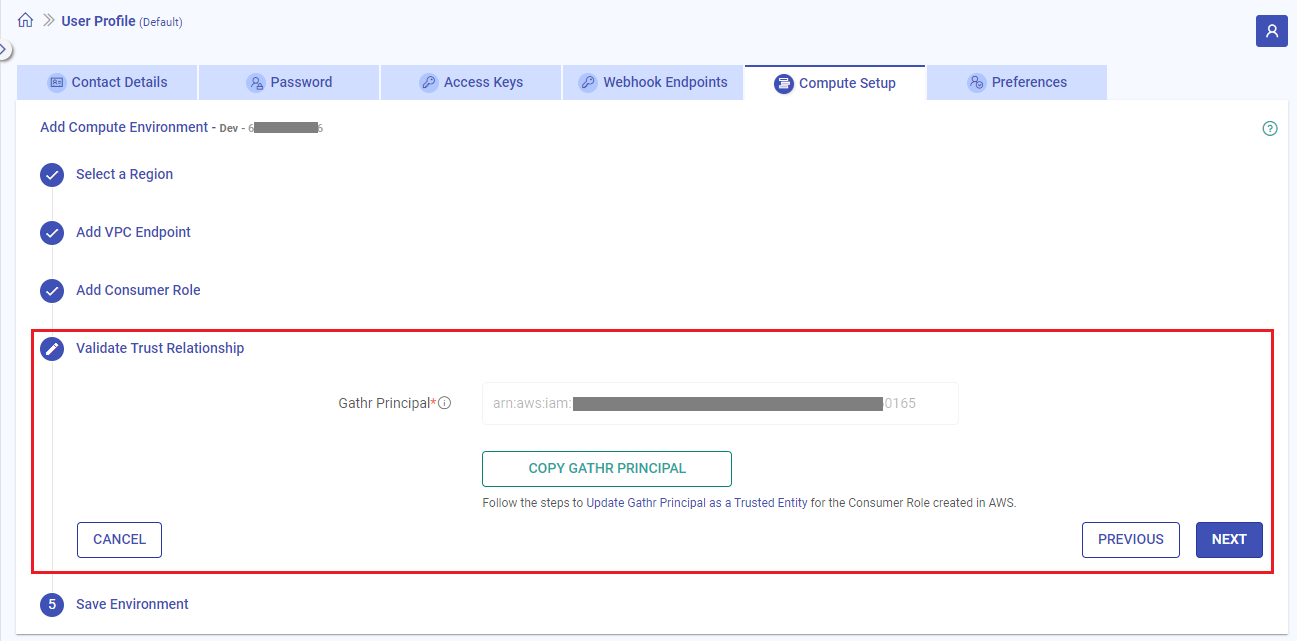
On the Validate Trust Relationship tab you can find the Gathr Principal.
It is your Gathr tenant ARN and needs to be updated as a trusted entity in the role created.
Steps to update your Gathr tenant ARN as a trusted entity in the role created for Gathr
Click on COPY GATHR PRINCIPAL and follow the steps given in Update Gathr Principal as a Trusted Entity.
Click on NEXT. A success message stating that “Gathr Principal is a valid trusted entity in the consumer role trust relationship” will get displayed.
2.4.1 Update Gathr Principal as a Trusted Entity
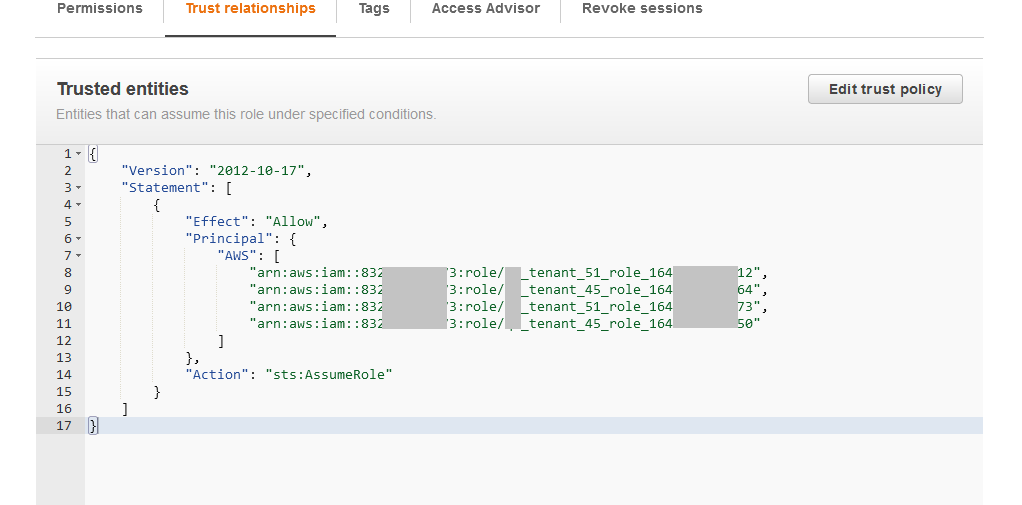
In AWS console, for the Gathr Role that you have created, click on the Trust relationships tab.
Click on Edit trust relationship and use the Gathr Principal that you copied from the Gathr console, to replace the Principal details as shown below:
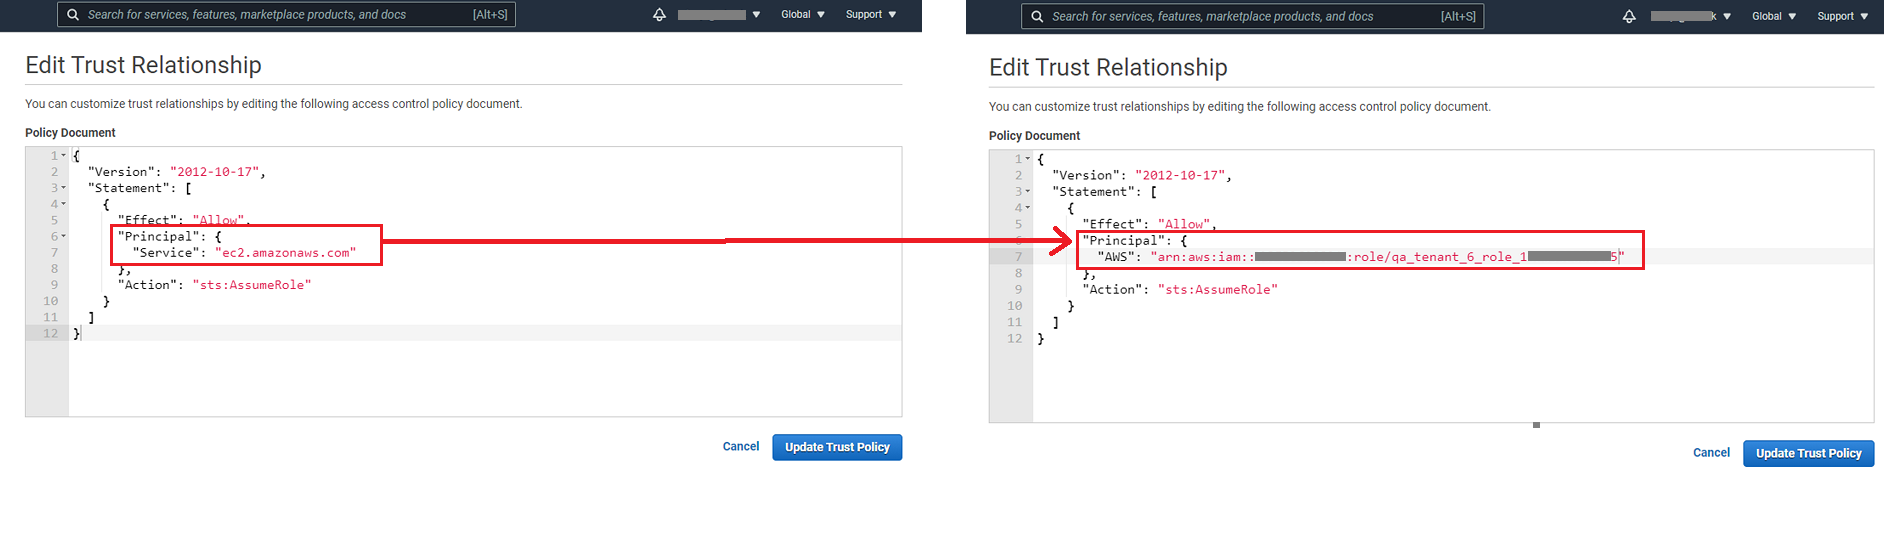
Click on Update Trust Policy option.
2.5 Validate Trust Relationship of Organization Users
Organization users should send their Gathr Principal to the organization administrator for adding it as a trusted entity.
Organization administrator can add all the required users’ Gathr principal as shown below:
Once added, all relevant users will be able to utilize compute environments in Gathr applications.
2.6 Save Environment Details
The next step in compute environment setup is to provide few details about the environment.
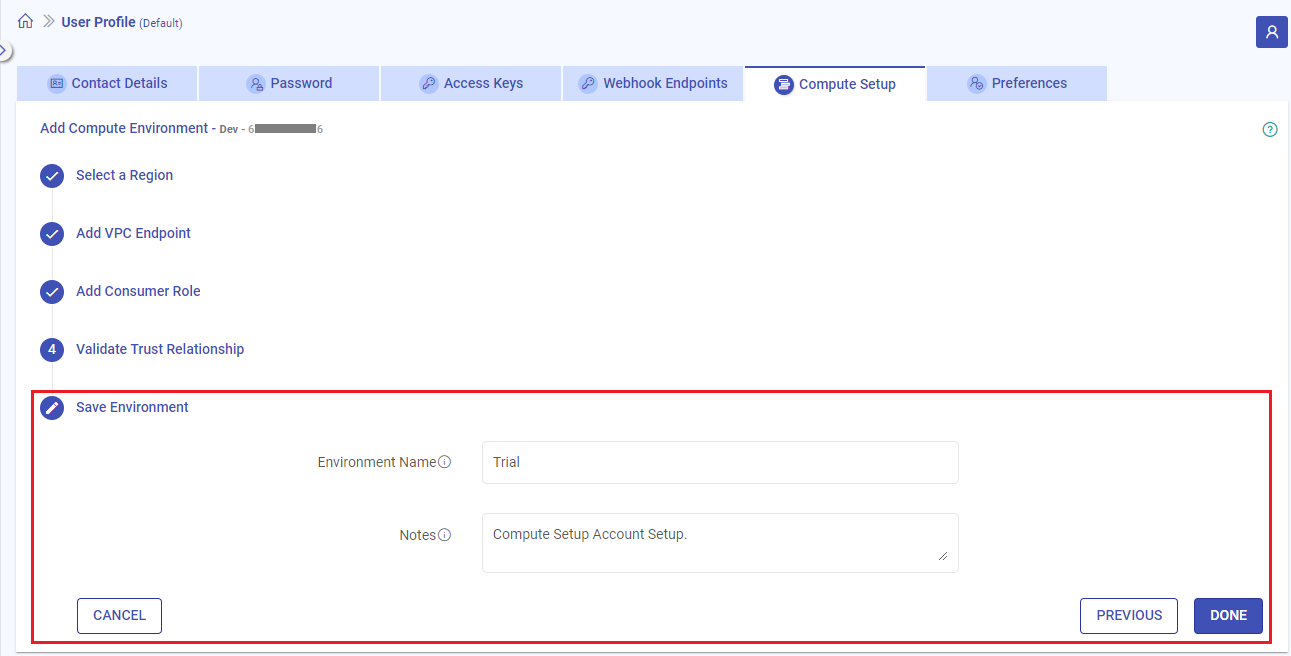
Steps to save the Compute Setup details
Provide the environment details referring to the table given below:
Field Name Description Environment Name A name can be added for the compute environment. Notes Optional notes can be added for the compute environment setup. Click on DONE. A success message stating that “Compute setup details have been saved successfully” will get displayed.
Link Compute Environment to Project
After successfully registering a compute account with Gathr, administrators play a crucial role in linking these registered accounts to specific projects. This step is essential for allowing users associated with each project to leverage the registered clusters for deploying their applications. For more details on how to link a compute environment to a project, please refer to Link Compute Environment to Project →
If you have any feedback on Gathr documentation, please email us!