Azure Databricks Compute Setup in Gathr
Azure Databricks integration with Gathr provides users with a powerful platform to seamlessly design and deploy ETL applications on Databricks compute. Users can connect to multiple Databricks workspaces from a single Gathr project to submit Gathr applications. When designing applications in Gathr, users can leverage Databricks interactive clusters. With Gathr, users can read data from various sources, apply transformations, and ingest them into Delta Lake and Unity Catalog, all while utilizing Databricks compute.
To begin harnessing Azure Databricks capabilities within Gathr, you will need to register your Databricks account with Gathr, setting up compute environments in a few simple steps. Once registered, you can bring your own compute environments into Gathr to run Data Ingestion, CDC, and Advanced ETL applications.
Prerequisites to Registering Databricks Account with Gathr
Ensure you have the following permissions in your Databricks workspace:
Workspace Permissions: Read-write permissions for the Databricks workspace to access necessary information.
It's recommended to have the Workspace Admin role to manage clusters and workspace settings.Cluster Permissions: Create-edit permissions to allow Gathr to create and configure clusters for running applications.
Token Permissions: Create-manage token permissions in Databricks for Gathr to authenticate and interact with the Databricks environment.
DBFS Permissions: Read-write permissions on Databricks File System (DBFS) for Gathr to store and access its binaries on DBFS.
Steps to Add Databricks Account
Steps to register Azure Databricks account in Gathr are as follows:
Login to Gathr and click User Profile (in left pane).
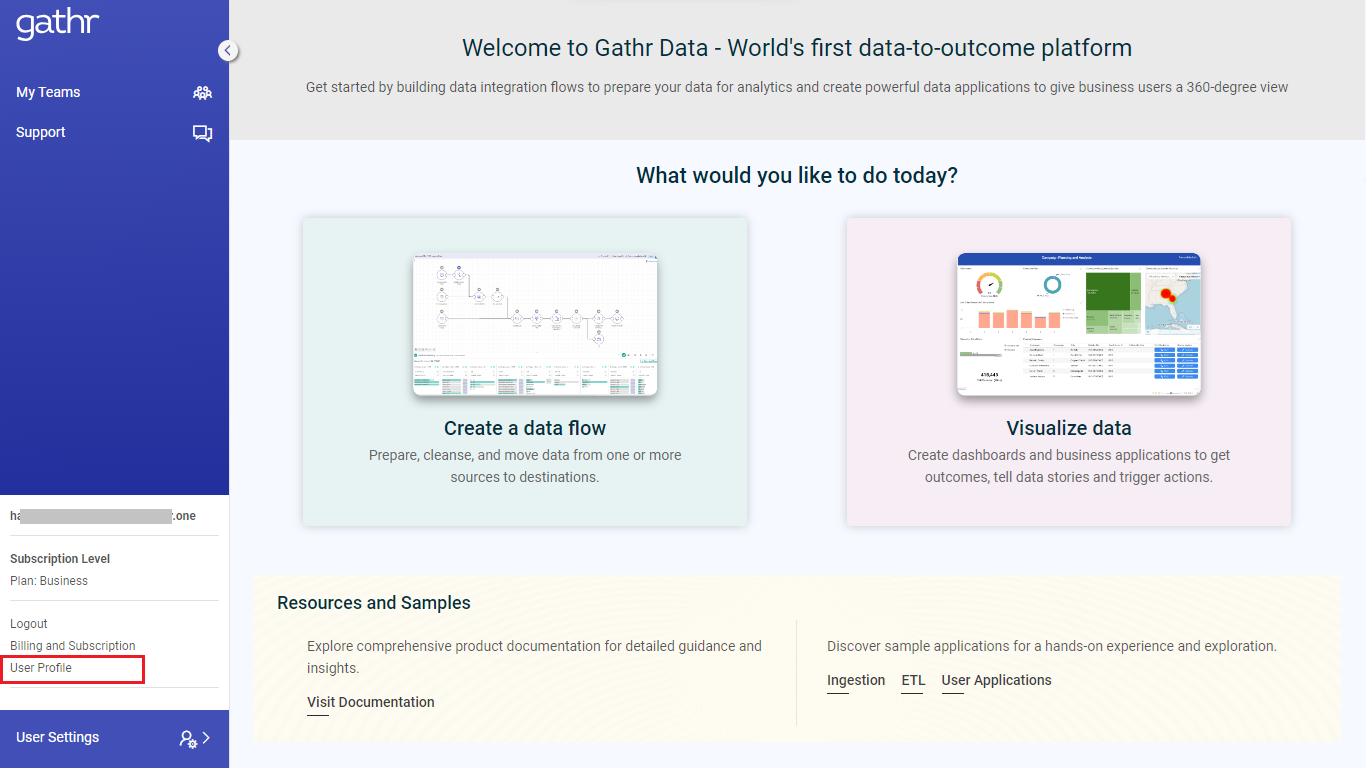
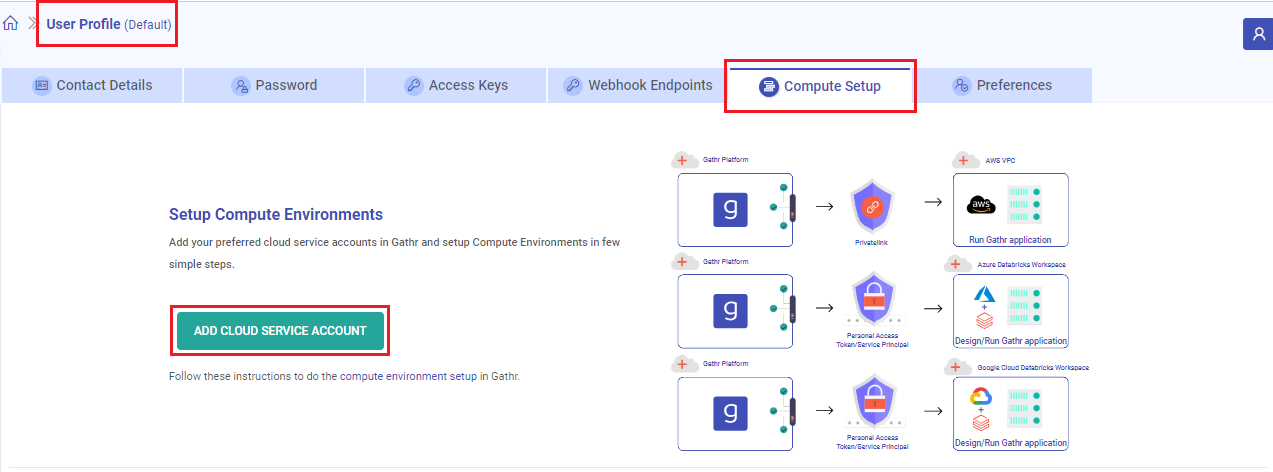
On the User Profile page, switch to Compute Setup tab and click on ADD CLOUD SERVICE ACCOUNT option.
Choose the Account Type as Azure Databricks.
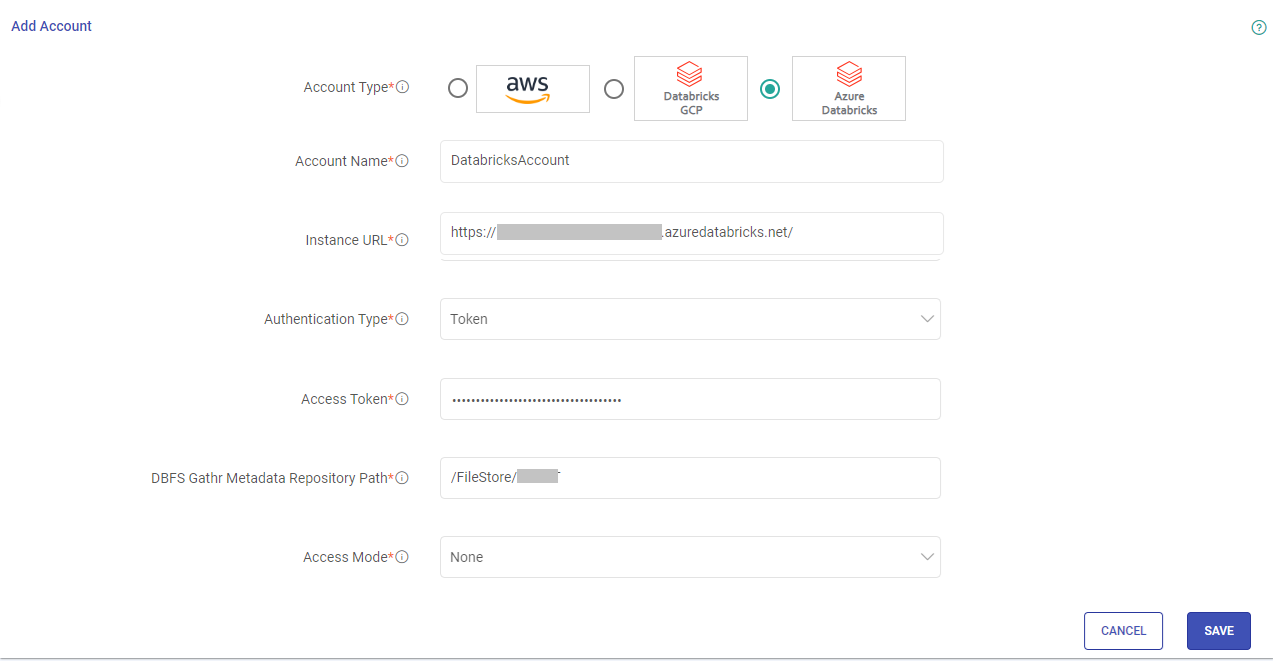
Provide your Azure Databricks account details referring to the table given below:
Field Name Description Account Name Provide a user-friendly alias for this Azure Databricks account. Example: Dev Account. This alias will be used for easy identification within Gathr. Instance URL Enter the URL of your Azure Databricks instance. This should be the endpoint where your Databricks workspace is hosted.
To know more about the Workspace URLs, click here.Access Token Paste the access token generated in your Azure Databricks workspace. This token is required for Gathr to authenticate and interact with the Databricks environment.
To know more about the steps to create an Azure Databricks personal access token for your Azure Databricks workspace user, click here.DBFS Gathr Metadata Repository Path Specify the path on the Databricks File System (DBFS) where you want to store Gathr binary and use it as the metadata root folder for Gathr.
The path should begin with “/”.
Example: /FileStore/gathrBinaries. Ensure that the provided path is accessible and has the necessary permissions.Access Mode Access mode is a security feature that determines who can use the compute and what data they can access via the compute. The options are:
- None: No Access Mode.
- Single user: Run SQL, Python, R and Scala workloads as a single user, with access to data secured in Unity CatalogSingle User Access When a user runs a command on a cluster with Single user access mode enabled, that user’s Azure Active Directory credentials are passed automatically to Spark, allowing the user to access data in Azure Data Lake Storage (ADLS) without having to specify their credentials manually. Click on SAVE option and the Databricks account details will get added following a success message.
Associate Registered Databricks Account to Project
Once the Databricks Account is registered, it should be associated to Gathr projects.
This is a mandatory step. Once completed, only then the project users will be able to submit jobs on the registered Databricks compute environment’s workspace.
- Only an individual signed up user or an Organization Administrator can associate the registered Databricks accounts to projects in Gathr.
Steps to Associate a Databricks Account to a Project:
Navigate to the Projects page.
Edit the project in which the registered Databricks compute environment should be associated.
Update the required fields as per the table given below:
Field Description Project Name The name of the project cannot be edited. Account Type The cloud account mapped at the time of project creation will be shown. Account Only organization administrators can edit this field.
The Databricks accounts that are selected in this field will be available for submitting jobs.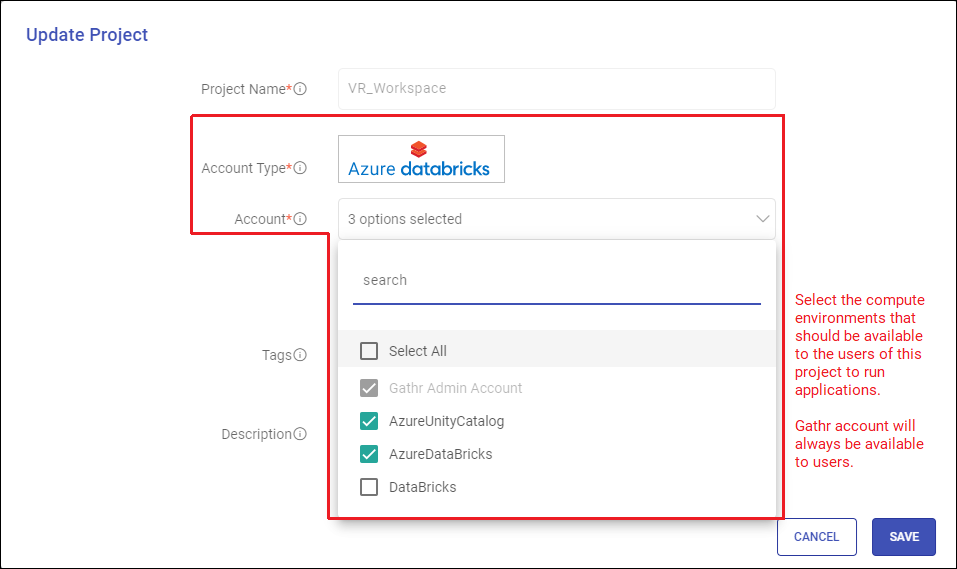
Gathr Admin Account is selected by default and it signifies that Gathr Compute will always remain as an option for submitting jobs.
Select the registered Databricks accounts that you want to have as deployment options.Be careful while deselecting any account details as the deployment of applications configured to run on such accounts will get impacted.Tags (Optional) Tags can be added or removed for the Project. Description (Optional) Description can be added or updated for the project. Save the updated project details.
Databricks Compute Setup Listing Page
Databricks accounts once registered with Gathr are shown on the Compute Setup listing page.
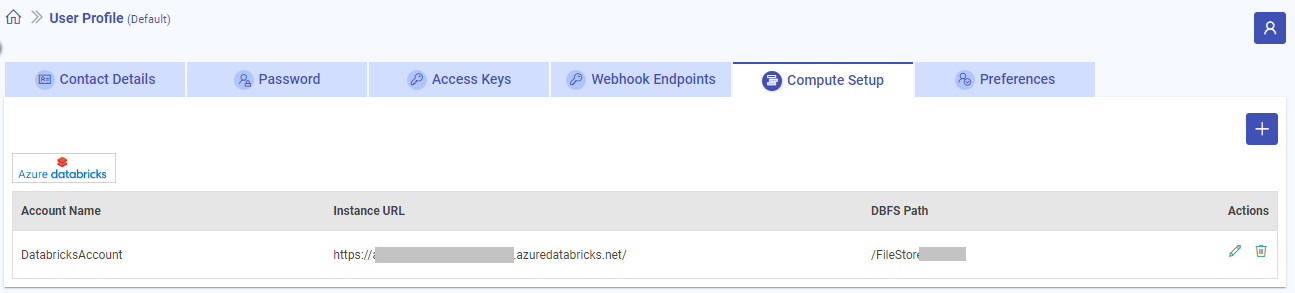
The details that can be seen on the compute setup listing page for Databricks account are:
Account Name
Instance URL
DBFS Path
Actions
Register Multiple Databricks Accounts
Multiple Databricks accounts can be added using the Add New Account button:
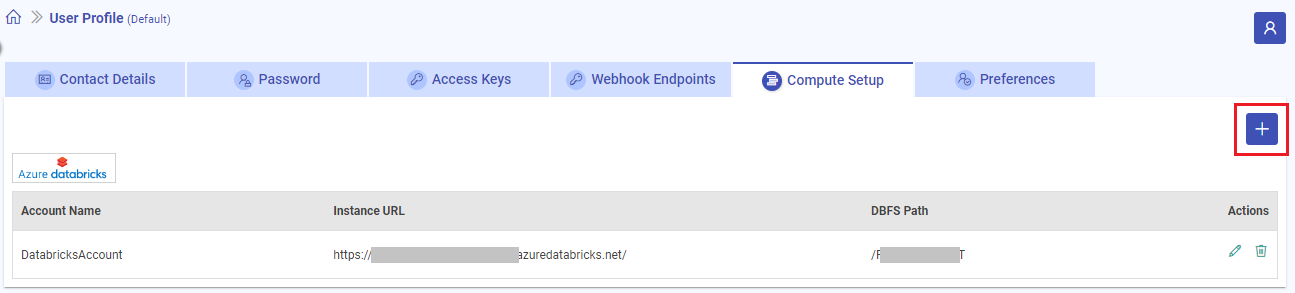
The remaining steps will be same as described in this topic above.
Switch from Gathr Engine to Databricks Engine
Gathr leverages Databricks Interactive Cluster to streamline the ETL, Ingestion, and CDC applications interactive development.
Gathr engine is your default engine when you login to Gathr. To take advantage of Databricks interactive cluster you need to switch to Databricks engine.
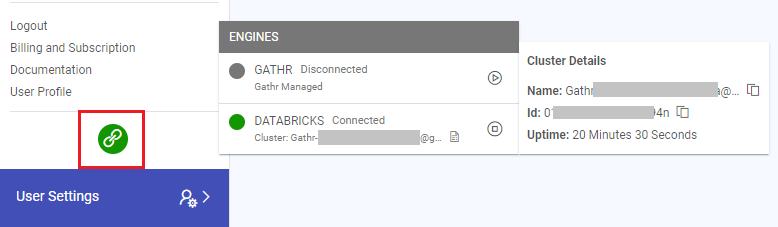
The engines are shown above the User Settings option.
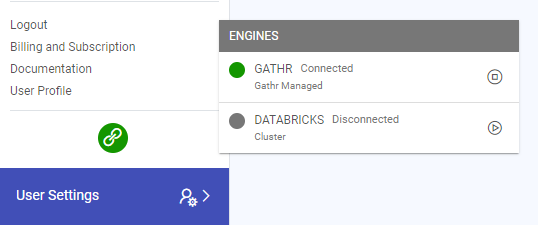
Hover over the engine symbol to view the available engine options.
For more details, see how to Associate Registered Databricks Account to Project.
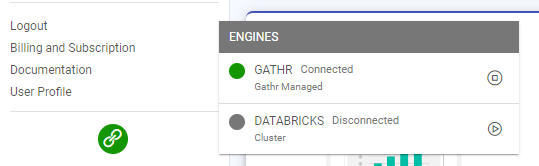
Switching Between Engines
After registering a Databricks account, and associating it to a project, users gain the option to switch between the Gathr and Databricks engines.
Refer to the topic, Steps to Add Databricks Account for step-by-step guidance on registering a Databricks account with Gathr.
Connecting to Databricks Engine
Click on the preferred engine option to make the switch.
To connect to the Databricks engine, users need to select the registered Databricks account from the options available.

After selecting the desired Databricks account from the drop-down, click SWITCH.
The connection process may take time equivalent to the cluster initialization time.
Displaying Databricks Engine Details:
Once connected, the Databricks engine details, including cluster name, ID, and uptime, are prominently displayed for user reference.
Leverage Databricks Job Clusters to Submit Gathr Pipelines
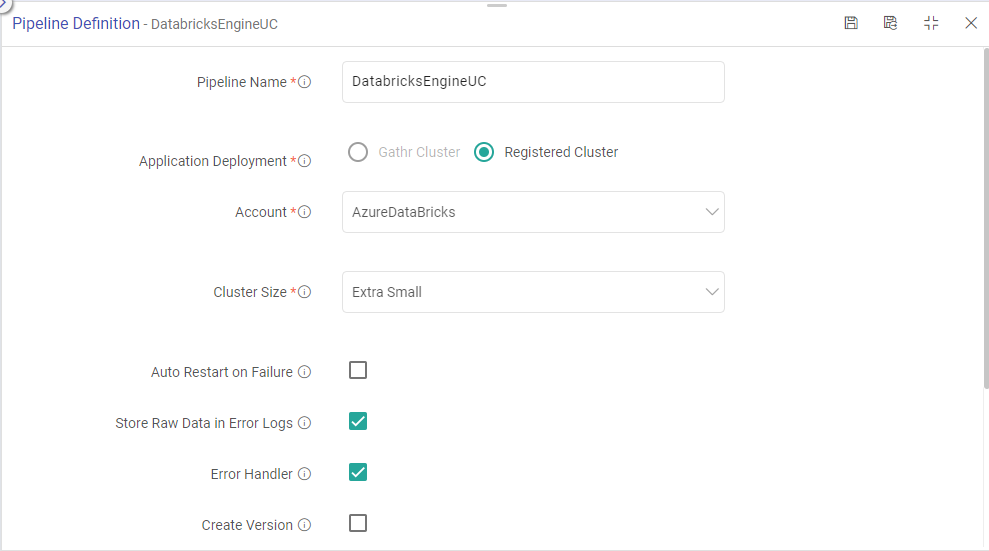
Applications you create in Gathr can run either on a Gathr cluster or a Databricks job cluster. This can be configured in two ways:
While saving application’s deployment preferences on the Pipeline Definition page you can select the registered Databricks account on which the job will run.
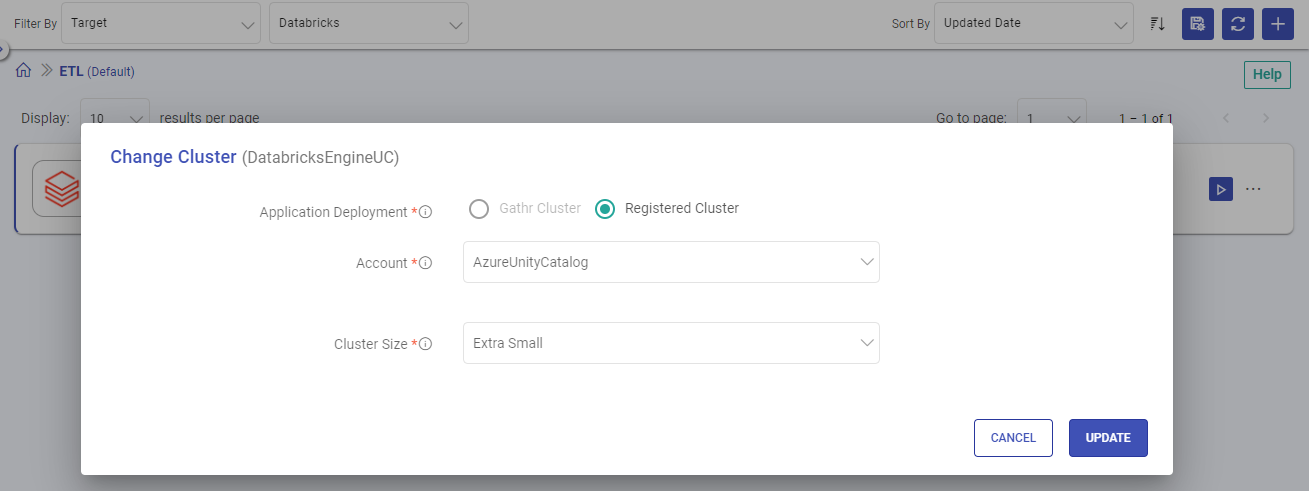
Or after saving the application, same thing can be done from the listing page using the Change Cluster option.
Ingesting Data to Databricks Delta Lake
Prerequisites
The Access Mode should be set to ‘Single User’.
The specified single user should have permissions to the Databricks Workspace and the corresponding Unity Catalog.
The specified single user should have permissions to run commands on the single user cluster.
Databricks ETL Target: Refer to Databricks ETL Target for more details.
If you have any feedback on Gathr documentation, please email us!