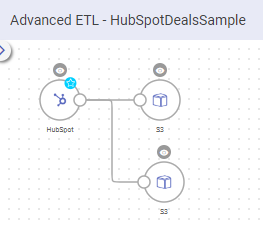
ETL Canvas
Using Gathr’s interactive ETL canvas, you can visually design and build your ETL applications, connect data sources, apply transformations, convert and interpret complex data through intuitive visual representations, and load data into target systems.
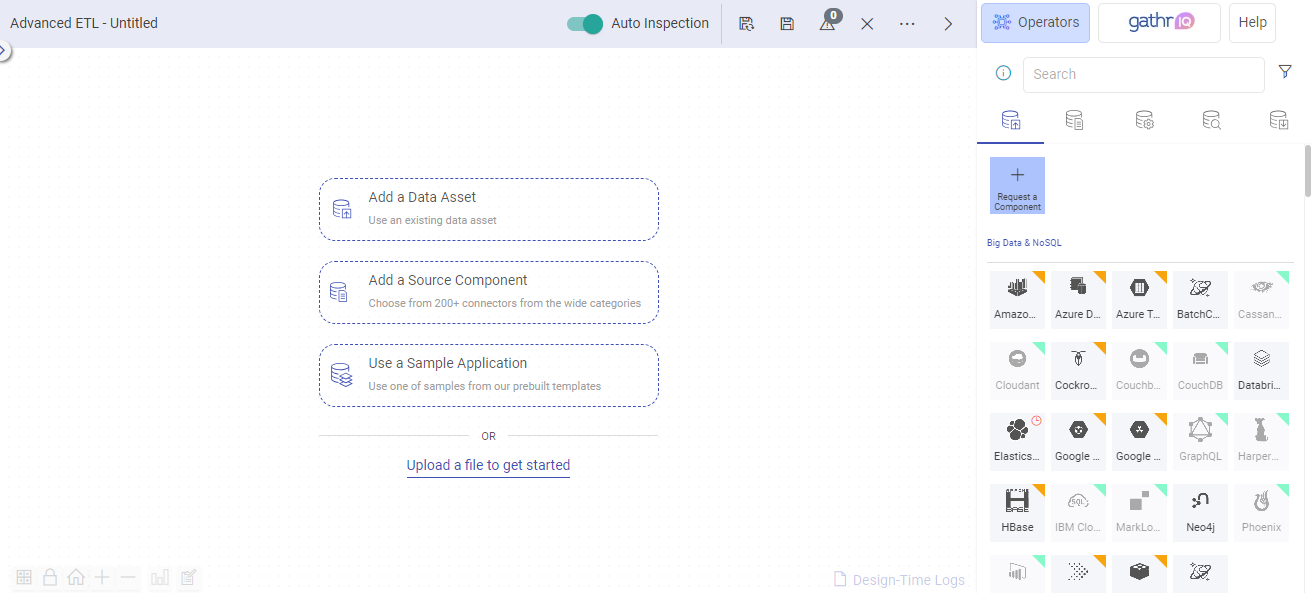
Options that are available on the ETL applications design page are described below.
Operators
In the ETL canvas, operators enable users to interact with Gathr’s diverse range of connectors.
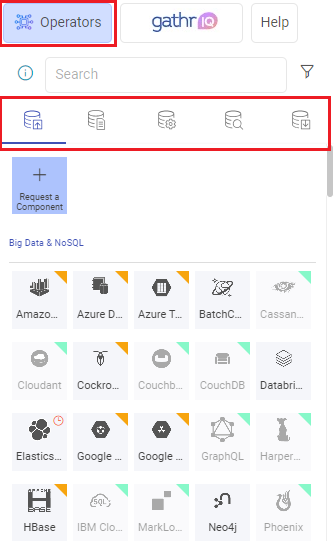
Operators are categorized into:
Data Sources: The first operator in an ETL application. Connects to external sources for data retrieval.
Data Assets: The first operator in an ETL application. Retrieves data from saved data assets.
Transformations: Built-in operators for data processing.
Analytics: AI-enabled operators for streamlined data processing through natural language inputs. Machine learning algorithms for model training and scoring. Visualization component for graphical representation of your data.
Targets: Destination for data in an ETL application.
These operators play a vital role in constructing data pipelines, facilitating smooth data extraction, transformation, and loading.
Some of the Data Sources and Targets are provided as standard operators, while others are organized into premium groups, each with its legend for easy identification.
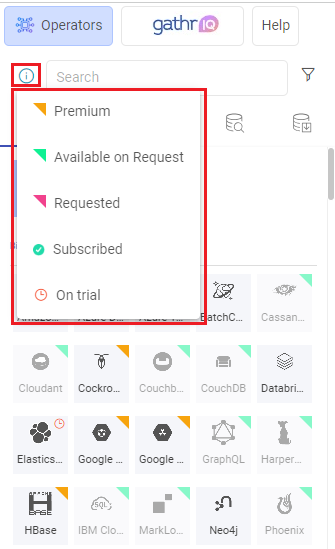
Explore the Connector Marketplace topic for detailed insights into each categorization and guidance on managing these operators.
AI Assistant for Data Transformation
Create ETL applications with Gathr’s AI Assistant and transform data effortlessly in 3 steps.
Step 1: Set up a source or transformation.
Start by adding a data source to the canvas or connecting a processor to an operator.
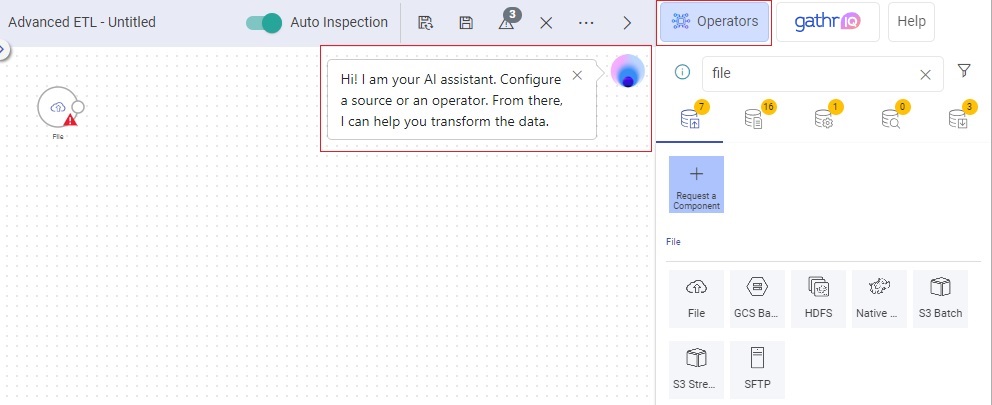
Once a data source is added to the canvas, the AI Assistant will prompt a message, guiding you to configure the source or the operator.
Configure the data source or any other operator, then, navigate to the AI Assistant tab.
The AI Assistant will pinpoint the name of the operator, signaling the starting point for data transformation.

For the AI Assistant to comprehend and respond effectively to natural language inputs, it needs a design-time schema and sample data from an operator.
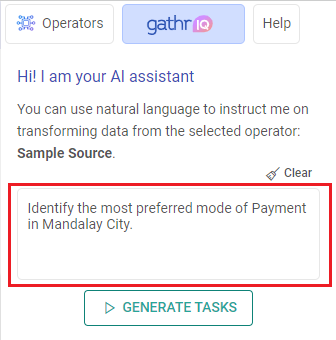
Step 2: Specify Data Transformation Needs
Formulate your data transformation requirements in plain, natural language.
Clearly express the desired outcomes and transformations you want for the data.
Provide detailed instructions to guide the AI Assistant in understanding and executing the transformation tasks accurately.
For instance: Identify the most preferred mode of Payment in Mandalay City.
Hint: Use Ctrl + Space to get input columns list in the prompt box.
 The AI Assistant features a single input box for dialogues, without a communication trail for requirements and responses. To initiate a new interaction or set of instructions, use the Clear option to reset the prompt box.
Step 3: Generate Tasks and Apply
Submit requirement using Ctrl + Enter or click on GENERATE TASKS.
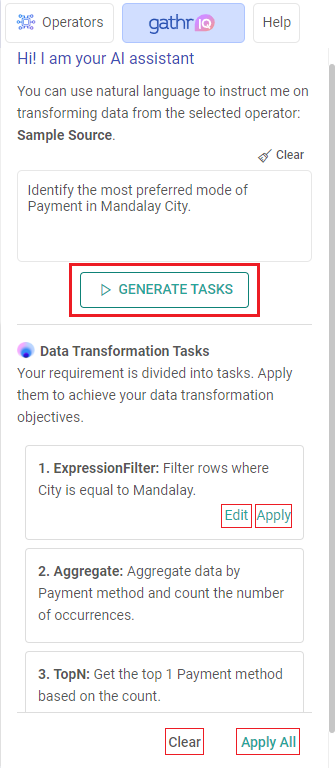
The AI Assistant will divide the requirement into meaningful tasks.
As required, each recommended task can be edited for fine-tuning.
You can Apply the suggested tasks individually or all at once.
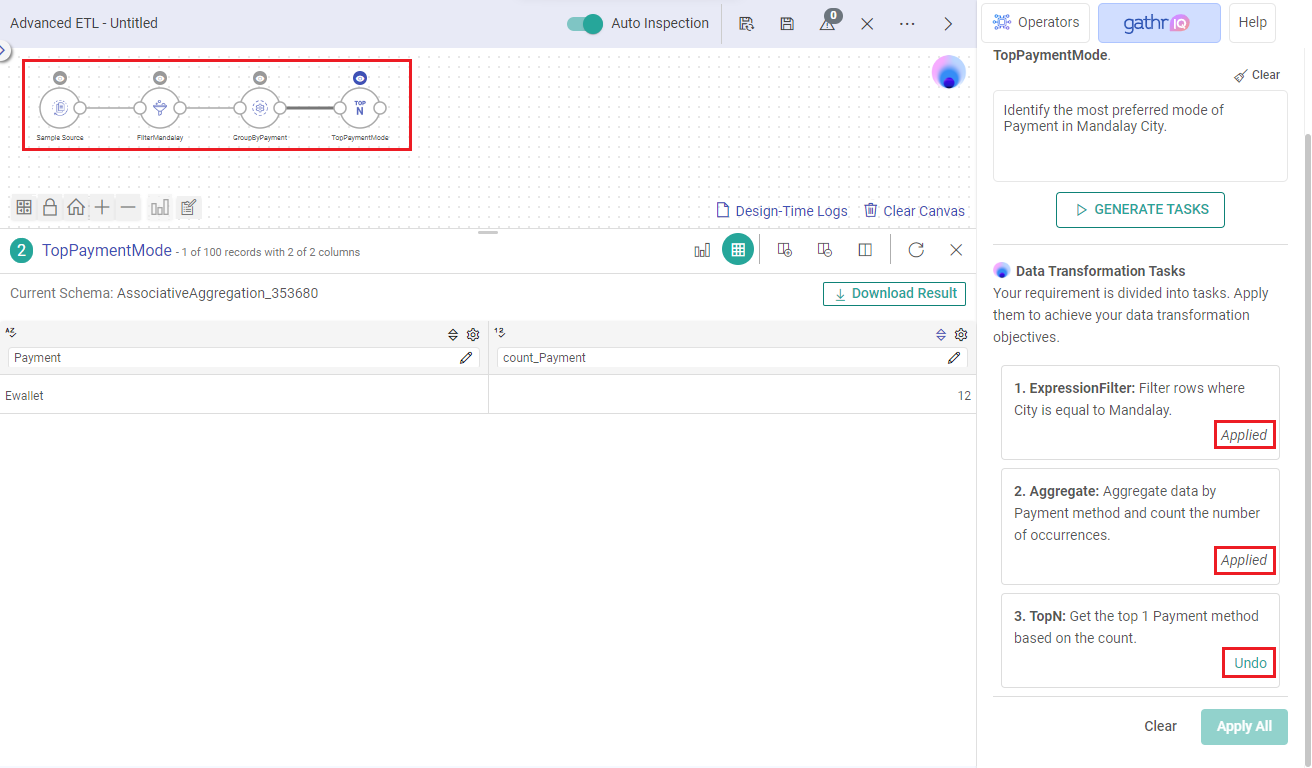
Each completed task will be labeled as Applied in its sequential step.
You can sequentially Undo tasks or Clear the entire task list and AI Assistant’s input prompt box to restart the process.
Once satisfied with the outcomes of the tasks, you can switch back to the Operators tab, add an emitter, and complete the application design flow.
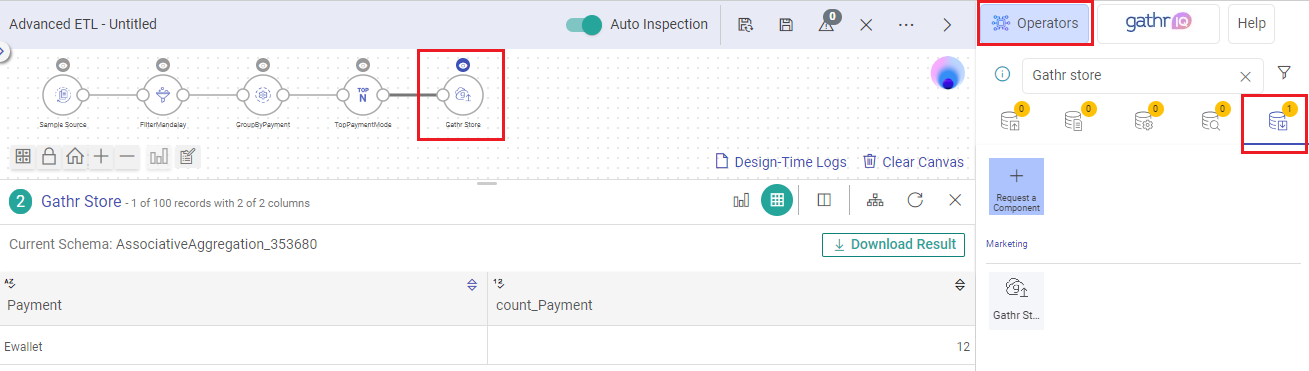
Save the application for further action.
Working with Multiple Input Streams
The AI Assistant currently does not support data processing instructions from multiple input streams.
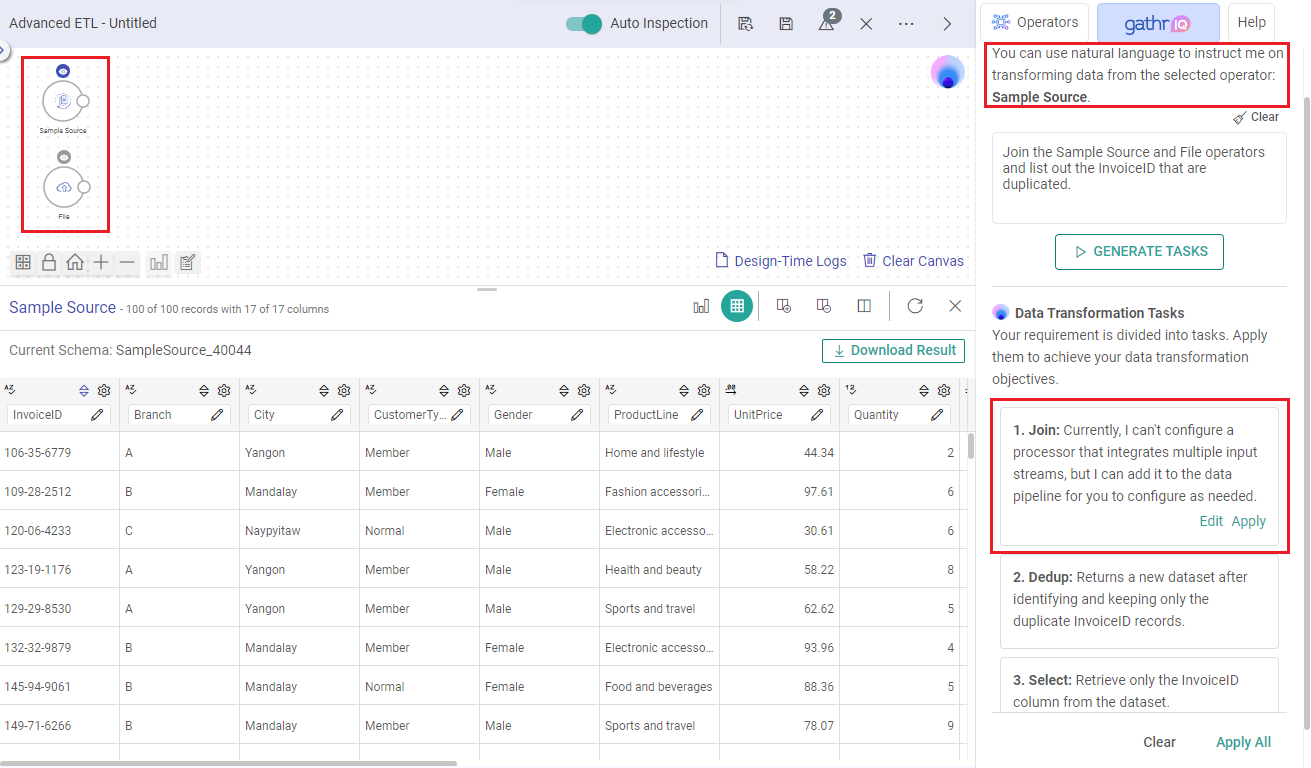
For operations like Join or Union, the AI Assistant will simply add the suggested processor to its starting point on the canvas.
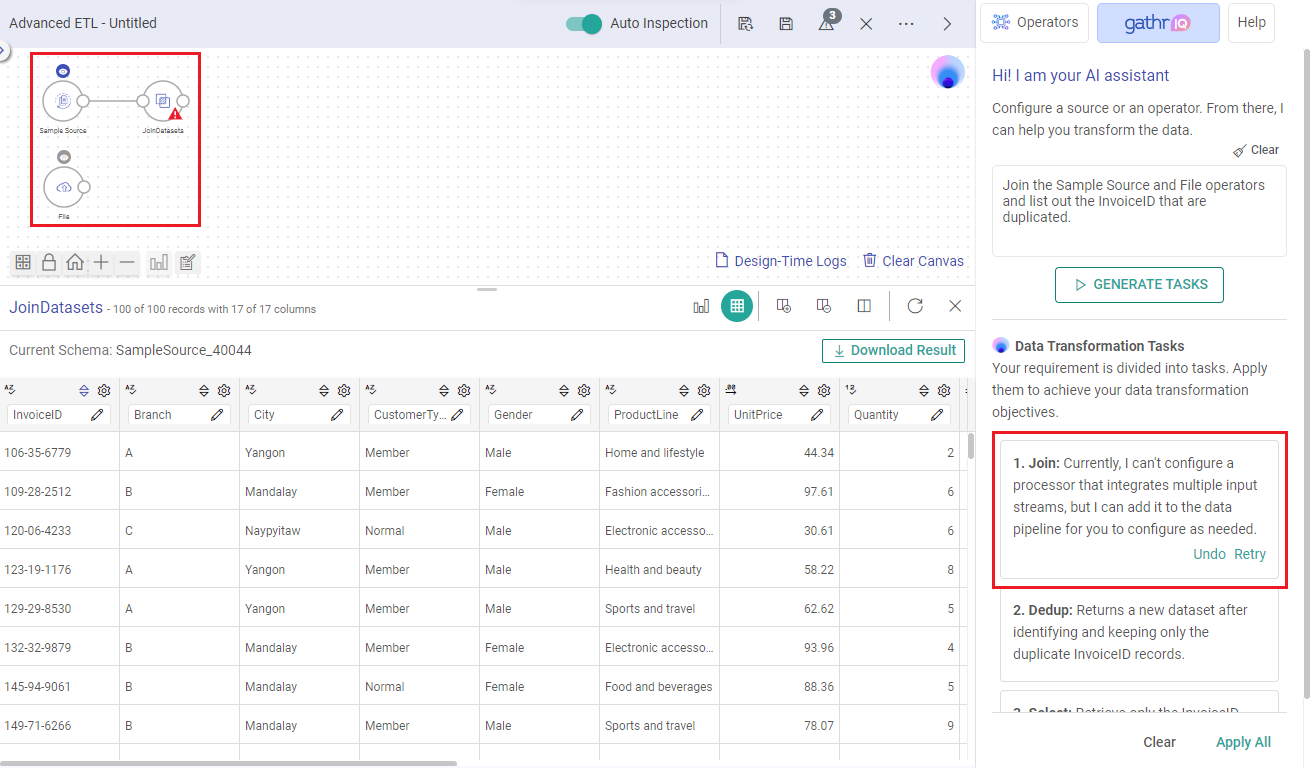
Following this, you have the option to manually configure the processor and finalize the design flow of the application.
Autosave
Autosave function automatically saves the current changes or progress in a draft ETL pipeline at regular intervals during a session.
It is an optional feature to protect the ETL pipeline drafts in case of session expiry, system failure or similar events.
Currently it is available for ETL pipelines and is disabled by default.
Click the Autosave option to enable it. Once enabled, the pipelines while designing will get autosaved as per the conditions given below:
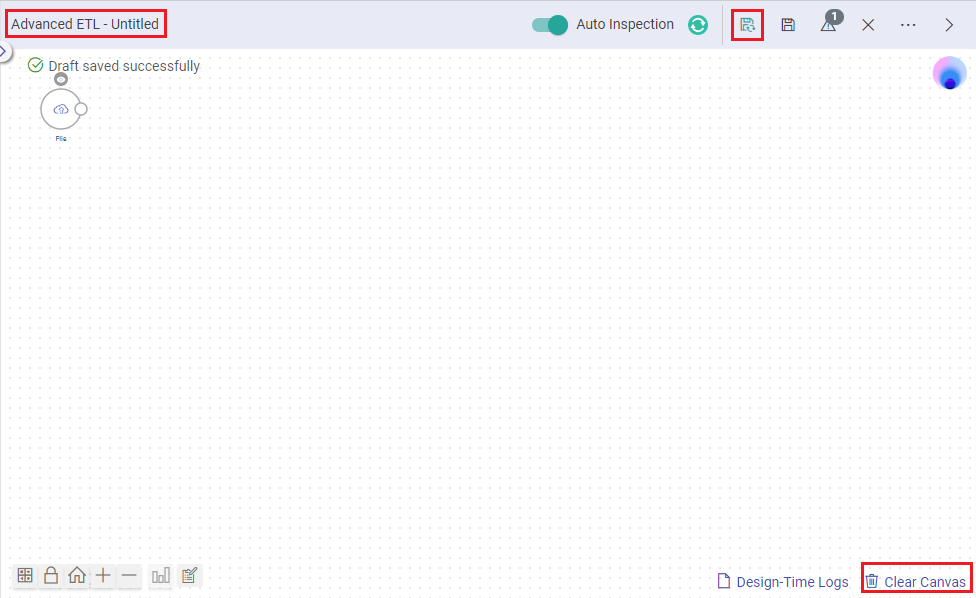
Autosave while creating pipeline
User has to configure at least one source component for the autosave to come into effect. This is a mandatory condition for autosave feature to work.
If a user has enabled autosave, then message with draft saved successfully will start appearing after regular intervals.
User can start adding components on the canvas while designing the pipeline, which will get saved as a draft until user saves the pipeline.
If a user exits the canvas without saving, then user can still access the previous draft of the pipeline with the create pipeline option.
User can clear the canvas if existing draft is no longer required, and start designing a new pipeline.
Autosave while editing an existing pipeline
The pipeline to be edited should have one source component configured for the autosave to come into effect. This is a mandatory condition for autosave feature to work.
If user edits any existing pipeline and closes the pipeline canvas or browser without saving it, then a draft of the pipeline will highlight on the pipeline listing page.
Draft prefix will be removed from the pipeline page listing once the user has saved the pipeline.
If a user switches version from an autosaved draft pipeline (in case multiple versions exist), then the draft will be replaced with the switched version.
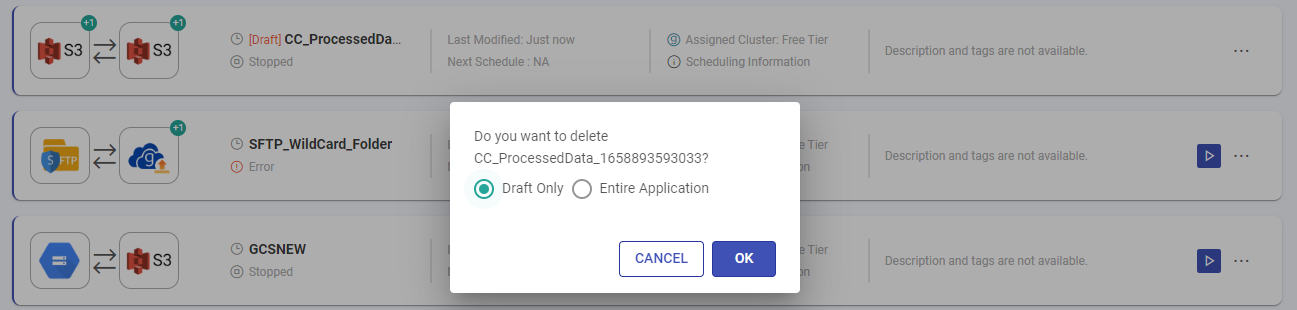
The pipeline listed as draft cannot be run or scheduled. But the history of such pipelines can be viewed.
To return back to the original state of the pipeline from its draft version, user can delete the draft pipeline.
Conditions in which autosave will not work:
Autosave feature cannot be enabled for pipelines that are scheduled.
Autosave feature cannot be enabled for pipeline that is part of any workflow.
Autosave feature will stop working if the pipeline design canvas is left idle for more than 30 minutes.
Autosave will pause during pipeline design for the time duration in which any action (such as save, upload jar, create version or switch version) is getting performed on a draft pipeline.
Autosave in shared projects
To avoid editing ETL applications by multiple users at the same time, the pipeline being edited by one user will be locked for all other users of that project.
In the duration of creating or editing the pipeline by one user, no other user will be allowed to edit or delete the same pipeline.
Once the user saves and exits the draft pipeline, then it will be unlocked and available to edit for other users.
The pipeline lock will not be released till five minutes if the tab or browser is closed without saving the pipeline. After five minutes, the auto-saved pipeline will be unlocked for other users.- Also, if a user does not act on a draft pipeline for 30 minutes, then the session will be logged out and the pipeline will be unlocked for other users.
Auto Inspection
When your component is inspect ready, slide the Auto Inspect button.
Auto Inspection lets you verify the component’s data with the schema as per the configuration of the component. This happens as soon as the component is saved.
For more details, please refer to the topic ETL Auto Inspection.
Right-Click Options on Components
When you add a component from the operators section to the canvas, you can right-click on it to access the following options:
Configure a Component
Open the configuration properties of the component. This option opens a section below the canvas where you can modify parameters, connections, or other configurations specific to the selected component.
Rename a Component
Change the name of the component directly from the canvas. This option provides a convenient way to customize the labeling of components for better organization and clarity within the ETL application.
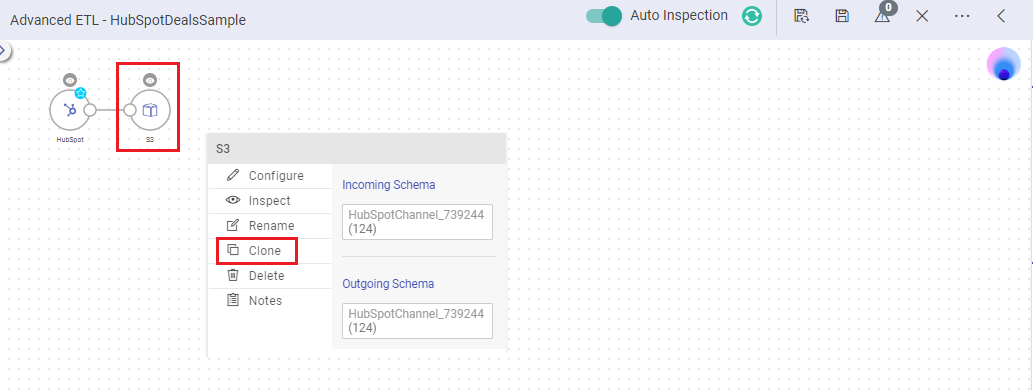
Clone a Component
When working with an ETL application, you have the option to clone any component on the canvas.
This is helpful when you want to create a duplicate of a component that has already been set up and only needs changes to specific fields.
This saves time and effort compared to configuring a component from scratch.
Steps to clone a component
Right-click on a component and choose Clone from the options to create its copy on the ETL canvas.
The component will be duplicated on the ETL canvas.
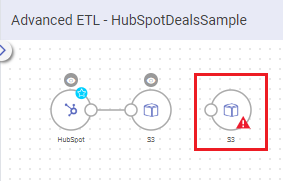
Connect the cloned component with a desired component in the ETL application.

Click on the cloned component to access its configurations.
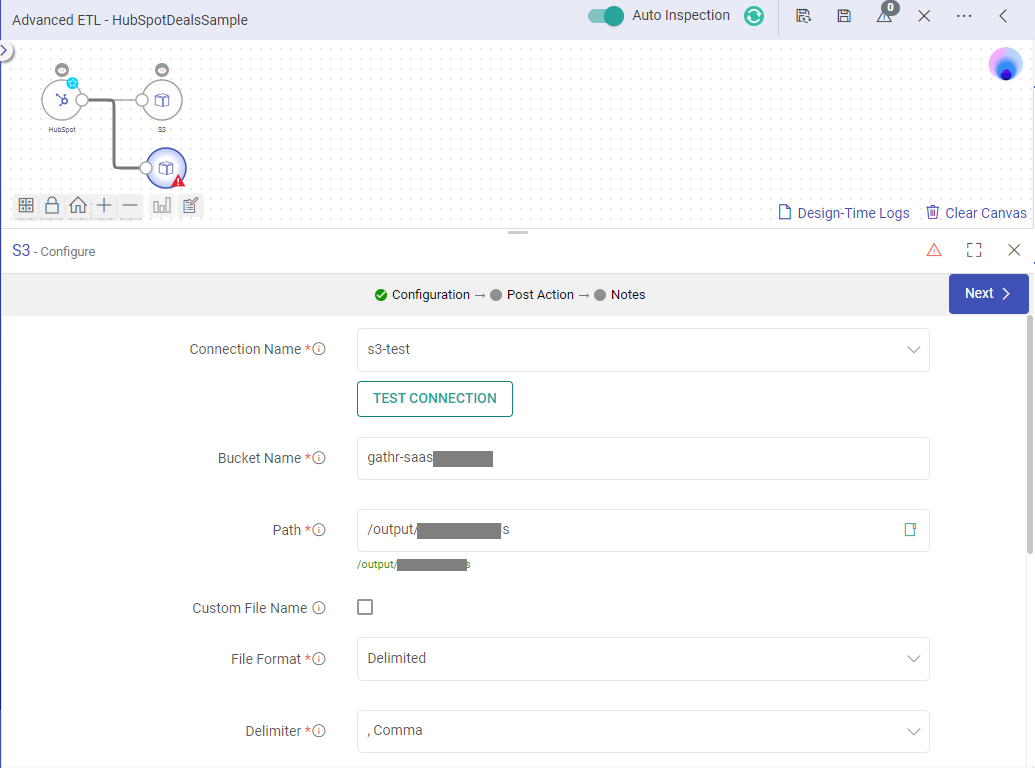
Make any necessary changes to the configurations and save them.
If needed, perform an auto inspection of the pipeline.
Delete a Component
This action permanently deletes the selected component from the application.
Manage Component Notes
Add, edit, or delete notes specific to individual components within the application directly from the canvas.
Click on Notes for a component or the Notes icon adjacent to the Maximize option.
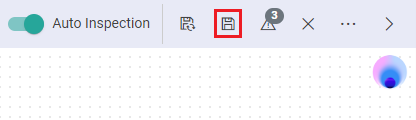
Save ETL Application
The Save option on the ETL canvas allows you to save your ETL applications, preserving the configurations.
After completing your pipeline configuration, click the Save button to access the Pipeline Definition page.
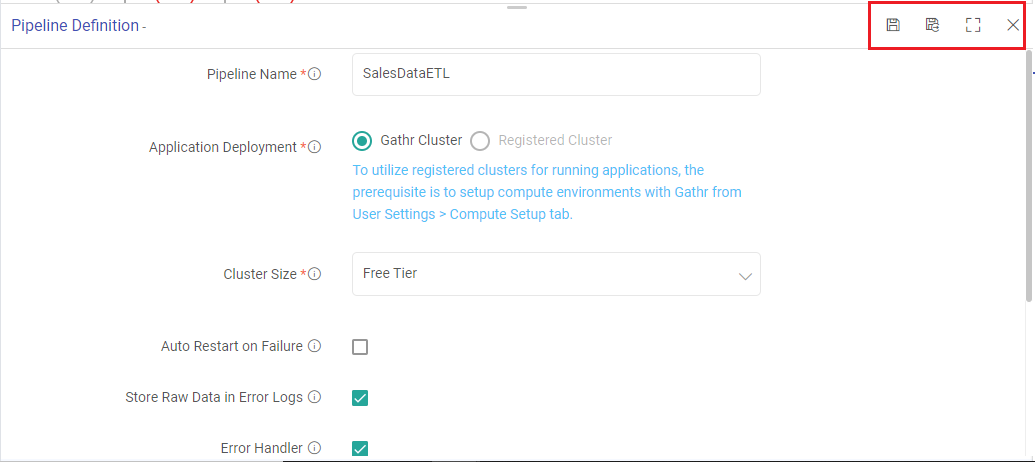
This page allows you to customize your deployment preferences and define application run handling scenarios.
Once you have provided your preferences, you can either choose to Save and continue working on your pipeline or Save and Exit to leave the canvas and return to the ETL listing page.
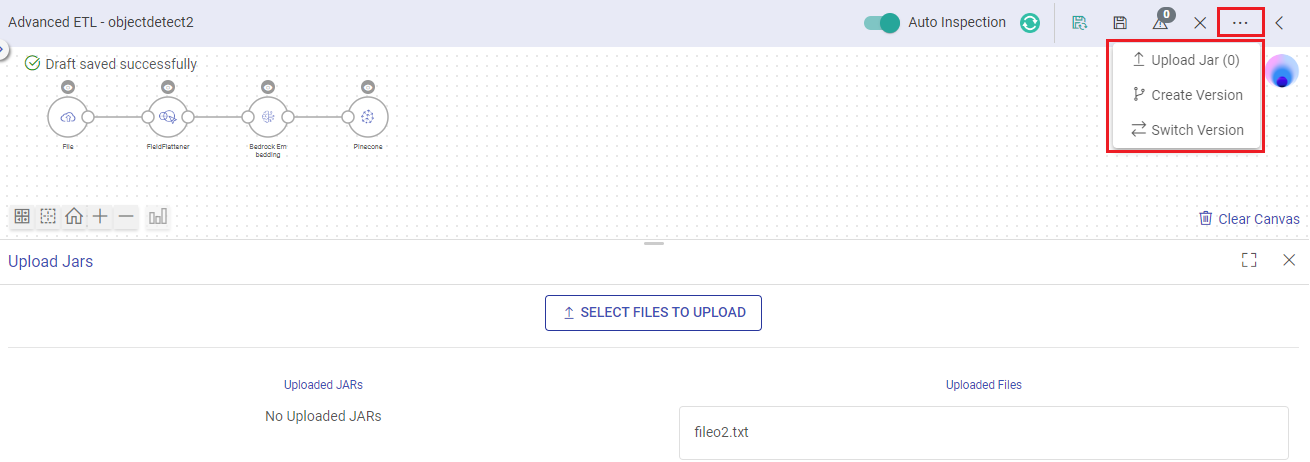
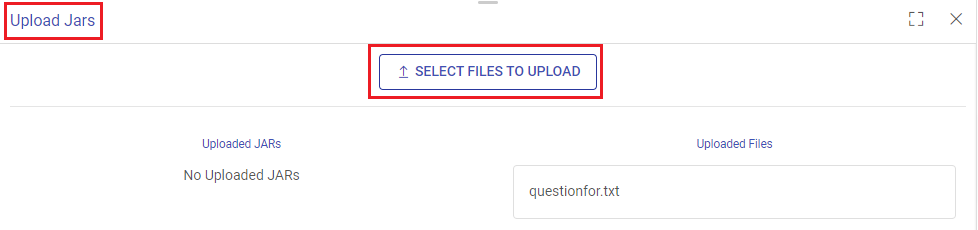
Upload Jar
User has an option to upload Jars in the Data Pipeline configuration.
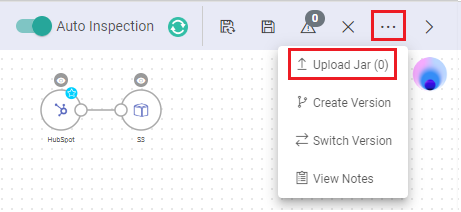
Click on the Upload JAR icon.
On the Upload Jars tab, use the upload icon and select files to be uploaded.
Create Version
Option to create a new version for an existing ETL application. The current version is called the Working Copy and rest of the versions are numbers with n+1.
A new version can be created either by clicking on the Create Version option as shown below or by selecting the Create Version checkbox while saving the pipeline.
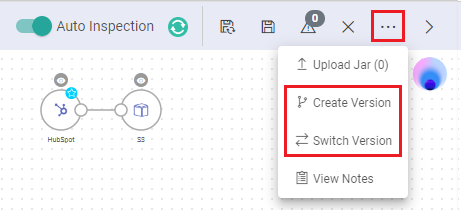
Switch Version
To switch the version of an ETL application, click on Switch Version on the pipeline editor page and choose a version. It will change the pipeline as per the selected version.
It is the Working Copy that is loaded to a newer version. Editing is always performed on the Working Copy of the pipeline.
View Notes
You can access the application-level notes from the right-side ellipsis (…) option while designing an application. These are applicable to application and not to any specific component.
When you click on View Notes, a Modal Window opens, and you can add new notes, edit, or delete the existing notes for the application.
Errors Warnings and Recommendations
During application design, Gathr provides notifications for errors, warnings, and recommendations to help users identify and resolve configuration issues.
Here are some of the error notifications that will be generated for the processors listed below:
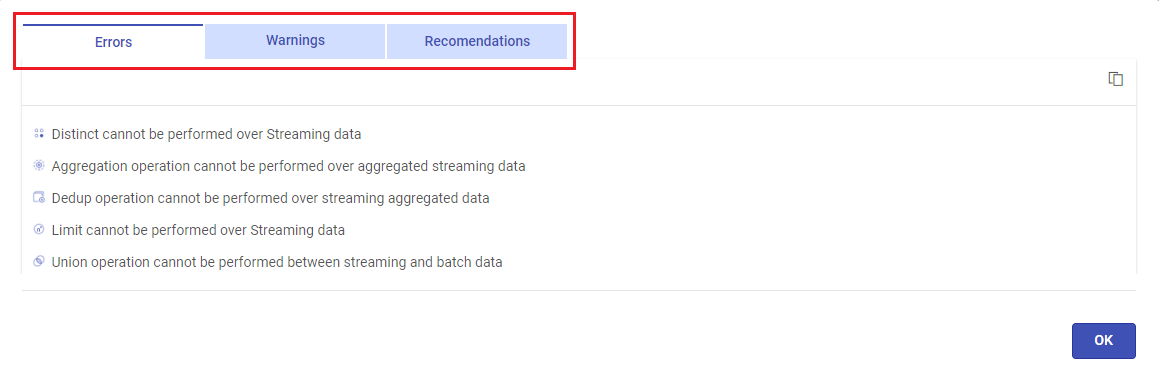
Aggregation: Multiple aggregation operations on a streaming data source are unsupported.
Distinct: Distinct is not supported for use with streaming data sources.
Sort: Sorting is not supported on streaming data sources unless it is performed with aggregation.
Dedup: Deduplication is not supported after aggregation on a streaming data source.
Limit: Limit is not supported on streaming data sources.
Union: Union is not supported between streaming and batch data sources.
ETL Canvas Editing Options

Organize
Automatically arrange and align operators on the ETL canvas, distributing them evenly, for better organization and clarity.
Multi-Select Mode
Enable this mode to lock the canvas for editing and select multiple operators simultaneously.
To select multiple operators, press Alt + left-click to create an area selection.
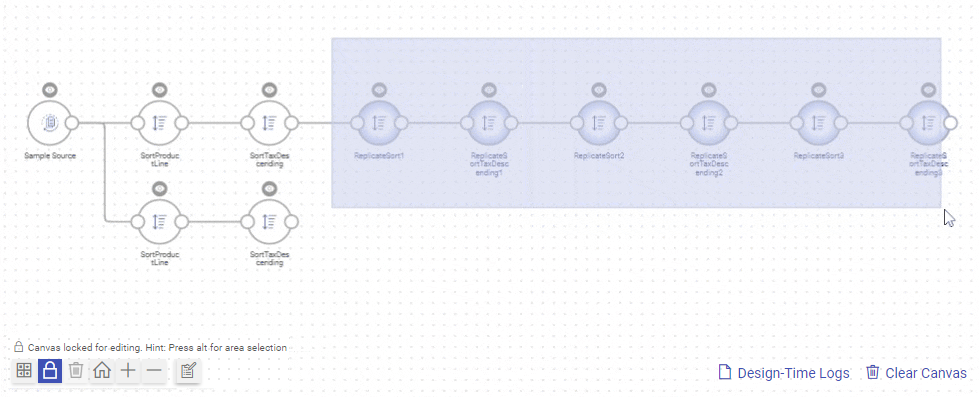
Once selected, move or delete multiple operators at once using the provided options.
Delete Selected Operators
Delete all selected operators on the canvas in one action.
This option appears when Multi-Select Mode is turned on.
Reset Zoom
Restore the zoom level of the canvas to its default settings to return to the standard view.
Zoom In
Increase the zoom level of the operators on the canvas.
Zoom Out
Decrease the zoom level of the operators on the canvas.
Clear Canvas
Remove all operators from the canvas. It’s useful when designing a new ETL application by removing all existing operators to get a clean slate.
Visualize
Effortlessly visualize complex data on Gathr’s ETL canvas, making it easier to understand and analyze. Simplify decision-making with clear, intuitive graphics. For more details, read how to Visualize data in Gathr →
If you have any feedback on Gathr documentation, please email us!