Quick Start Guide
The aim of this quick start guide is to help you achieve below objectives:
Before you Begin
File Upload connector is the source used to create ETL and Ingestion applications.
To help you begin, a sample CSV can be downloaded and used in the File Upload connector.
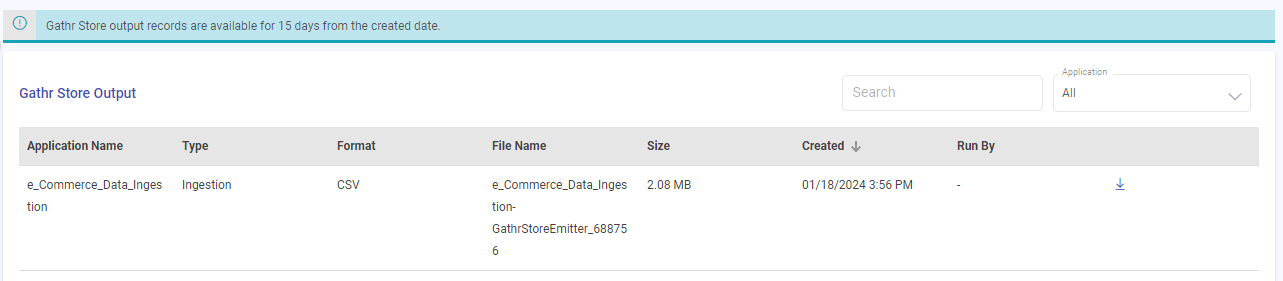
Gathr store is the target used to create ETL and Ingestion applications.
Gathr store is a temporary storage service provided by Gathr. It allows you to access processed data results by downloading them from the Gathr Store output.
Quick Start with Data Ingestion
Create and run an Ingestion application in four simple steps:
Step 1: Configure the data source for the Ingestion application.
Step 2: Configure the target for ingesting data.
Step 3: Save the application with preferred deployment configuration settings.
Step 4: Run the application and oversee its performance.
Explore detailed walkthrough of each step below:
Step 1 - Configure Source
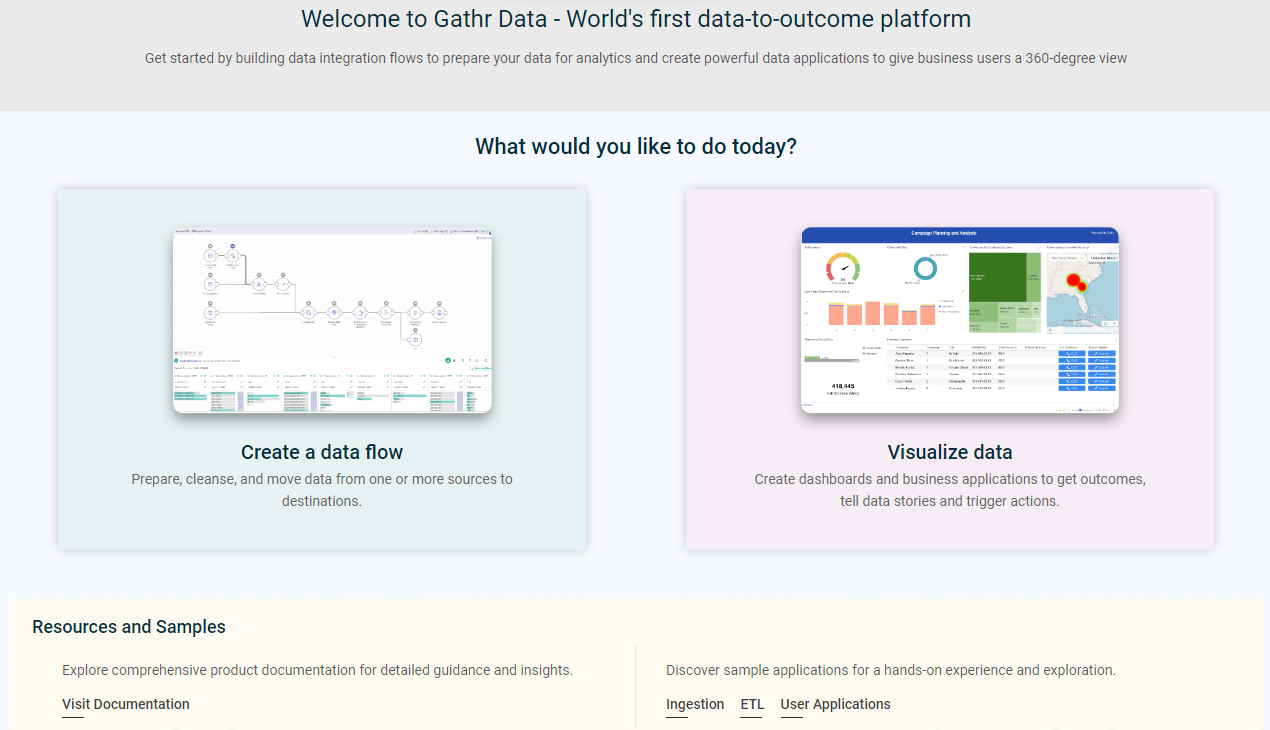
Choose Create a data flow from the Gathr’s landing page.

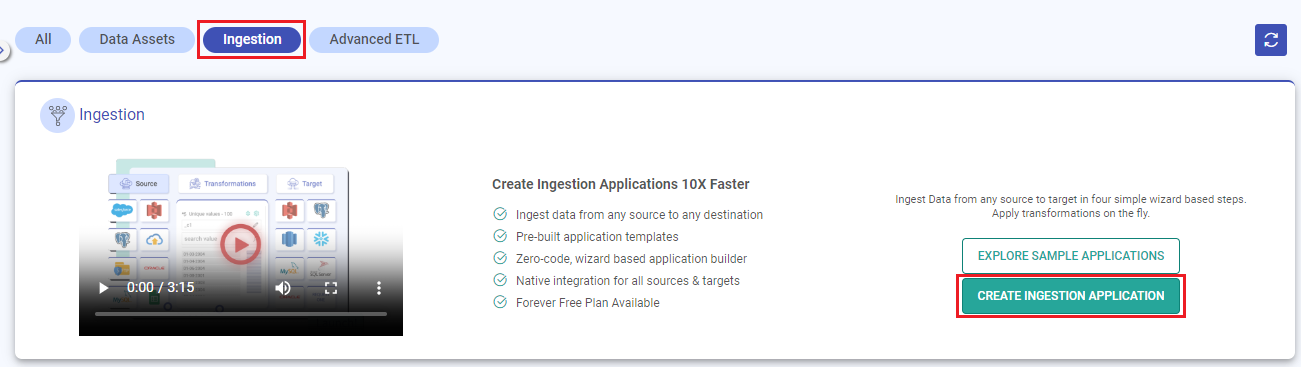
On the dashboard, switch to Ingestion tab, and click on CREATE INGESTION APPLICATION.
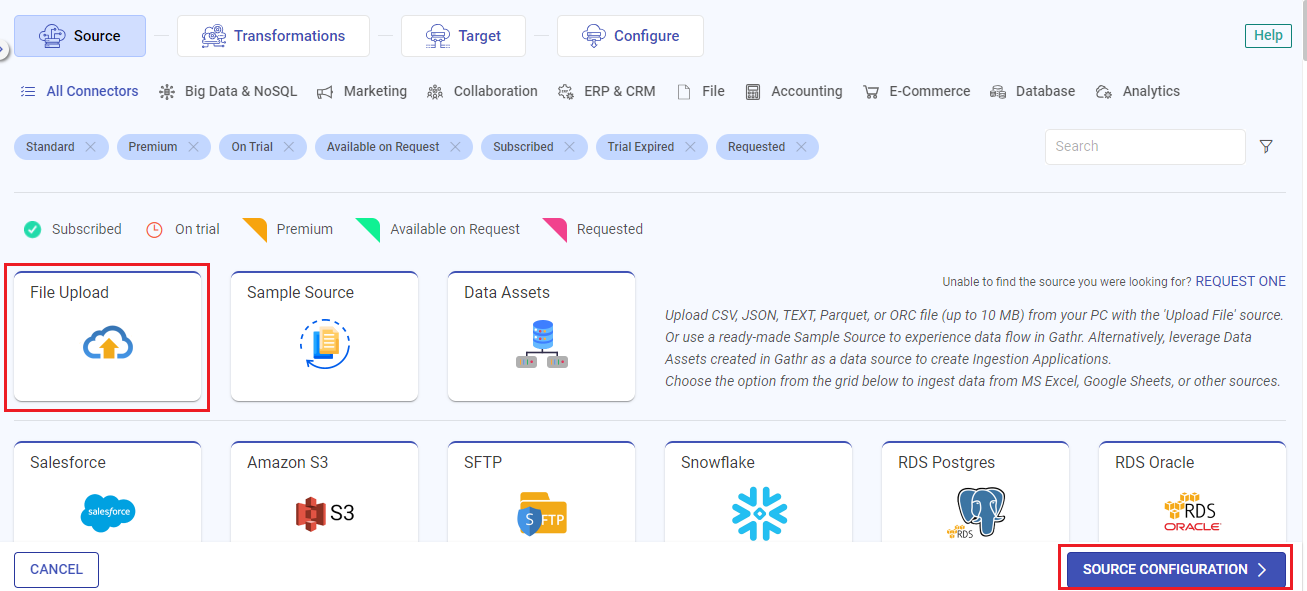
Select File Upload as data source.
Update the Data Format and Header parameters. It allows the application to read the source data accurately.
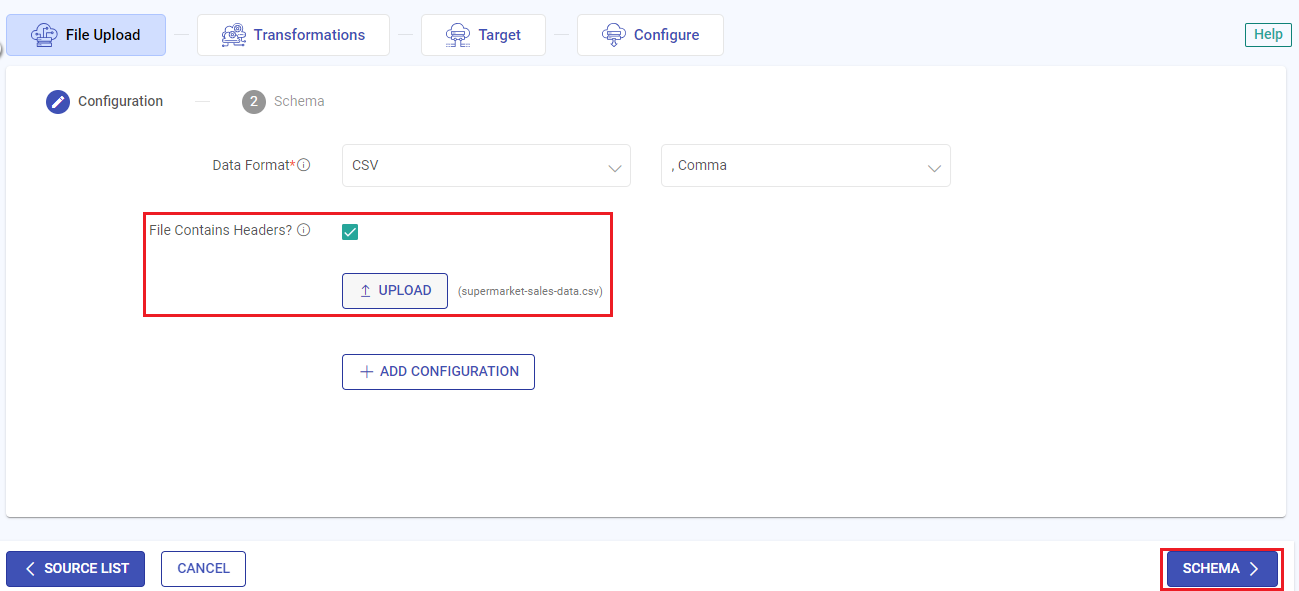
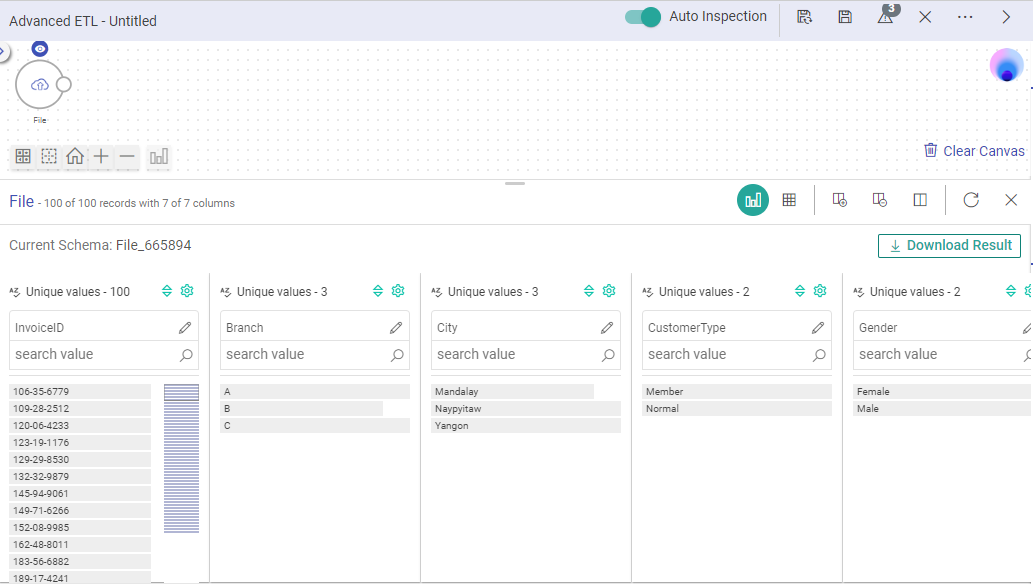
Upload the sample file supermarket-sales-data.csv or any other file of your choice and click on SCHEMA button to populate the source schema for preview.
Make sure data format is set to match the type of file you upload.Detect Schema → To check the populated schema details.
Supported Data Sources → Explore the supported data sources.
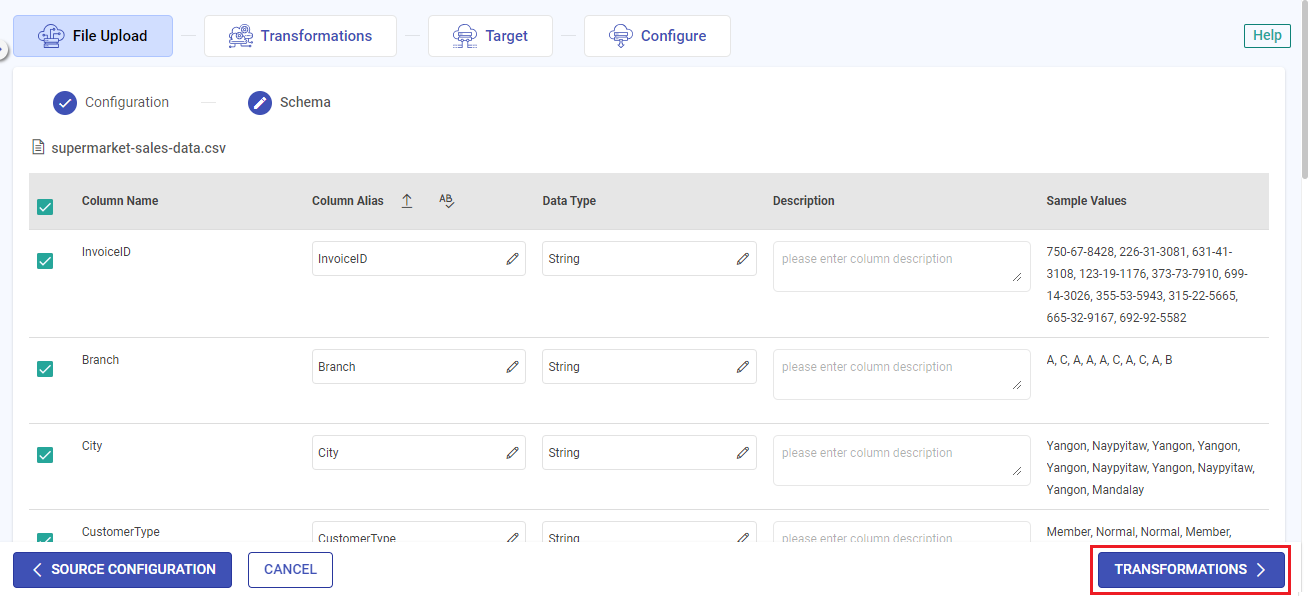
Click on TRANSFORMATIONS button to complete the configuration of the file data source.
You can see the Profile Pane. To know more, refer to Data Preparation.
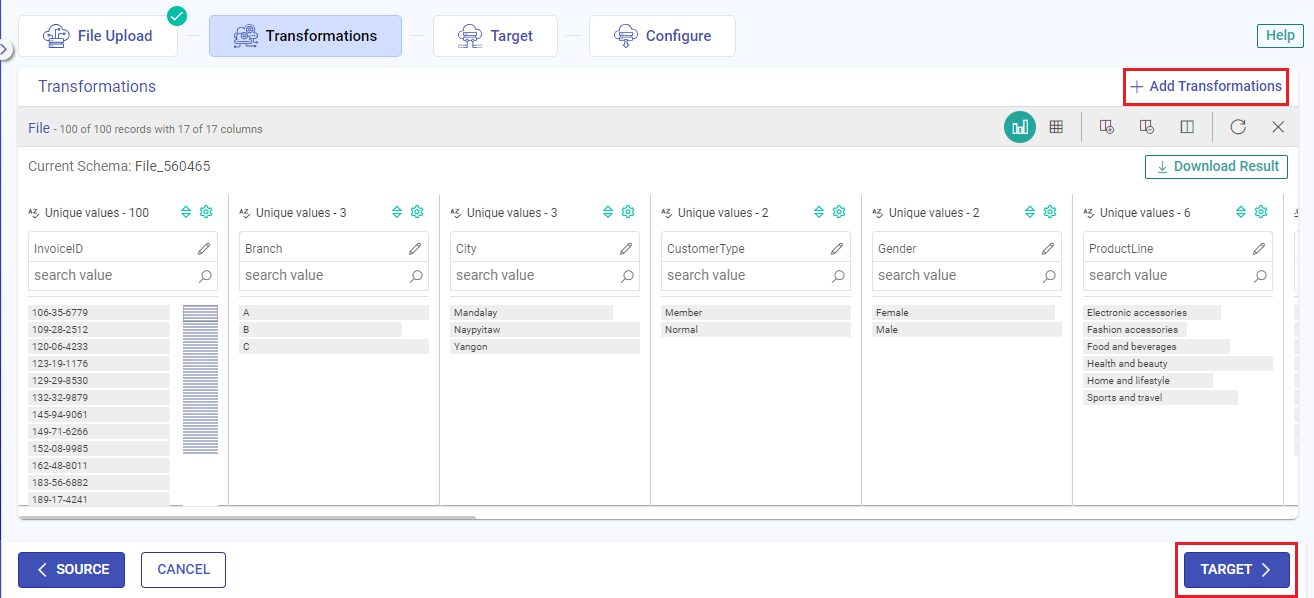 You can transform data to be ingested by applying required transformations
To know more, refer to Gathr supported Transformations in Data Ingestion.
Step 2 - Configure Target
Select the Gathr Store as target.
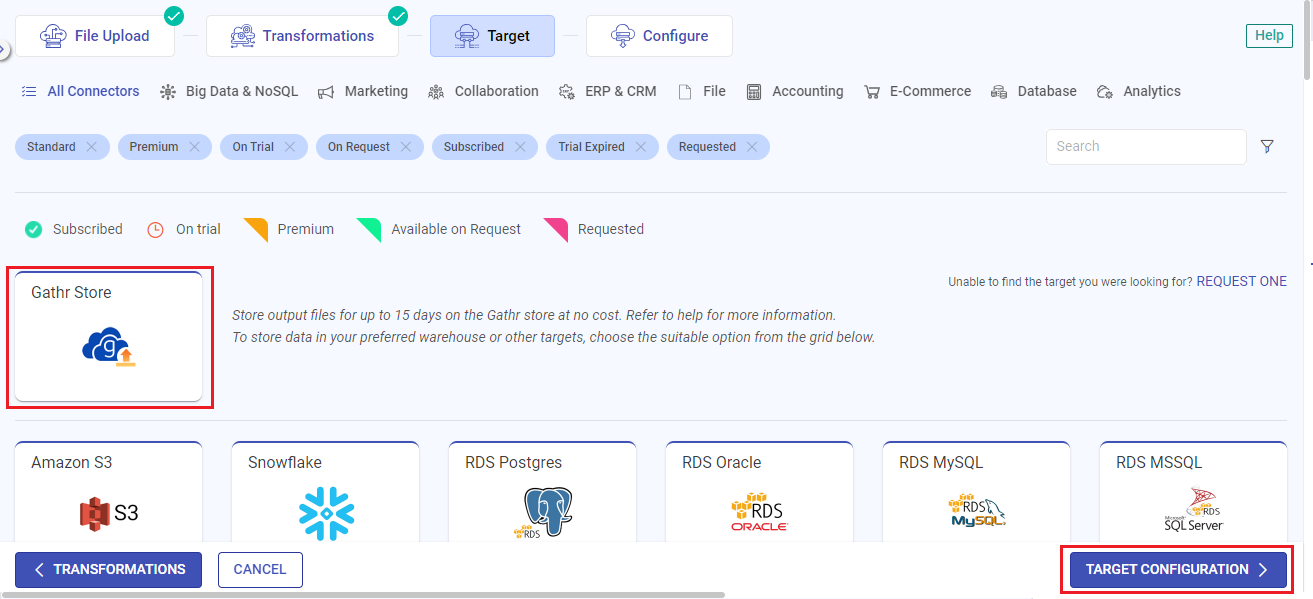
Select the delimiter type, output fields, and configure any other parameters to complete the target configuration.
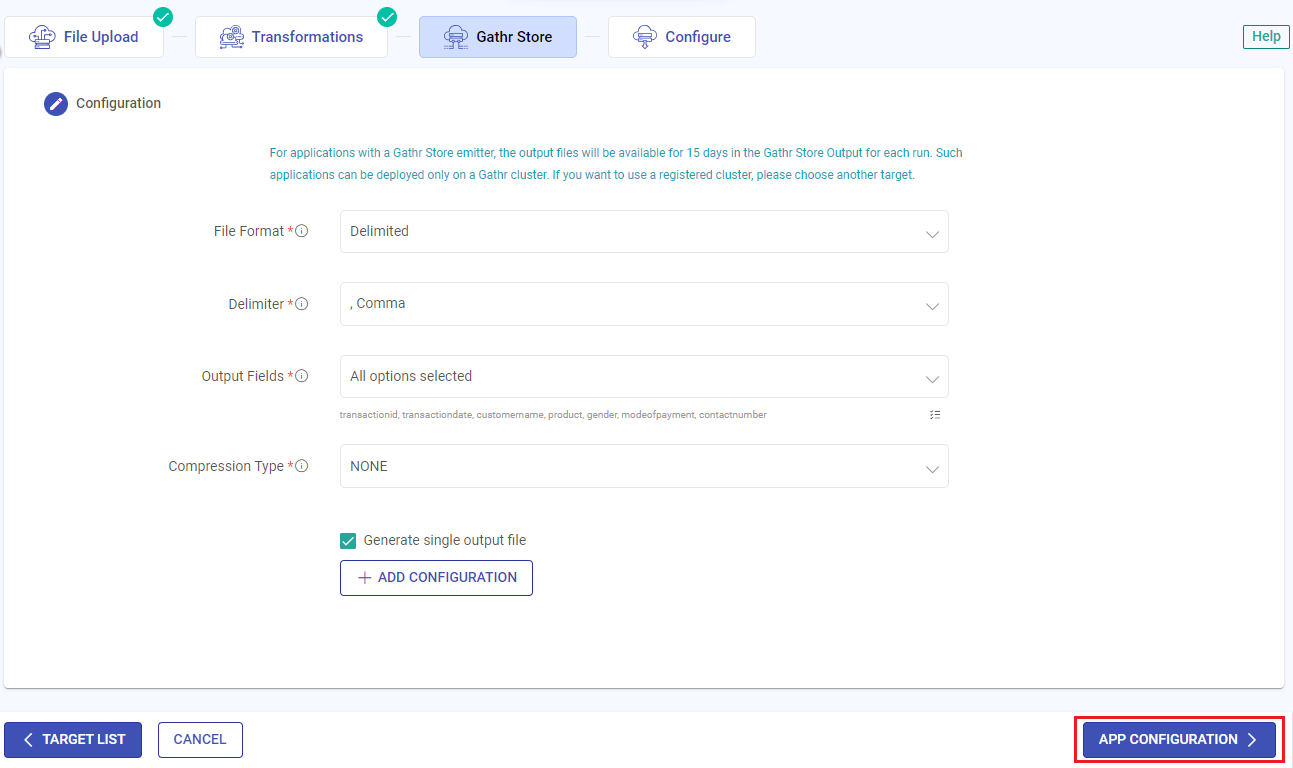
Click on APP CONFIGURATION to complete the target configuration.
- Similarly, you can add other emitters as required. To know more, refer to Gathr supported Emitters.
Step 3 - Save Ingestion Application
Update runtime configuration preferences.
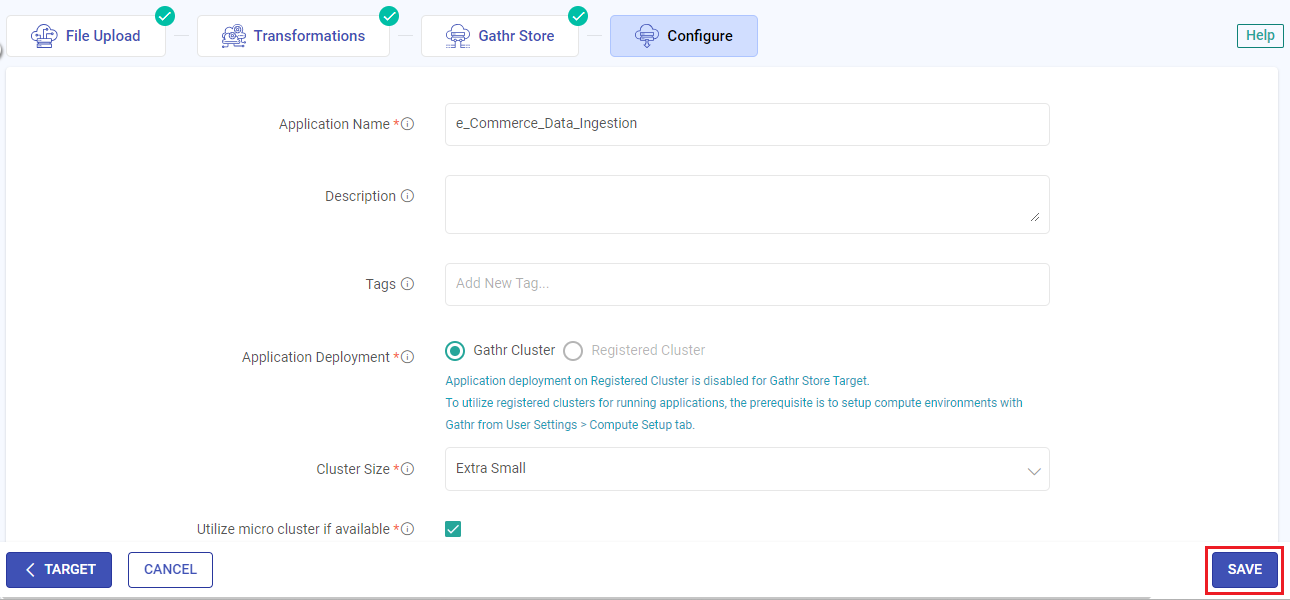
Click on SAVE button to save the application and exit to the Ingestion listing page.
To know about various options available on the Ingestion applications listing page, click here.
Step 4 - Run Ingestion Application
Run the saved Ingestion application from the listing page.

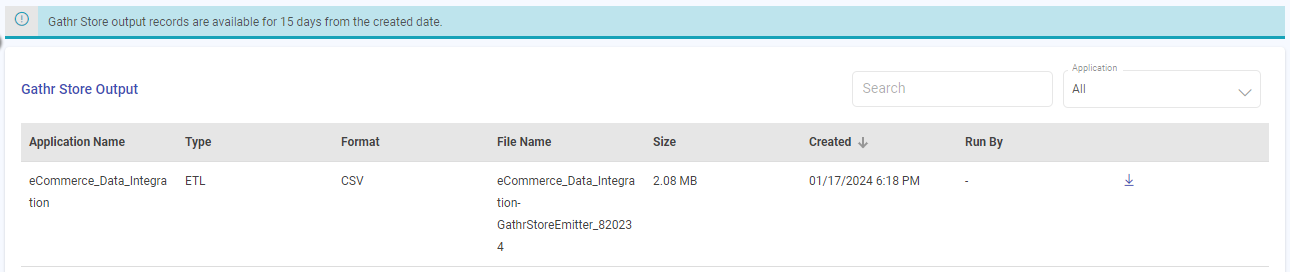
With Gathr Store as target, the emitted data after running this application will be available in the Gathr Store Output.
Explore the following features to manage Ingestion application:
Application Details → View active job progress, scheduling, and cluster details.
Application History → Check the application’s historical runs and activity details.
Error Search → Search runtime errors using keywords and filters.
Quick Start with ETL
Create and run an ETL application in five simple steps:
Step 1: Configure the data source for the ETL application.
Step 2: Add transformations based on specific data processing requirements.
Step 3: Configure the target for emitting the processed data.
Step 4: Save the application with preferred deployment configuration settings.
Step 5: Run the application and oversee its performance.
Explore detailed walkthrough of each step below:
Step 1 - Configure Source
Choose Create a data flow from the Gathr’s landing page.
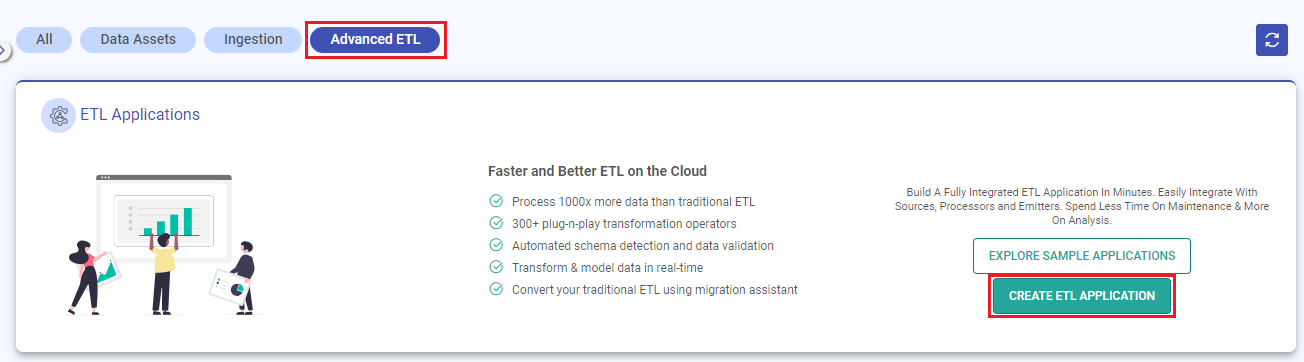
On the dashboard, switch to Advanced ETL tab, and click on CREATE ETL APPLICATION.
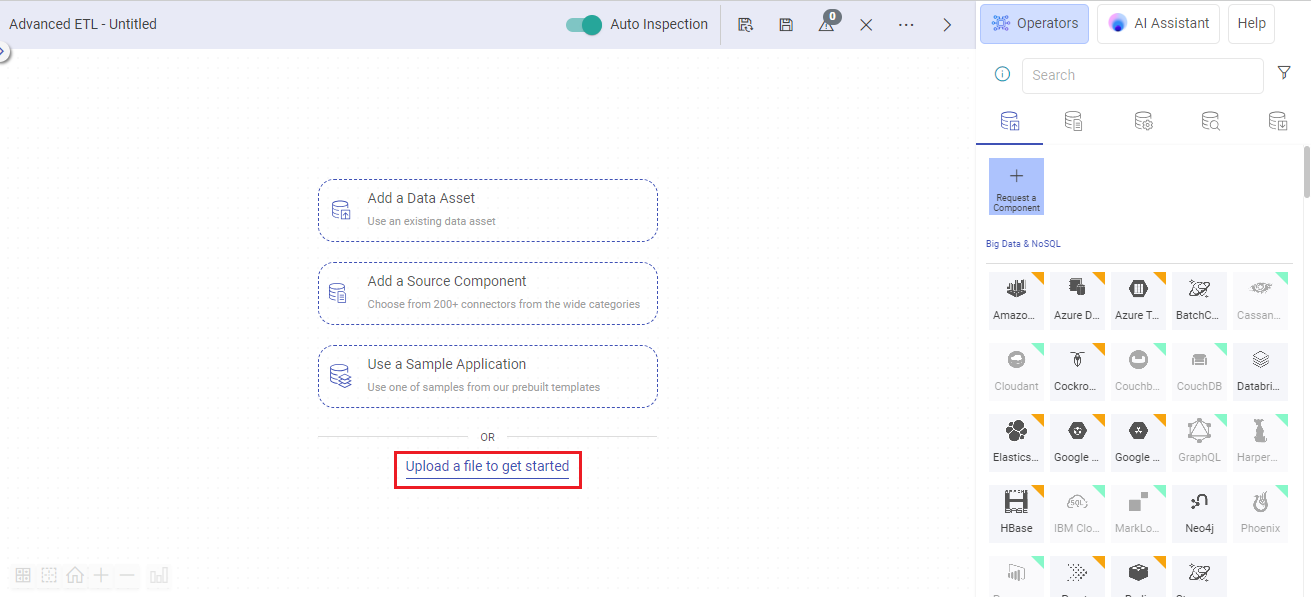
Click on Upload a file to get started to utilize File Connector as a data source.
There are several features available on the ETL canvas. To know more about them, click here.
Update the Header and Data Format parameters. It allows the application to read the source data accurately.
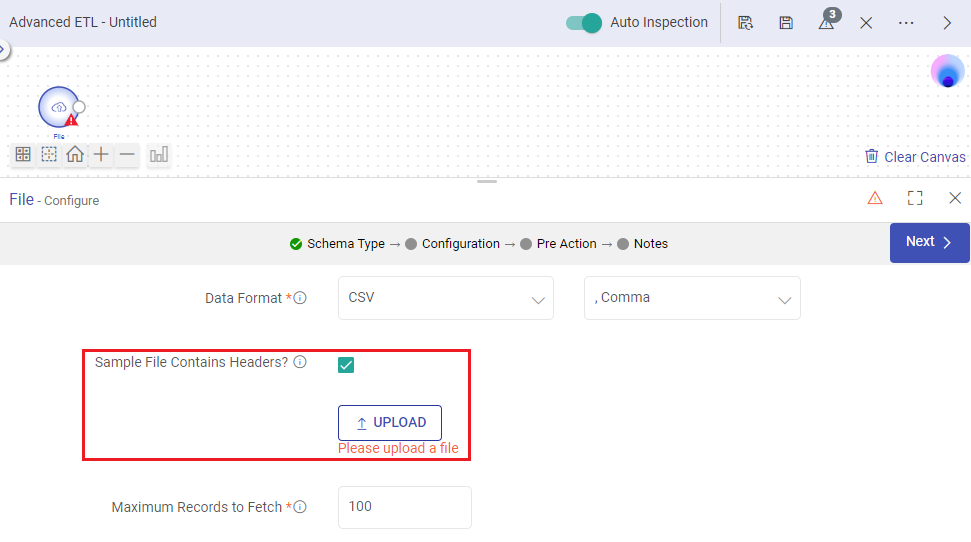
Upload the sample file supermarket-sales-data.csv or any other file of your choice.
Make sure data format is set to match the type of file you upload.Proceed to next tabs till you complete the configuration of the file data source.
For quick start, you can leave rest of the sections to default settings.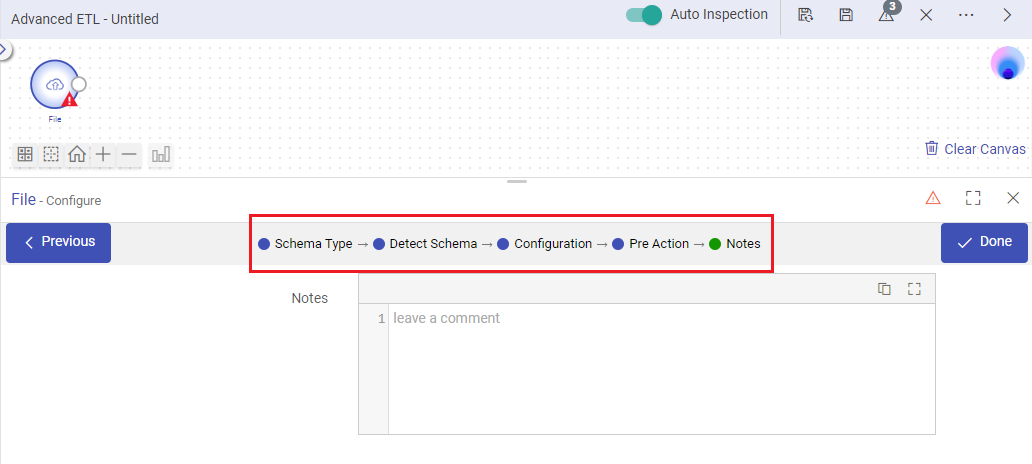
Explore tab-specific details to configure any other data source by following the links below:
Schema Type → To know how sample data can be provided at app design time for data sources.
Detect Schema → To check the populated schema details.
Supported Data Sources → Explore the supported data sources.
The incremental read option is available based on the chosen data source.
Pre-Actions → Understand how to execute SQL queries or Stored Procedures during pipeline run.
With this step the data source configuration is completed.
Step 2 - Add Transformations
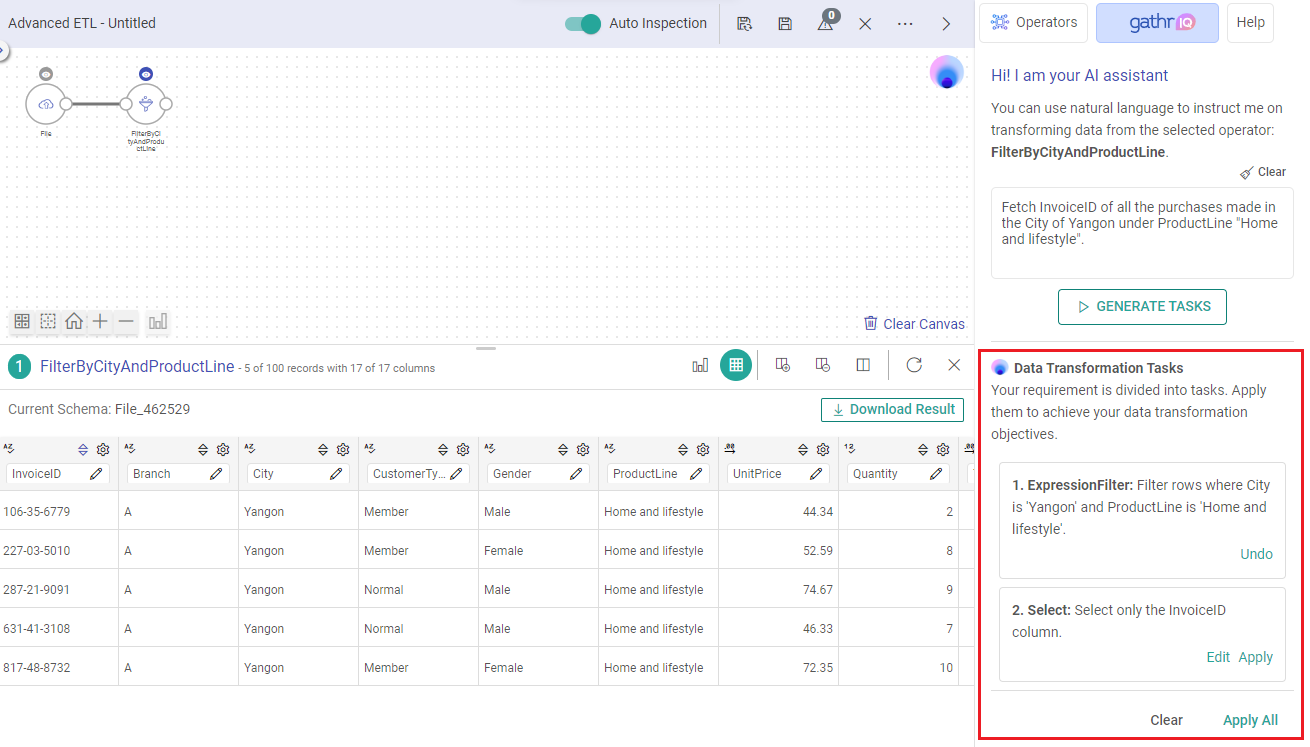
Data transformation using AI Assistant
After configuring a data source, utilize Gathr’s AI Assistant to add transformations.
Switch to AI Assistant and instruct using natural language to transform source data.
Use the example below to guide the AI Assistant in processing sales data for your unique needs.
Fetch InvoiceID of all the purchases made in the City of Yangon under ProductLine "Home and lifestyle".
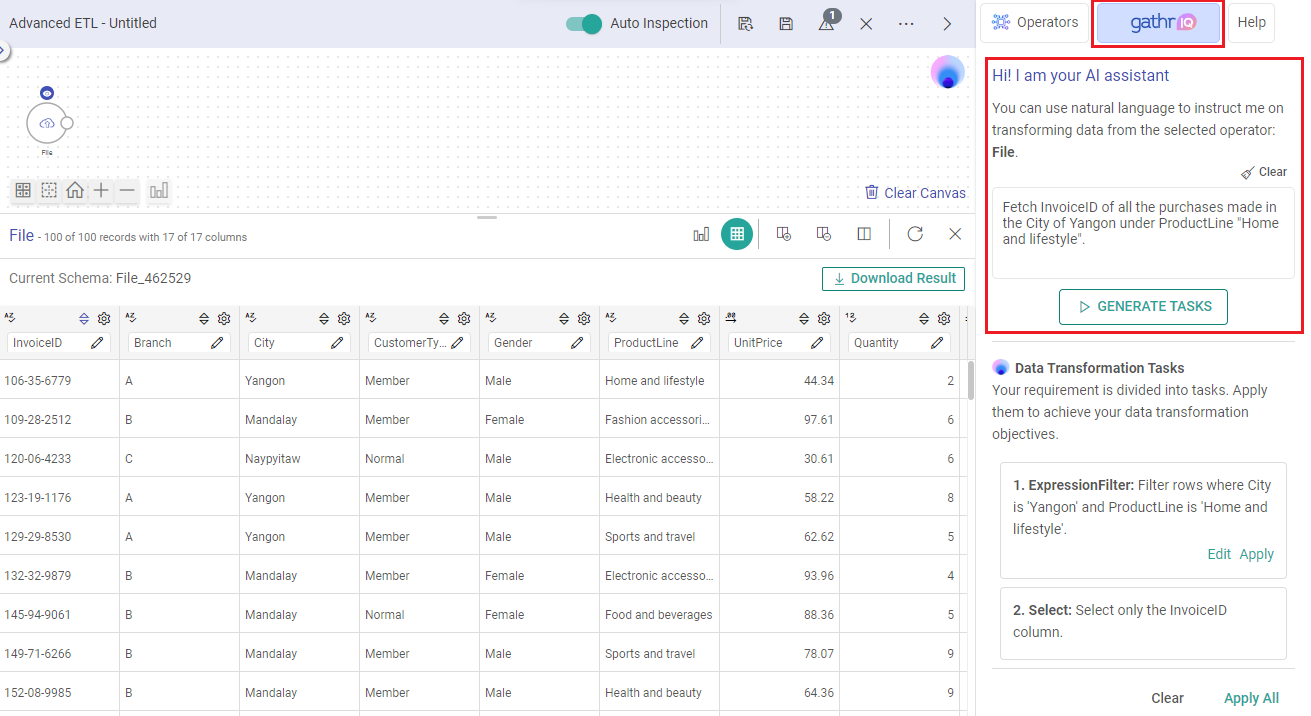
Following your instructions, the AI Assistant generates tasks by breaking down your requirements.
You can apply the recommended tasks individually or all at once to achieve your desired results.
After completing the tasks, you can transform the data further or return to the operators section to add data emitters.

User-driven data transformation
Effortlessly tailor your data transformation with the user-driven control in just a few simple steps:
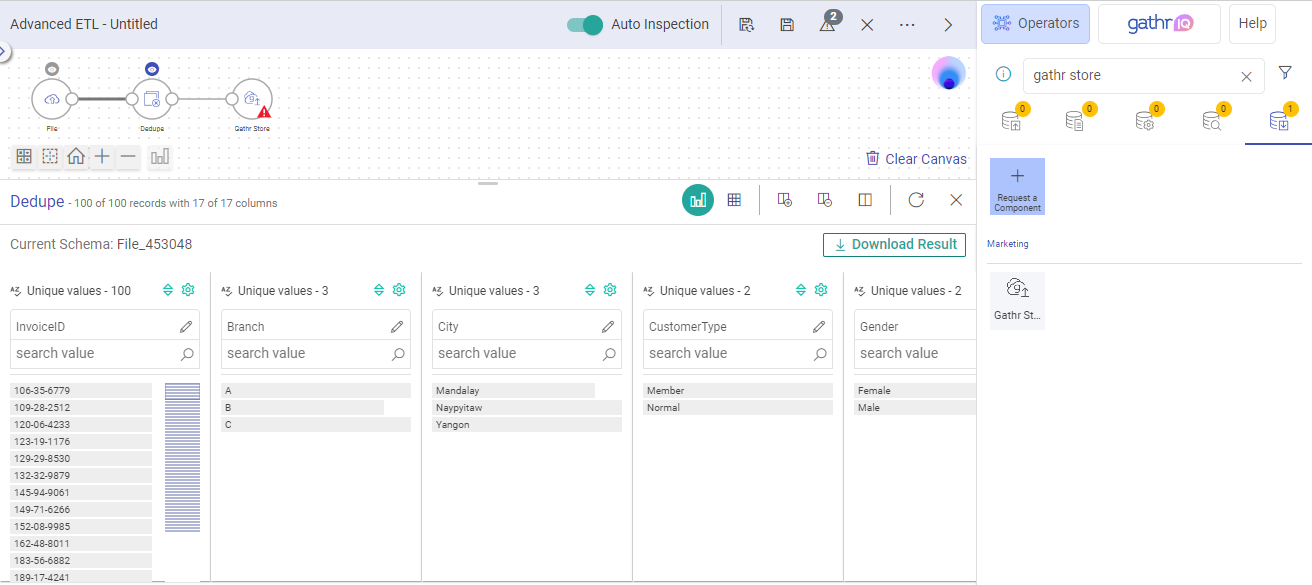
Navigate to the Transformations section, drag and drop the Dedup processor next to the File conector.

Click on Dedup transformation to see its configuration fields.
Select the reference column for removing duplicate records, and proceed to finalize the configuration.
Once the transformation configuraion is done, you can see the Profile Pane. To know more, refer to Data Preparation.
Similarly, you can add more transformations as required. To know more, refer to Gathr supported Transformations.
Step 3 - Configure Target
Navigate to the Emitters section, search for “Gathr Store” and drag and drop it next to the Dedup transformation.
Click on Gathr Store to see its configuration fields.
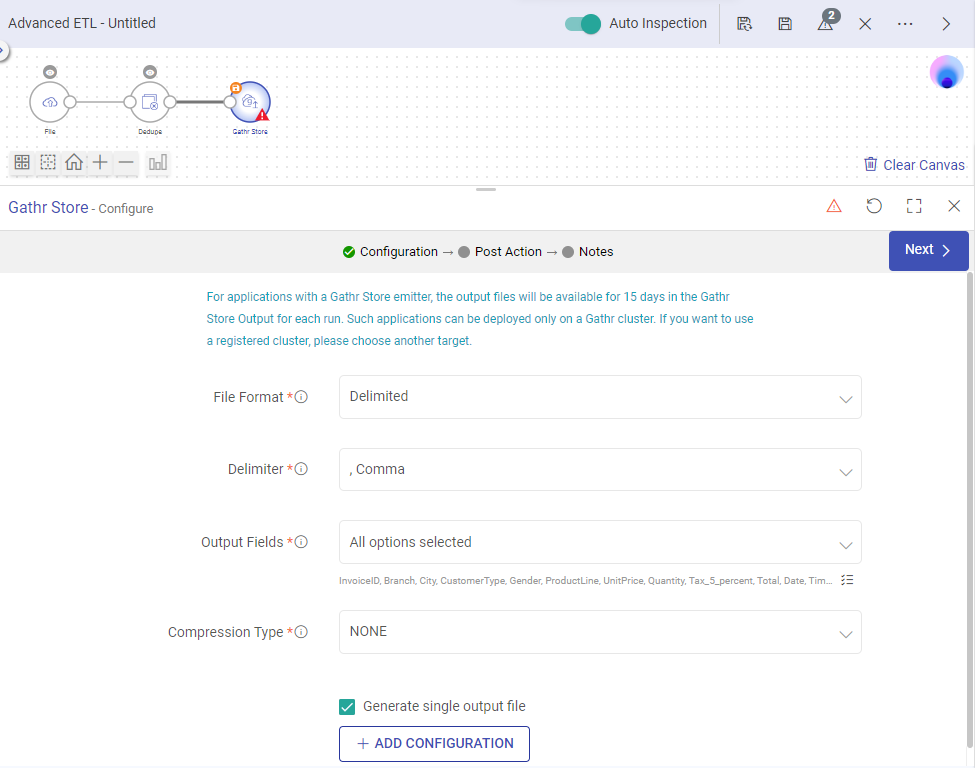
Select the delimiter type, output fields, and configure any other parameters in the target.
Continue to complete the target configuration.
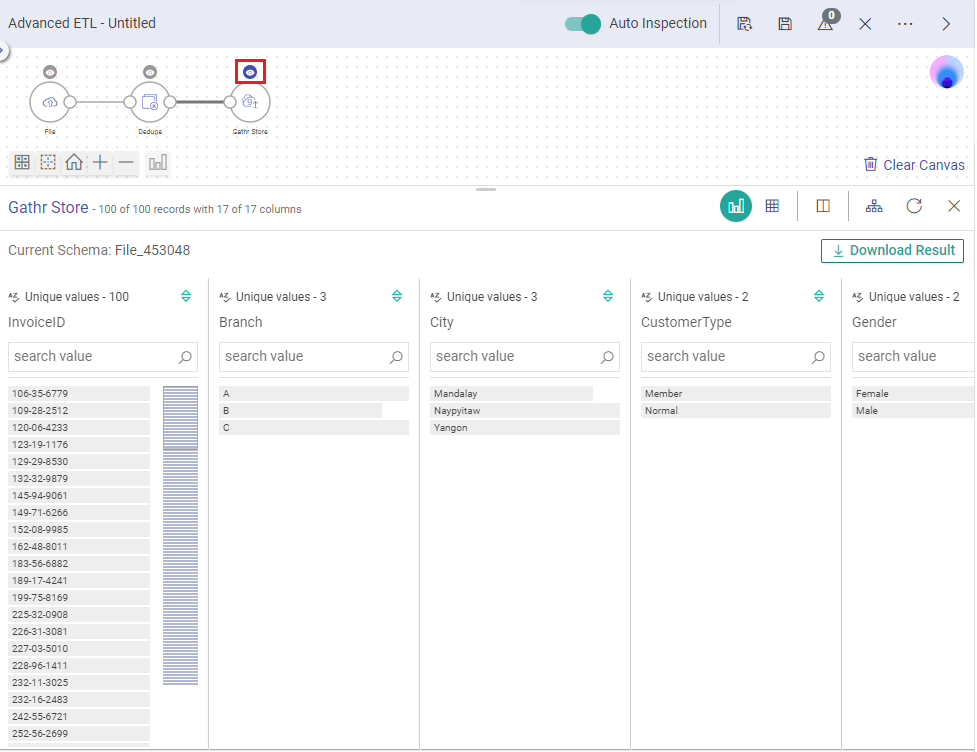
Click on component inspection button (the eye icon) - placed right above the configured target, to preview the processed data.
- Similarly, you can add other emitters as required. To know more, refer to Gathr supported Emitters.
Step 4 - Save ETL Application
Click on Save button above the Components pallet to load the Pipeline Definition page.
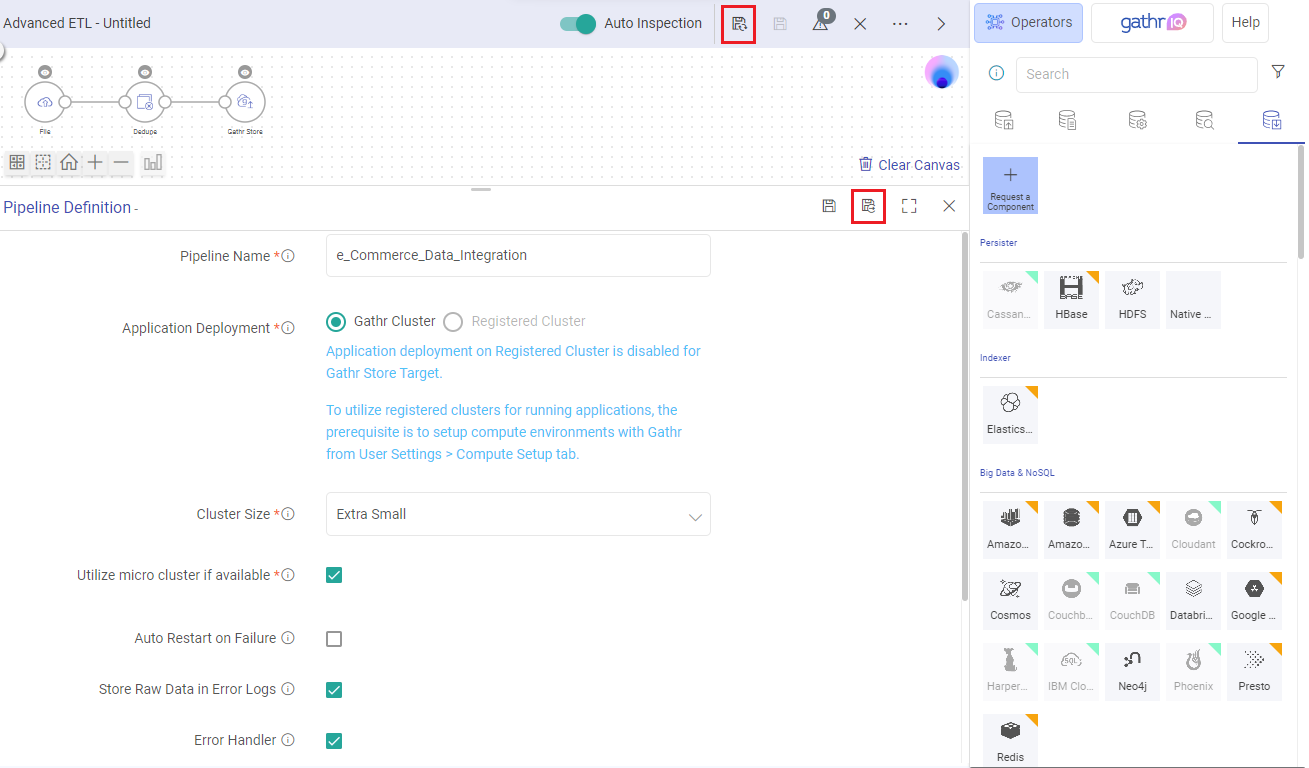
Update runtime configuration preferences.
Save the application and exit to the ETL listing page.
To know about various options available on the ETL applications listing page, click here.
Step 5 - Run ETL Application
Run the saved ETL application from the listing page.
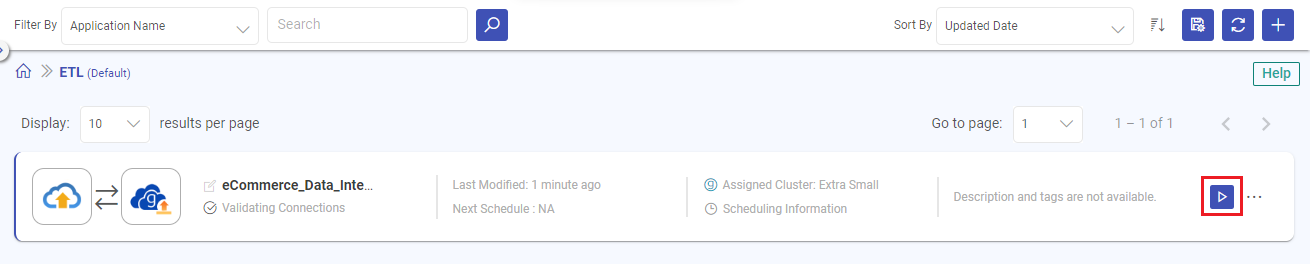
With Gathr Store as target, the emitted data after running this application will be available in the Gathr Store Output.
Explore the following features to manage ETL application:
Application Details → View active job progress, scheduling, and cluster details.
Application History → Check the application’s historical runs and activity details.
Monitor Application → Keep an eye on error metrics.
Error Search → Search runtime errors using keywords and filters.
Audit Trail → Review audit activities performed on the application.
If you have any feedback on Gathr documentation, please email us!