Data Quality Processor
Data Quality operator defines the quality rules for data and performs necessary action on the faulty data.
It performs series of validations on individual data field along with actions on functions, in case if applied validation fails. Varieties of validations are available for each Data Type such as Not Null, Contains, and Starts With and Ends With.
Data Quality operator has seven categories of Validation functions, one for each Data Type.
Array
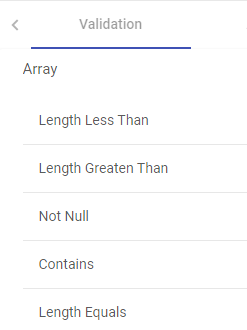 Array represents the JSON (not nested) array of primitive types (String, Number, Double and Boolean)
Decimal

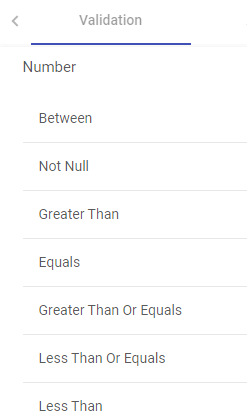
Number
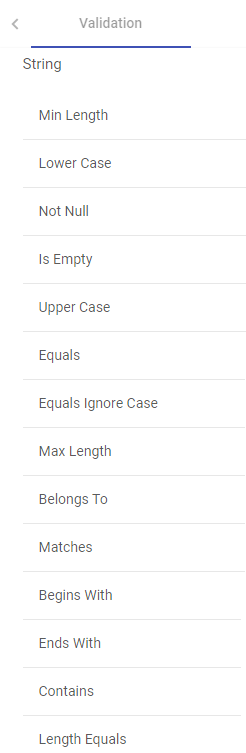
String
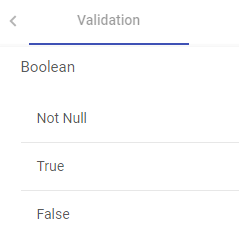
Boolean
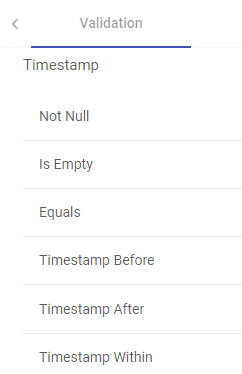
Timestamp
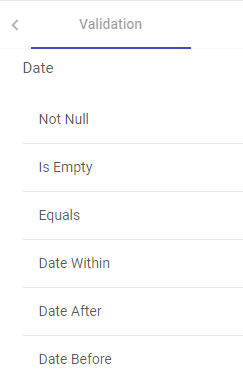
Date
Opening Braces and Closing Braces
Use these braces for adding or separating two or more expressions.
Data Quality operator has three Action functions that are triggered when Validation fails:
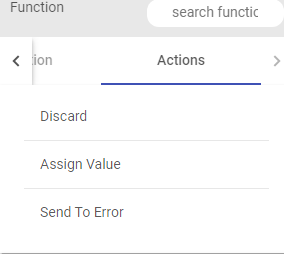
- Discard – It discards the record for further processing in application.
If a record is eligible for more than one action then Actions will be executed as per below order:
Send To Error (Highest priority)
Discard (Lowest priority)
- Assign Value – It gives option to assign static or dynamic values to any message field.
- Static Values:
Select any message field and apply validation on it. If the validation criteria is not met, assign static values to that field.
Example:
Let us apply validation on field “id” (id equals to 10).
Click on the Save button for saving the validation criteria.
Whenever the value of the field “id” is equal to “10”, the record will be processed as it is.
If the value of the field “id” is not equal to “10”, static value 100 will be assigned to that id.
Click on the Save button for saving the configuration settings.
We can see in the above screen wherever id value was not 10, the value got replaced with the static value 100.
- Dynamic values: Dynamic String Values and Dynamic Numeric values.
Dynamic String Values:
Dynamic values can be assigned using @ (the rate operator).
Select any message field and apply validation on it. If the validation criteria is not met, assign dynamic values to that field.
Example:
Let us apply validation on field “id” (id equals to 10).
Wherever the value of the field id is equal to 10, the record will be processed as it is. If this validation criteria is not met, dynamic value should be assigned to that id.
You can dynamically assign the values of any other field like crop, soil, climate, pest, cost_per_hectare (message fields) to the field id wherever validation criteria is not met.
Write @ (the rate operator) in the values text box of Configuration Settings-Assign Value.
All the message fields will be displayed in the drop-down list. Select the field whose value is to be dynamically assigned to field id.
For example, let us select field “soil” from the drop-down list.
Write the expression as: @{soil}
The selected field value has to be enclosed within the curly braces.
After writing the expression, click on the Save button.
Wherever the value of the field id is 10, the record will be processed as it is.
Otherwise, the value of the field soil will be assigned to the id value in that column.
Click on the Save button for saving the configuration settings.
We can see in the below screen, wherever field id value was not 10, field soil got assigned to the id value.
Dynamic Numeric value: For numeric fields, mathematical operations can be used for assigning the values.
Example:
Let us apply validation on field “id” (id equals to 10).
Wherever the value of the field id is equal to 10, the record will be processed as it is. If this validation criteria is not met, assign dynamic value to the field id using arithmetic operators.
Let us apply simple mathematical operation on the field “cost_per_hect”.
Write the expression as @{cost_per_hect+100}
The expression will be evaluated as cost per hectare value will be added to 100. The output will be assigned to the field id wherever its value is not 10.
Click on the Save button for saving the configuration settings.
Let us evaluate the columns “id and cost_per_hect”.
The value of the cost_per_hect in the second row is 7193, if 100 is added to it, the output is 7293 and this value gets assigned to the field id.
The value of the cost_per_hect in the third row is 7403, if 100 is added to tithe output is 7503, this value gets assigned to the field id.
Accordingly, all id values get updated except where the id is 10.
- Send To Error – It persists the invalid records in configured error handler target and discard the records for further processing in the application. Right click the Send To Error button to open the error handler configuration. When the data validation fails, a json message is sent to the configured error handler target. This json has the key “errorMessage” in the error handler target, that contains the expressions due to which validation fails.
Processor Configuration
On the configuration canvas of Data Quality operator, select fields, then select the necessary Validation and Action functions.
Choose a field in message panel from Configuration, respective data type validations will be expanded in function panel.
After selecting the message, select the validation functions and connect them.
Connecting lines show the Logical operator, AND/OR over it.
By default, the AND operator is selected, but it can be toggled to OR operator via right click on it.
Most validation functions in Data Quality operator does not require user input such as Not Null, Is Empty, Upper Case etc, hence no error icon gets visible on top of them. There are some validation functions which requires user input and shows the error (red) icon for configuration.
Right click on the field (message) to configure the required input for validation function. Configuration panel also shows the Negate option so that same validation function can be utilized with reverse condition.
Once all of the validations are configured, you can add an Action function at the end. This action function gets triggered if validation fails.
You can select multiple fields and define the validations.
“yyyy-MM-dd HH:mm:ss”
“yyyy-MM-dd”
If you have any feedback on Gathr documentation, please email us!