PMML Models
PMML stands for “Predictive Model Markup Language”. It is the de facto standard to represent predictive solutions. A PMML file may contain a myriad of data transformations (pre and post-processing) as well as one or more predictive models.
Its structure follows a set of pre-defined elements and attributes which reflect the inner structure of a predictive workflow: data manipulations followed by one or more predictive models.
Below mentioned is the list of PMML Models available in Gathr.
Logistic Regression
Logistic Regression is a classification algorithm. It is used to describe data and to explain the relationship between one dependent binary variable and one or more independent variables. It is used to predict a binary outcome like 1 or 0, yes or no, true or false given a set of independent variables.
Logistic Regression analytics processor will be used to perform prediction on the incoming data by using a PMML.
An existing PMML file can uploaded to the processor or a PMML can by created using the processor.
Configuring Logistic Regression Model
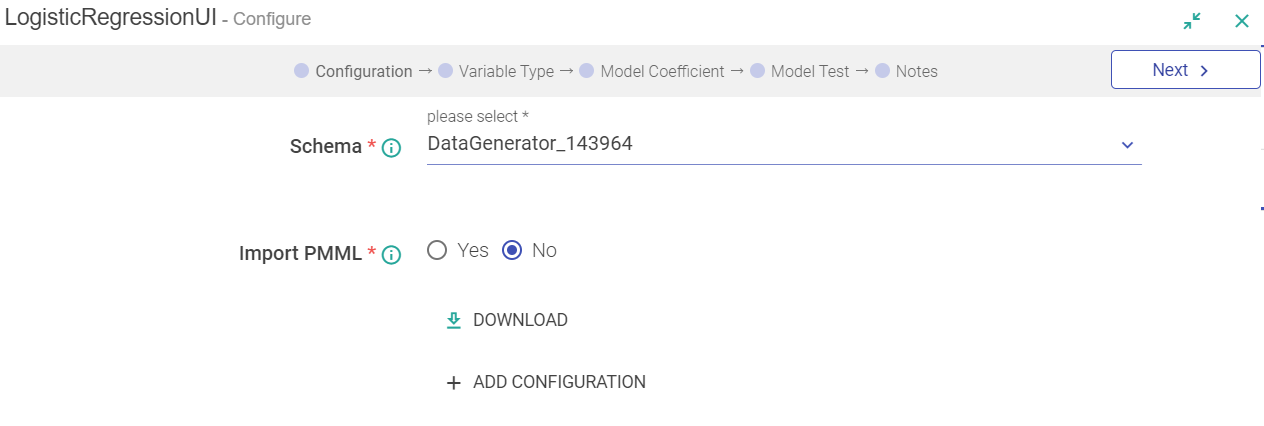
To add Logistic Regression model into your pipeline, drag Logistic Regression model to the canvas and right click on it to configure.
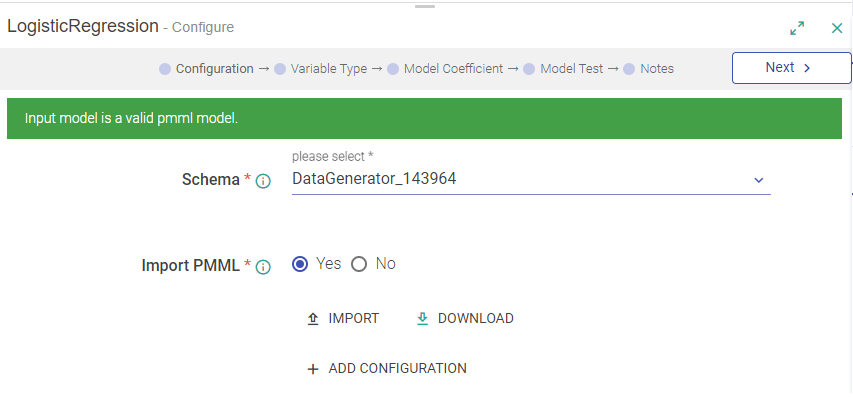
The Configuration Settings of Logistic Regression model are as follows:
| Field | Description |
|---|---|
| Schema | Select the message on which Logistics Regression is to be applied. |
| Import PMML | Enables to import PMML file. Yes: when the Model is Imported, four tabs are enabled – Import and Download, which are to be followed in sequence. Also the model is validated and a success message is displayed or if the model is invalid a failure message will be displayed. No: If the Model is not imported and created, Download the Model option is enabled. |
| Import | Import a PMML file. |
| Validate Model | Checks the validity of the model. Validating a model is mandatory before viewing or testing the model. |
| DOWNLOAD | Download the PMML Model that was created or imported. |
| Add Configuration | Configure additional parameters in Key – Value pair. |
Logistic Regression can be processed in two ways.
Import PMML model
Choose Import Model as Yes and click the Import button to load the PMML file.
Once the model is imported, following checks will be performed on the Model:
The imported file must be a valid PMML file and it must have Logistic Regression model.
The features and output defined in the model must be present in the selected message with the data type expected by model.
If the check fails, then the model will not be loaded in the processor and save features will be disabled. If above checks are met, then model can be saved.
Notes:
If the PMML model imported is not as per the analytics processor chosen, then validation of the model will throw an error.
All the values on screen will be read-only since an imported model cannot be edited.
If model variables are not defined in the message, they appear in red. This is to highlight that these fields need to be defined in the message, to consume the model in Gathr, as shown below:
Since PMML model is imported, the Variables cannot be edited.
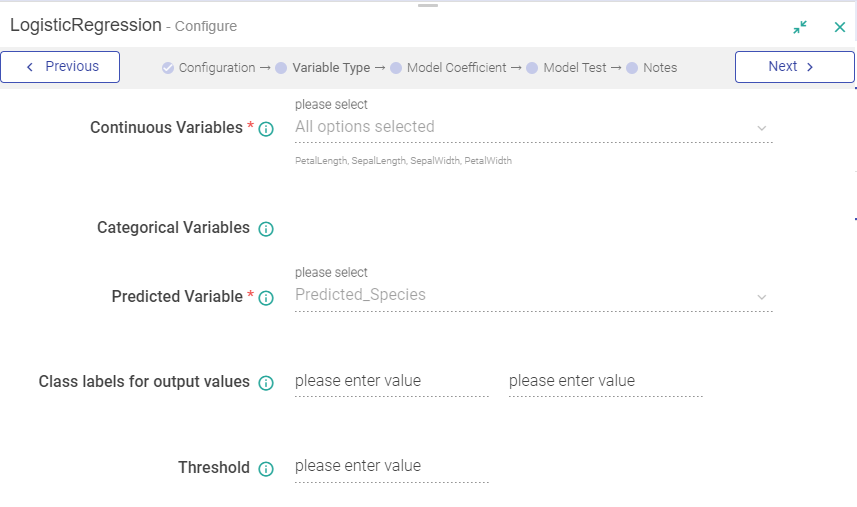
If you want to classify the model output i.e. probability, then specify the threshold parameter, Low and High Classifiers under Variable Type. Threshold parameter takes a numeric value. The output value of the model is compared with the threshold, if the output is greater than threshold then the High classifier appear as output otherwise the Low classifier will appear.
After viewing the Variable Type, Click Next and Model Coefficients Page will open.
Click on Load Defined Variables to load the Variables and provide values against variables.
Now you can Test your Model with Values.
Once you have tested the mode, provide your notes in the add notes section and save the configuration.
Other option is to create your own PMML model.
Create PPML Model
If you want to create a PMML Logistic Regression model, follow the steps mentioned below:
Select a message from Message and select Import PMML as No.
Select Next, it will take you to Variable Type tab.
Select the Input Variables, which is Continuous and Categorical Variables.
Provide a name to the Predicted Variable (Output) and provide Class labels for output values and a Threshold value.
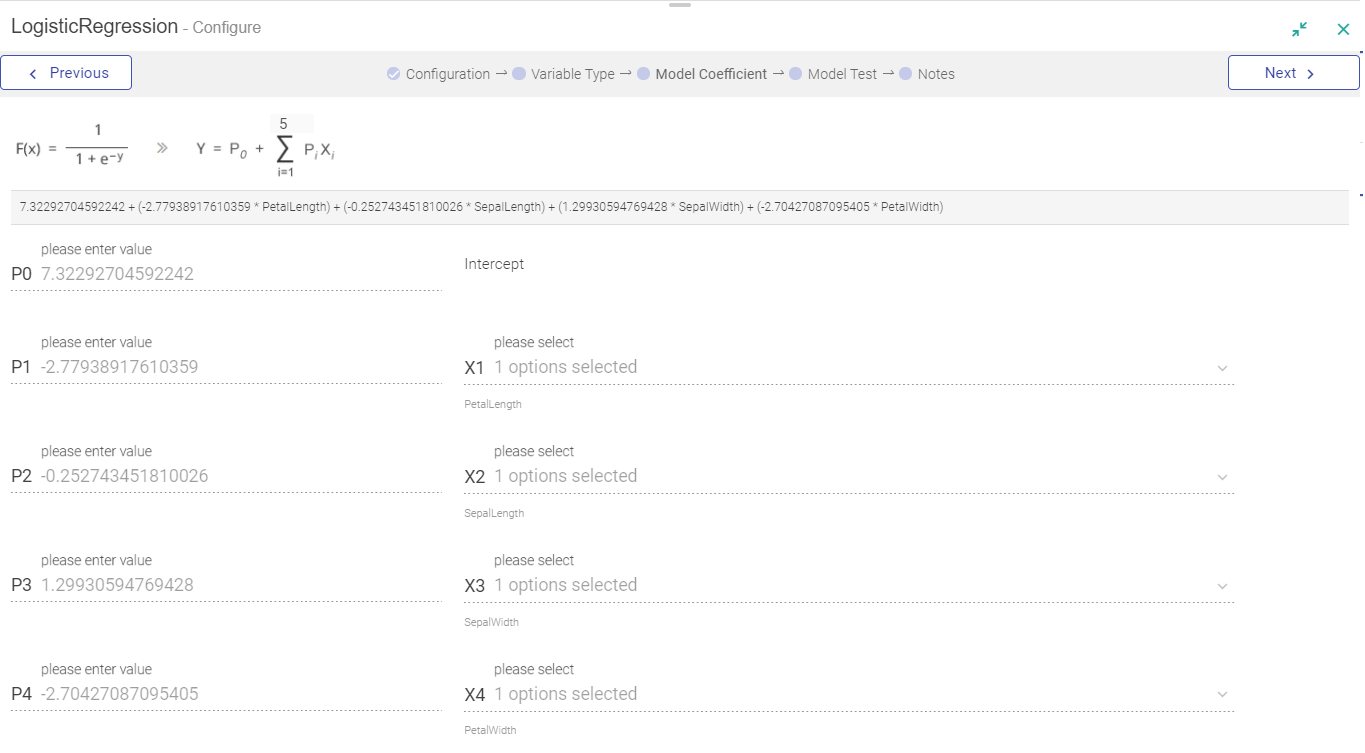
Click Next to view the Model Coefficients. All the model features defined on Variables Type screen can be used in Model Coefficients.
The screenshot above represents the generic formula for Logistic Regression, where P0 represents model Intercept and PiXi represents combination of Model Coefficient and Model feature respectively.
You can load all defined model features using Load Defined Variables link or choose one at a time from the list. You can specify the respective coefficients of the feature under coefficients column (PO-P8). If you are aware of the number of model variables to be used in model, specify the number in formula (above Sigma symbol) and those many rows will be automatically loaded on screen. In each row, you must specify the coefficient next to Pi and respective feature next to Xi, where i is the row number. Apart from features, a combination of continuous model features i.e. Interaction terms can also be defined as Xi.
Provide values to Probability and proceed to testing the Model.
Test the Model
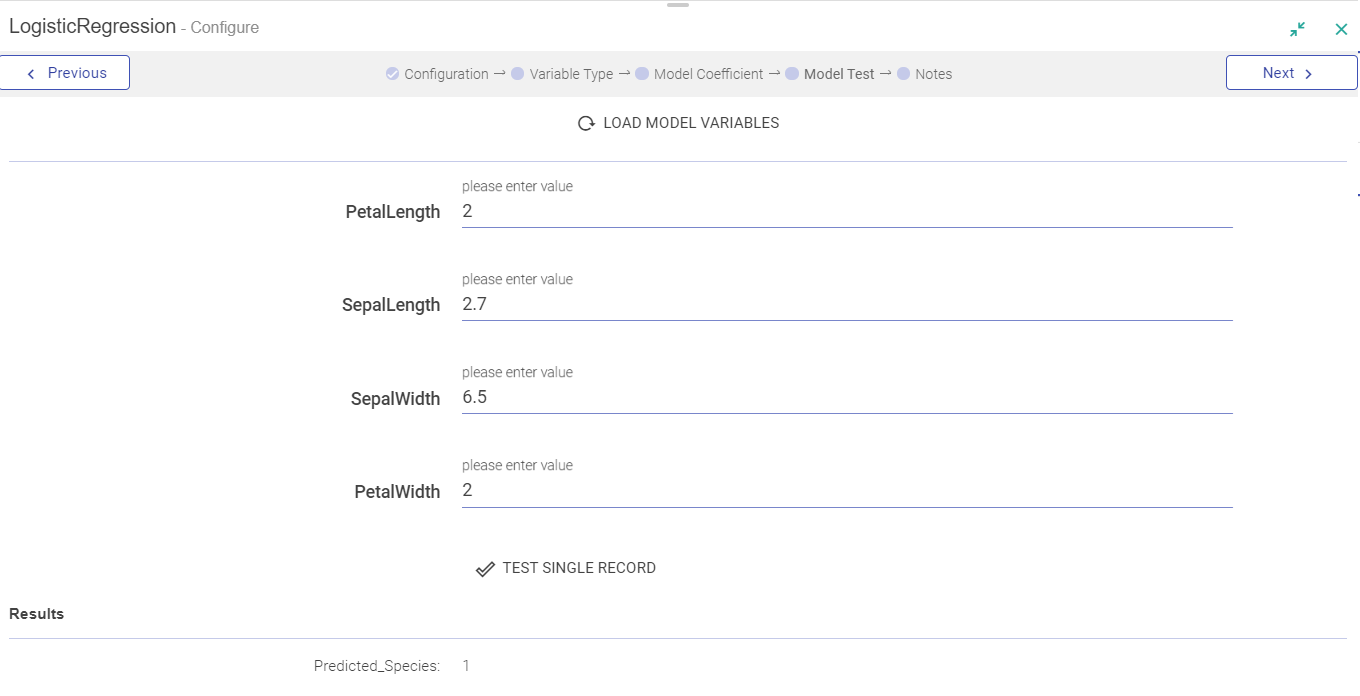
Once the model is loaded, you can test the model with Model Test tab. Click Load Model to load and view the model.
Specify value of all model features and perform a single record test. The system will evaluate the model for this input and will show all the output parameters on screen.
Add Notes and save the Configuration.
Regression
Regression analytics processor is used to analyze data through Regression model. Regression analysis is used for estimating the relationship among variables. It helps to identify how the value of dependent variable changes when any one of the independent variable is changed, while other independent variables are fixed. It is used for prediction and forecasting.
Configuring Regression Model
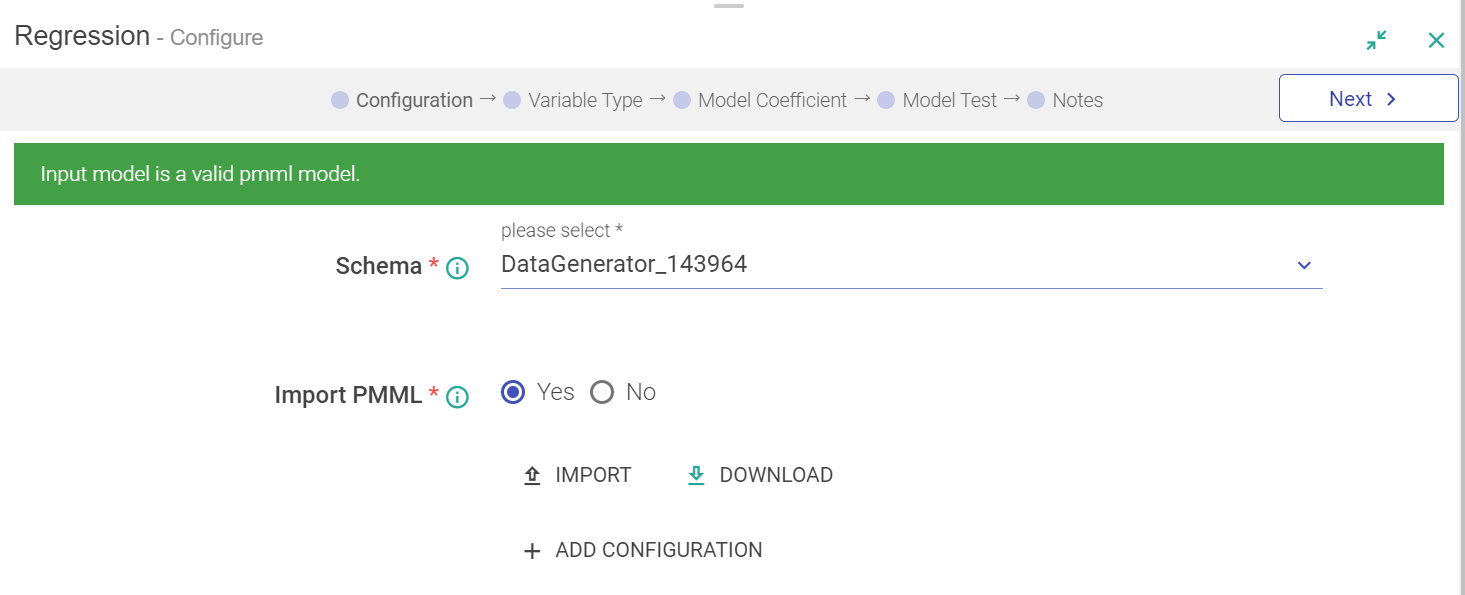
To add Regression model into your pipeline, drag Regression model to the canvas and right click on it to configure.
The configuration settings of Regression model are as follows:
| Field | Description |
|---|---|
| Schema | Select the message on which Regression algorithm is to be applied. |
| Import PMML | Enables to import PMML file. Yes: When the Model is Imported, four tabs are enabled – Import, Validate Model, View Model and Download, which are to be followed in sequence. No: If the Model is not imported and created, download the Model option is enabled. |
| Validate Model | Checks the validity of the model. Validating a model is mandatory before Viewing or Testing the model. |
| Download | Download the PMML Model that was created or imported |
| Add Configuration | Configure additional parameters in Key – Value pair |
Regression can be processed in two ways:
Import PMML Model
Choose Import Model as Yes and click the Import button to load the PMML file.
Once the model is imported, a message will be displayed validating if the model is valid or not.
Following checks will be performed:
The imported file must be a valid PMML file and it must have Regression model. If this check fails, then the model will not be loaded in the processor, View Model and Save features are also disabled.
The features and output defined in the model must be present in the selected message with the data type expected by model. If the message does not have certain attributes defined in model, then the View Model feature will be enabled but the model still cannot be saved. The error message in this case will explain which fields need to be defined.
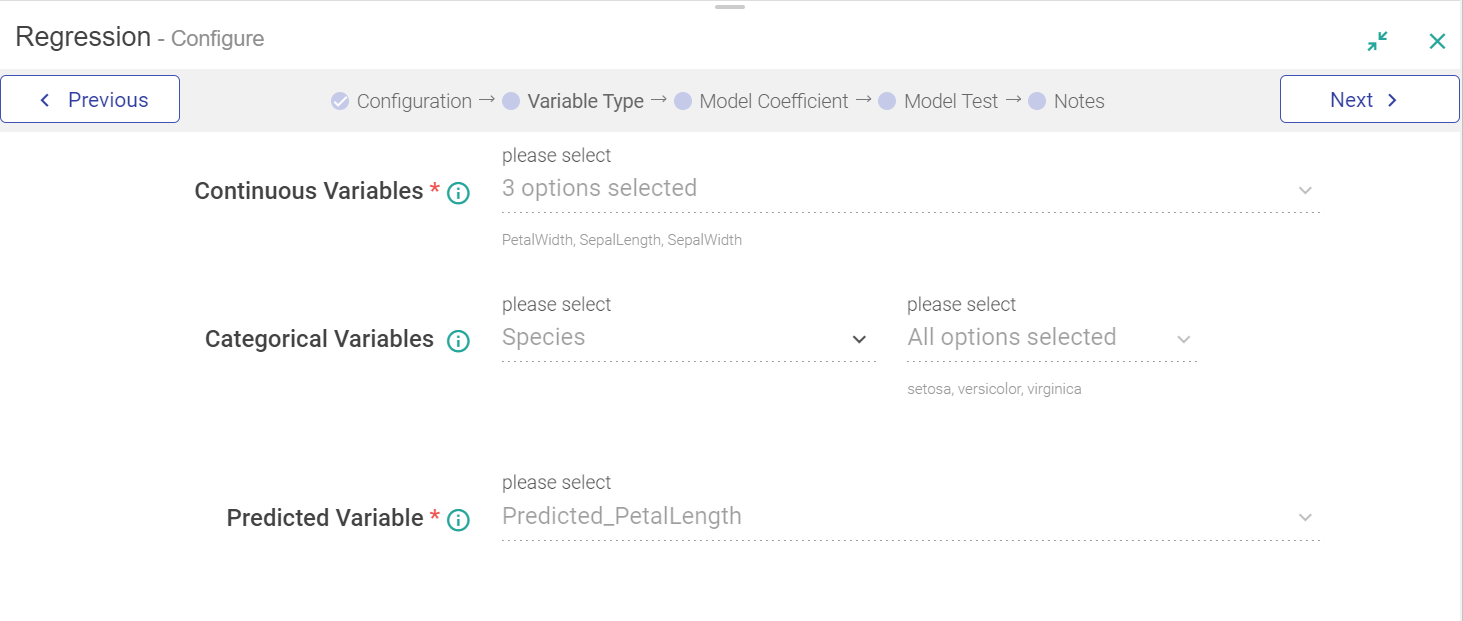
When you click on next, Variable Type Tab opens the Variables as shown below:
Since PMML model is imported, the Variables cannot be edited.
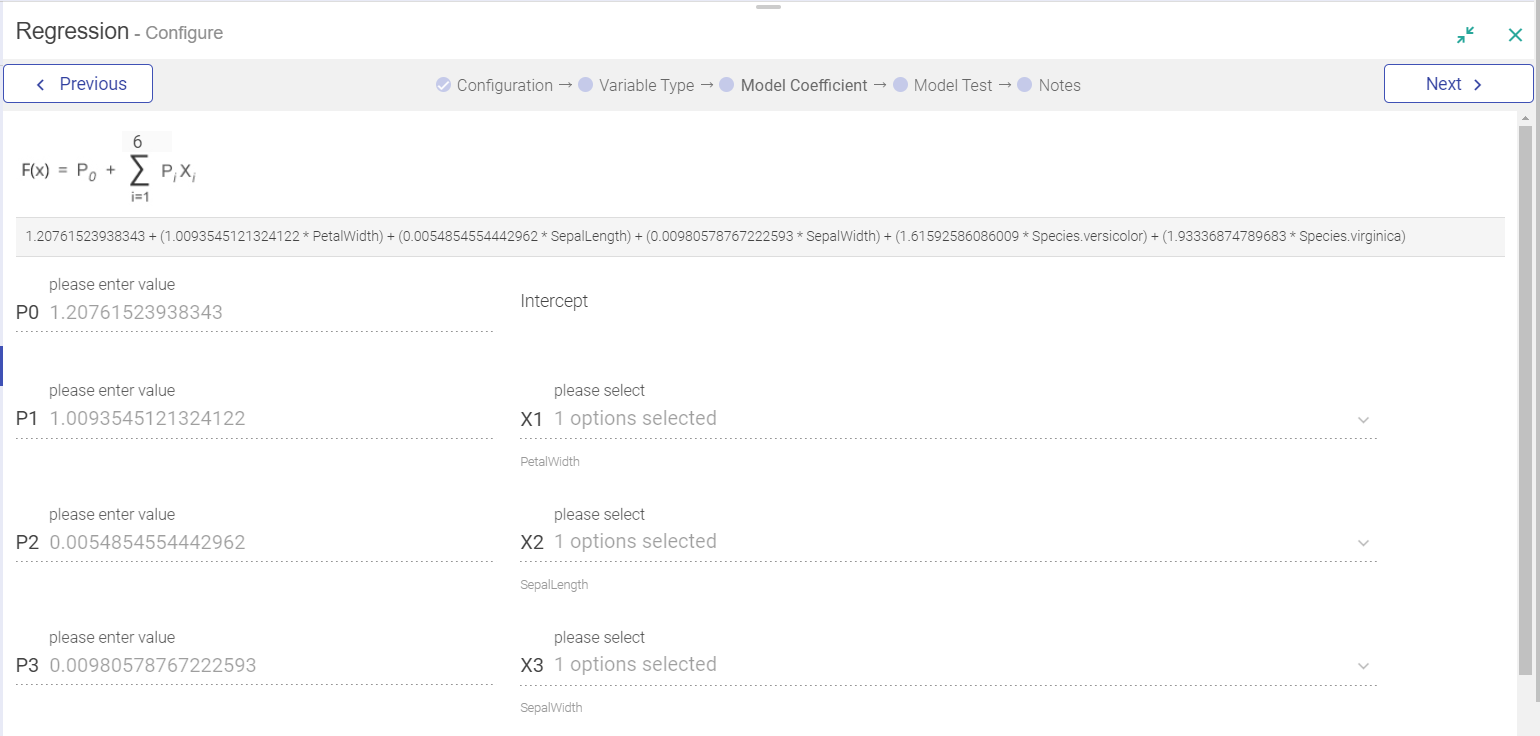
After viewing the Variable Type, click Next and Model Coefficients page will open.
Click on Load Defined Variables to load the variables and provide values against variable.
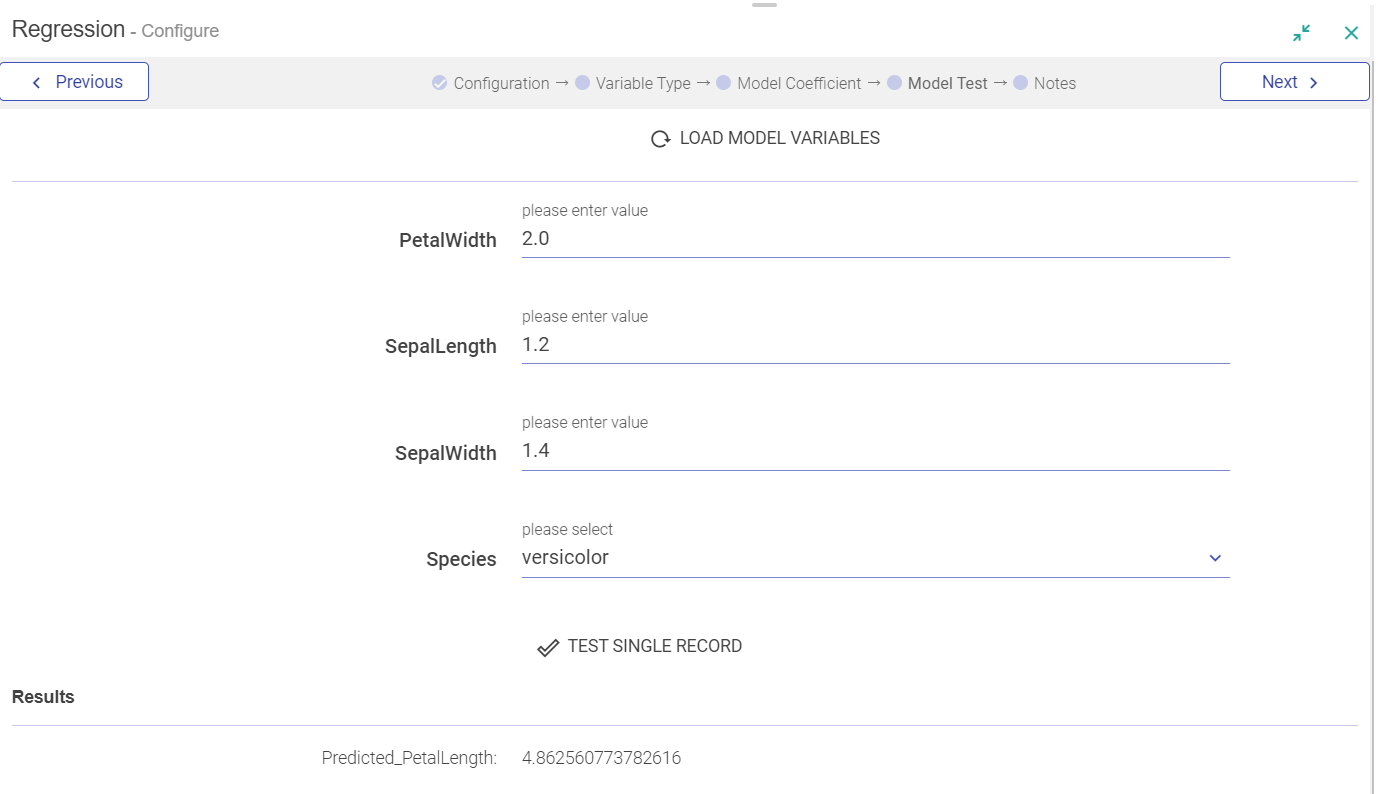
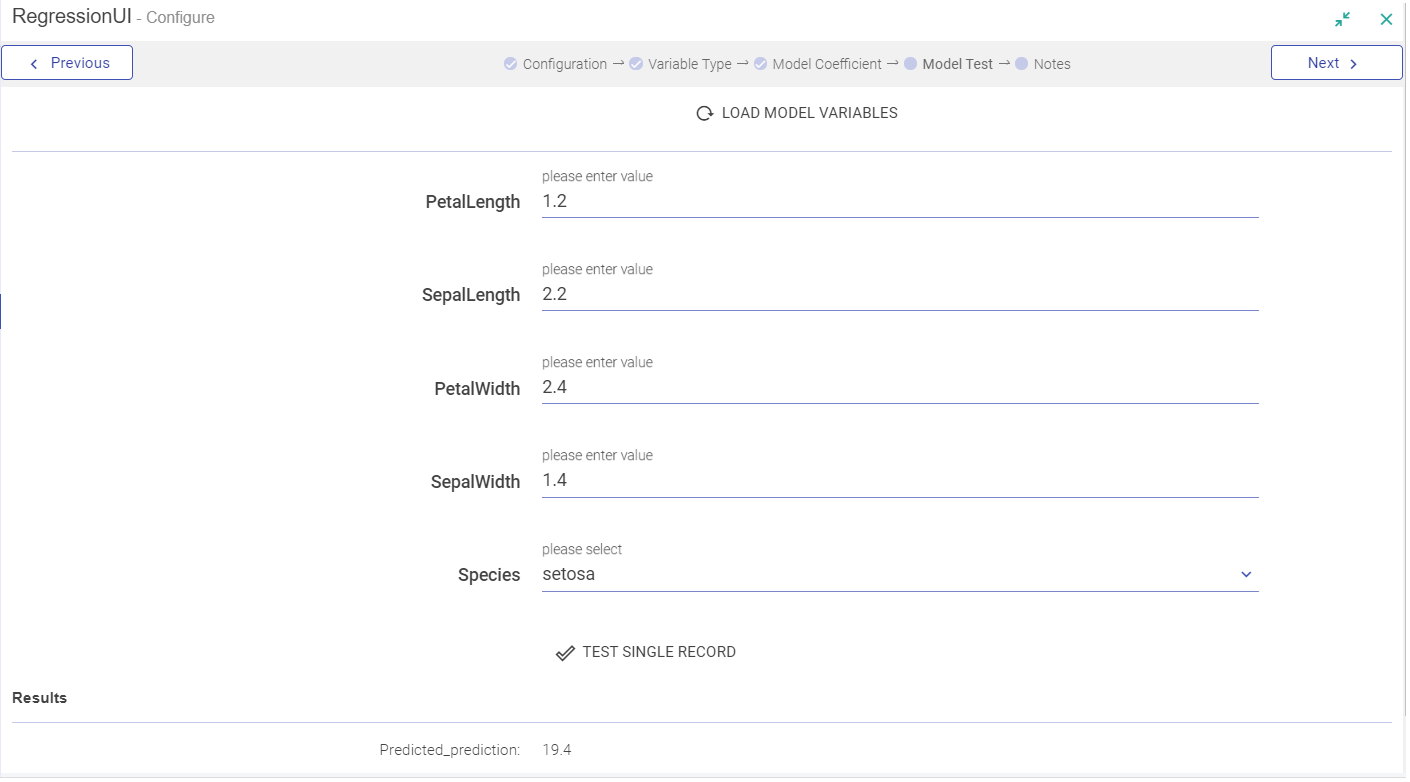
Now, test your Model with Values.
After the Model is tested, provide your notes in the Add Notes section and save the configuration.
Other option is to create your own PMML model.
Create PMML Model
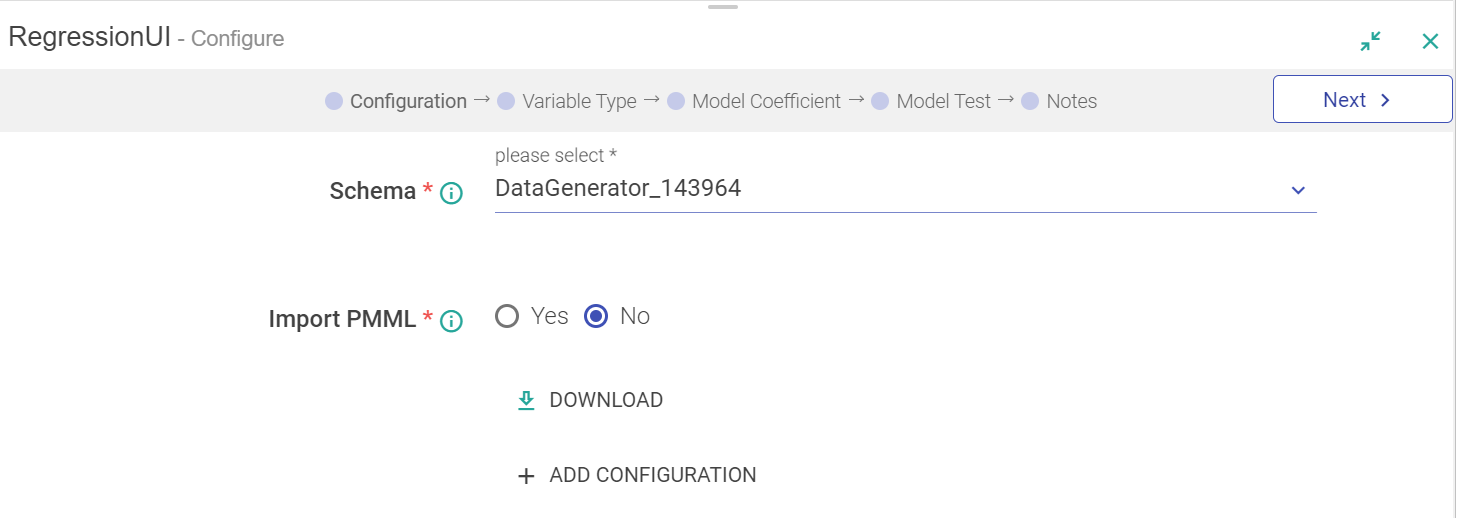
If you want to create a PMML Regression model, choose Import PMML as No.
Variable Type
Variable Type and Model Coefficients tabs are enabled.
You must select the message field this variable corresponds to, along with the possible categories.
You can also use upload CSV option to populate categories for categorical variables under Categorical Variables via Add Variables, as shown below:
Model Coefficients
All the model features defined on Variable Type can be used on Model Coefficients page. The screenshot below represents the generic formula for Regression.
When you click on Next, you can test your model with values.
Once you have tested the mode, provide your notes in the Add Notes section and save the configuration.
Cluster Model
Cluster Model Analytics processor is used to analyze data through Cluster model. It is commonly known as data clustering.
Data clustering is the task of diving a dataset into subset of similar items. Applying data clustering to a dataset generates group of similar data items. These groups are called clusters i.e. collection of similar data items.
Data clustering can help you identify, learn or predict the nature of new data items especially how new data can be linked for making predictions.
For example, in pattern recognition, analyzing pattern in the data like buying pattern in particular region or age group can assist you develop predictive analysis.
Configuring Cluster Model
To add ClusterModel into your pipeline, drag ClusterModel to the canvas and right click on it to configure.
| Field | Description |
|---|---|
| Message | Select the message on which ClusterModel algorithm has to be applied. |
| Import PMML | Enables to import PMML file. Yes: when the Model is Imported, four tabs are enabled – Import, Validate Model, View Model and Download, which are to be followed in sequence. No: If the Model is not imported and created, Download the Model option is enabled. |
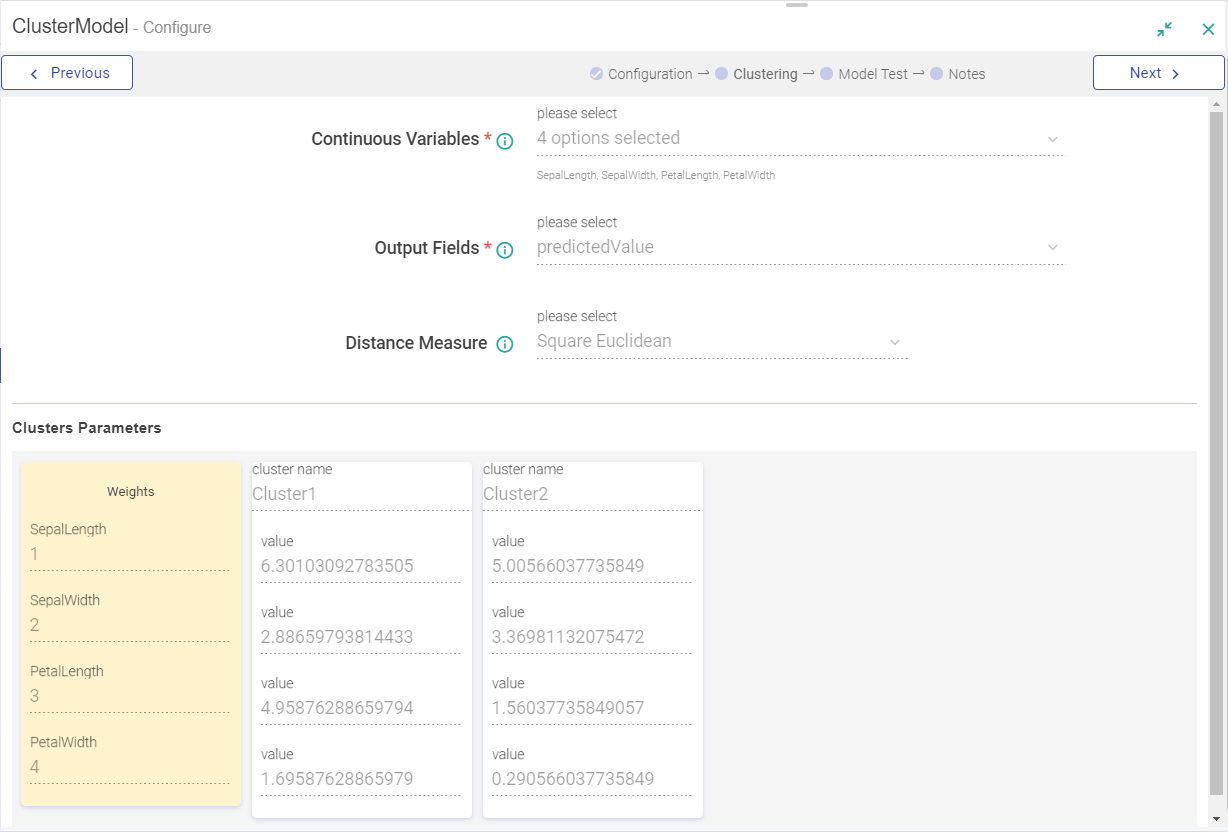
| Clustering | Clustering allows you to define various model features i.e. continuous variables, along with output variables, distance measure parameter and clustering parameters such as weight, cluster. |
| Validate Model | Checks the validity of the model. Validating a model is mandatory before Viewing or Testing the model. |
| Download | Downloads PMML file created either using Gathr UI or Import option. |
| Add Configuration | Configure additional parameters in Key – Value pair. |
ClusterModel can be processed in two ways:
Import an existing model
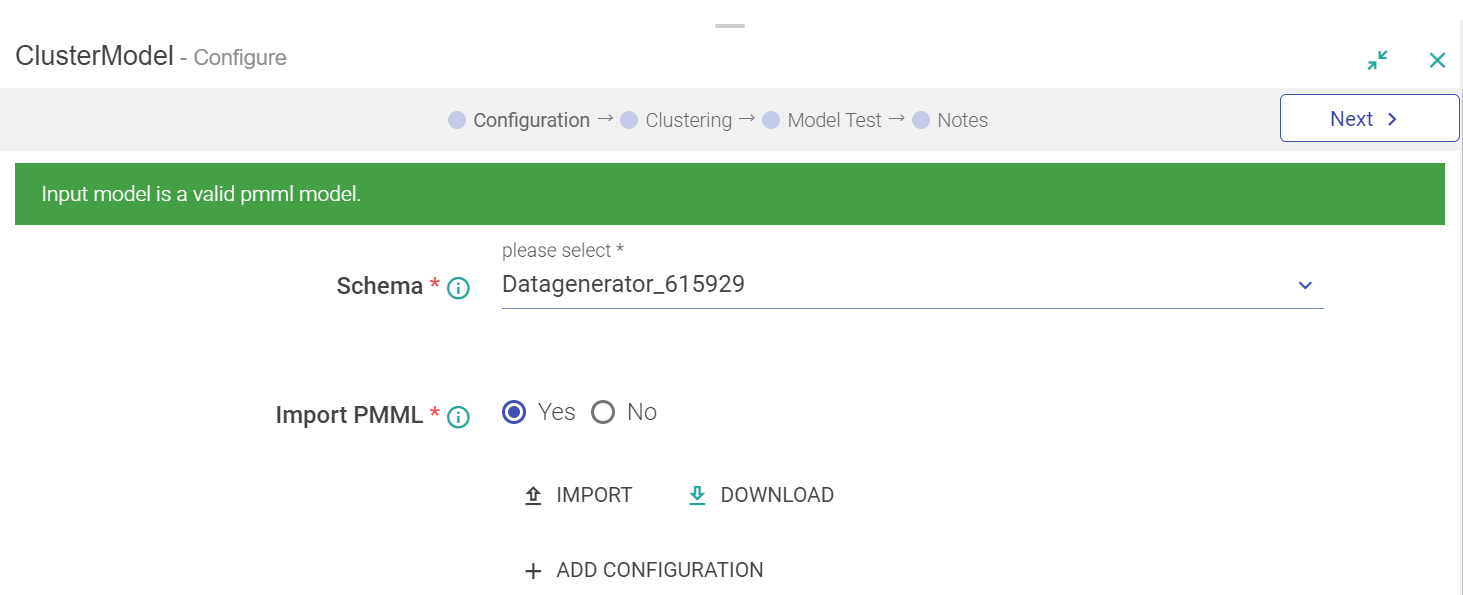
Choose import model as Yes and click the Import button to load the PMML file.
Once the model is imported, click on Validate Model.
Checks will be performed on the model and if the defined variables does not match with the model then you will receive an error.
Create your own model through Gathr UI
If you have a ClusterModel definition and wish to create the model in Gathr. Choose import model as No and then clustering tab will be enabled.
You can add new cluster by clicking on add cluster link (plus icon)
Test the model
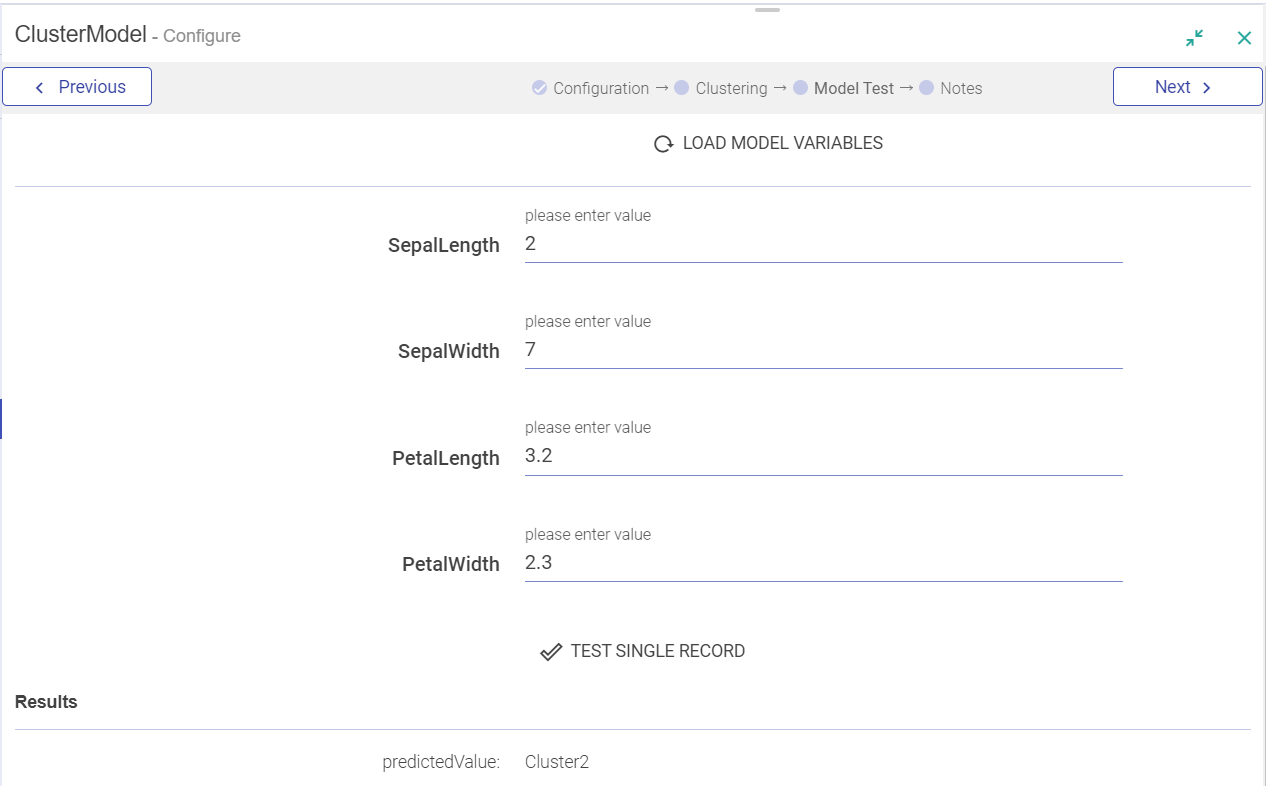
Once the model is loaded (through UI or import) then you can test the model from Model Test screen. Click Load Model to load and view the Model.
Specify value to all model features and perform a single record test through Test Single Record. The system will evaluate the model for this input and will show all the output parameters on screen.
SupportVectorMachine
SupportVectorMachine analytics processor is used to analyze data through SupportVectorMachine model. SupportVectorMachine is a machine-learning algorithm that can be used for both classification and regression challenges. However, it is mostly used in classification problems.
Configuring SupportVectorMachine Model
To add SupportVectorMachine model into your pipeline, drag SupportVectorMachine model to the canvas and right click on it to configure.
| Field | Description |
|---|---|
| Schema | Select the message on which SupportVectorMachine algorithm has to be applied. |
| Import PMML | Enables to import PMML file. Yes: when the Model is Imported, following tabs are enabled – Import and Download. |
| Add Configuration | Configure additional parameters in Key – Value pair. |
| Validate Model | Checks the validity of the model. Validating a model is mandatory before Viewing or Testing the model. |
SVM Processor can be processed in the following way:
Import PMML Model
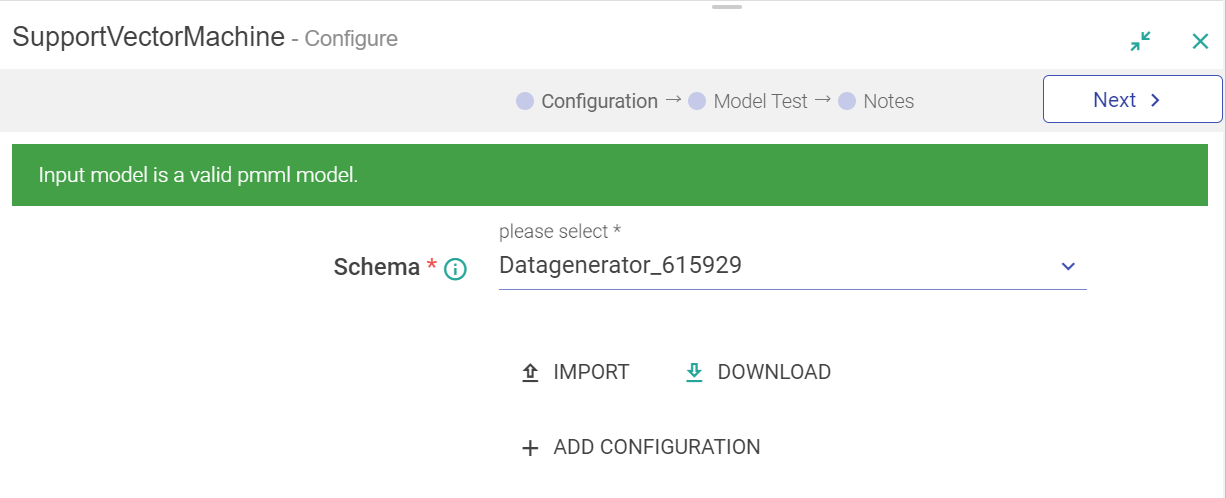
If you have a PMML file representing SupportVectorMachine then import it. Click on Import button to load the file.
Once the model is imported, model validation with variable checks will be performed.
The next tab that is enabled is Test Model.
Test Model
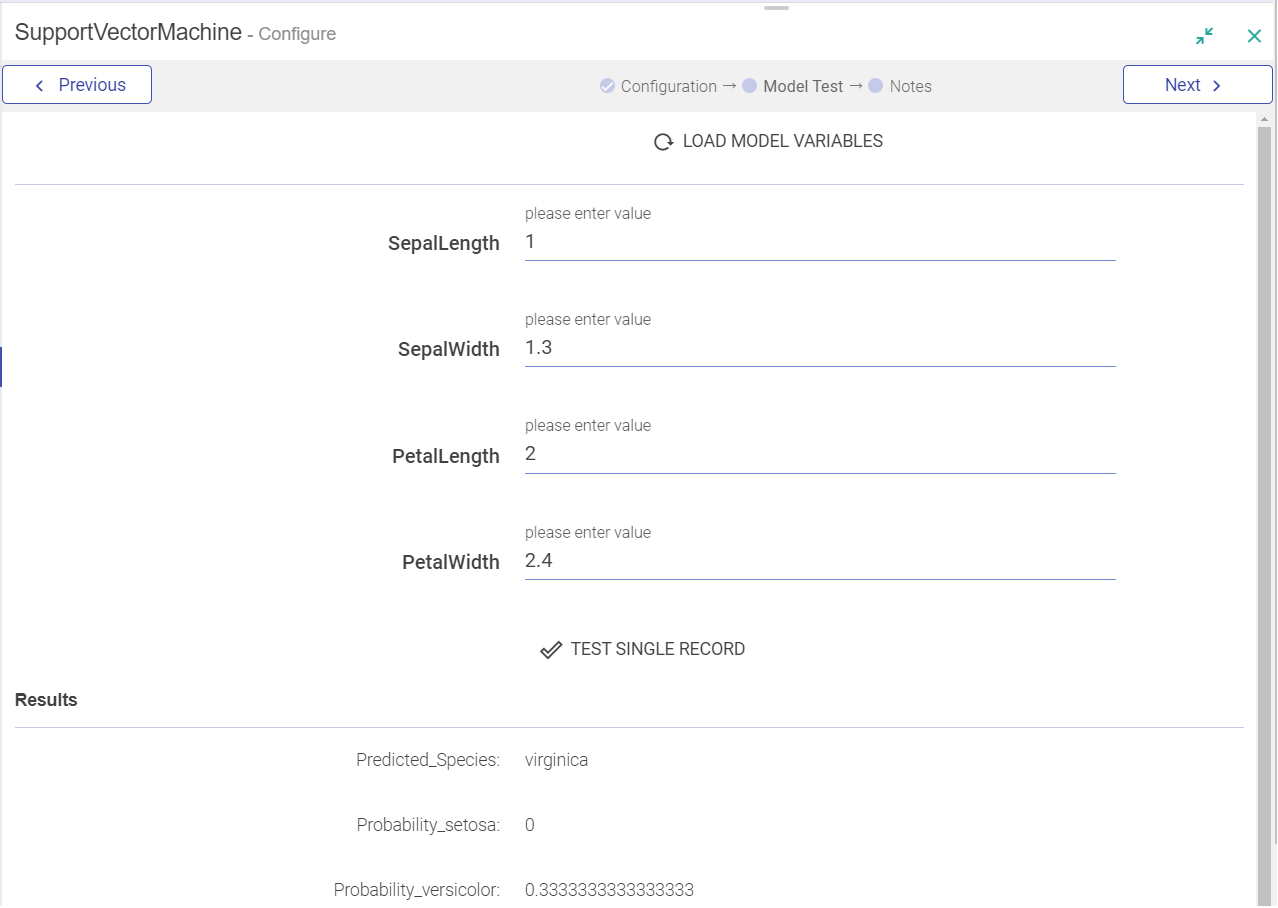
You can test the model by clicking on Model Test Tab. Click Load Model to load and view the Model.
Specify value to all model features and perform a single record test through Test Single Record. The system will evaluate the model for this input and will show all the output parameters on screen.
NaiveBayes
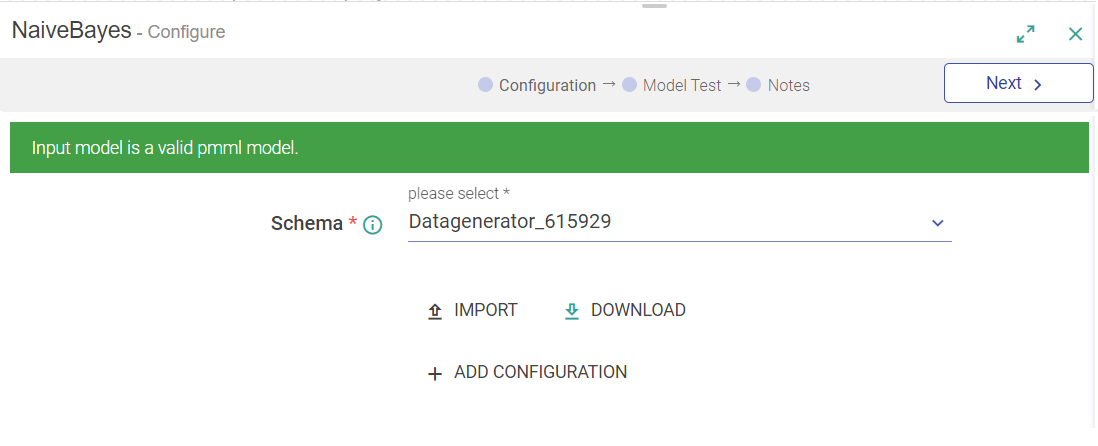
NaiveBayes analytics processor is used to analyze data through NaïveBayes model. NaiveBayes model is easy to build and particularly useful for large data sets.
NaiveBayes classifier assumes that the presence of a particular feature in a class is unrelated to the presence of any other feature.
For example, a fruit may be considered an apple if it is red, round, and about 4 inches in diameter. Even if these features are dependent on each other or upon the existence of the other features, all of these attributes individually, contribute to the probability that this fruit is an apple and that is why it is known as ‘Naive’.
A Naive Bayesian model is simple to build, with no complex iterative parameter estimation that makes it specifically useful for very large datasets.
| Field | Description |
|---|---|
| Message | Select the message from the drop-down list on which analytics algorithm has to be applied. |
| Import | Enables to import the PMML file |
| Validate Model | Checks the validity of imported PMML file. |
| Download | Downloads PMML file created either using Gathr UI or Import option. |
| Add Configuration | Configure additional parameters in Key-Value pair. |
Input to this processor can only be provided as:
If you have a PMML file representing NaiveBayes, then you can directly import it. To do so click on Import button to load the file.
Once the model is imported, it should be validated. Following checks will be performed:
The imported file must be a valid PMML file and it must have NaiveBayes model. If this check fails, then the model will not be loaded in the processor and Save feature will be disabled.
The features and output defined in the model must be present in the selected message with the data type expected by model.
If the message does not have certain attributes defined in model then model cannot be saved, since without these features in message you will not able to execute the processor. The error message in this case will explain which fields needs to be defined.
Save the model once, the checks are met.
You can Download PMML file that you have imported.
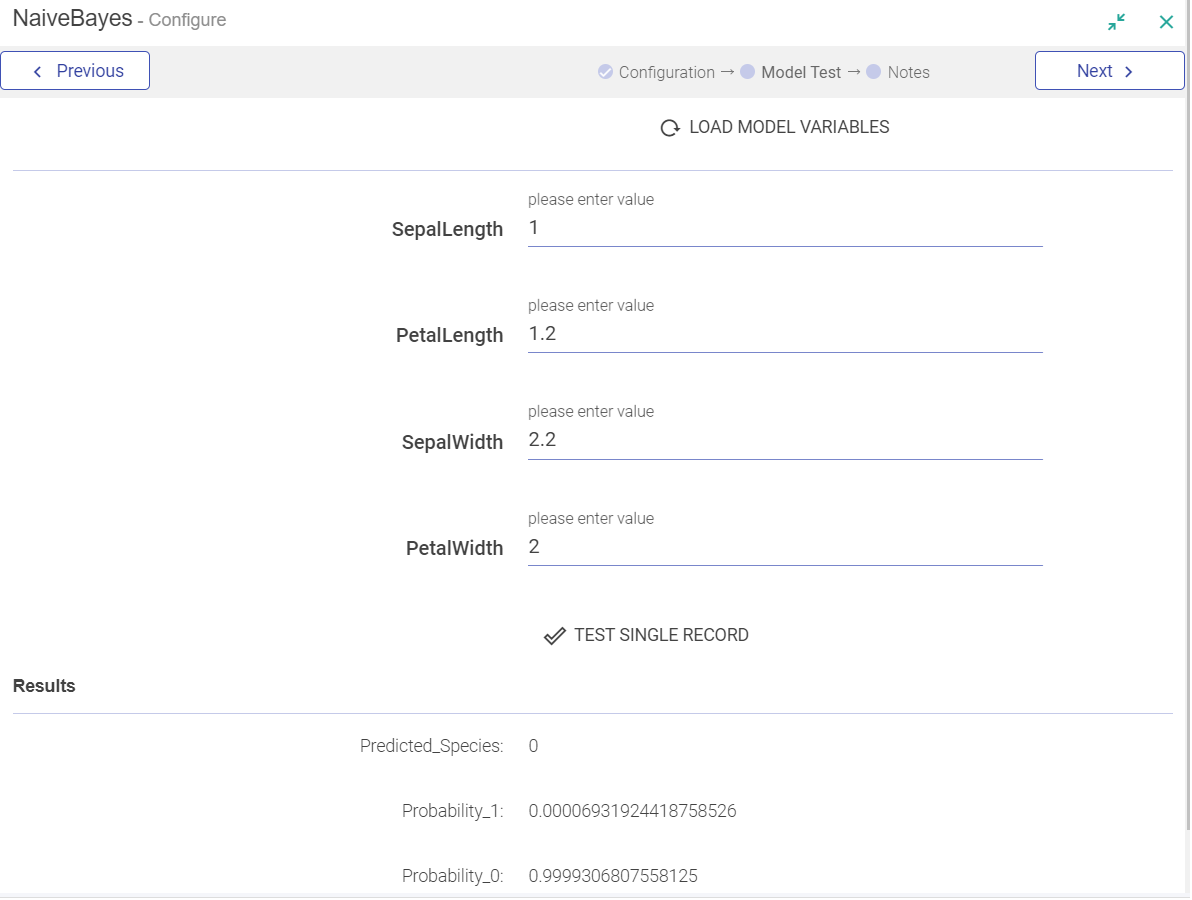
Once the model is loaded, test the model using Model Test tab.
Test Model
Click on the Model Test tab. Click on Load Model button for loading the model fields.
Specify value for all the model features and perform a single record test by clicking on TEST SINGLE RECORD button. The system will evaluate the model for this input and will show all the output parameters on screen.
Add notes and save the configuration.
Ensemble
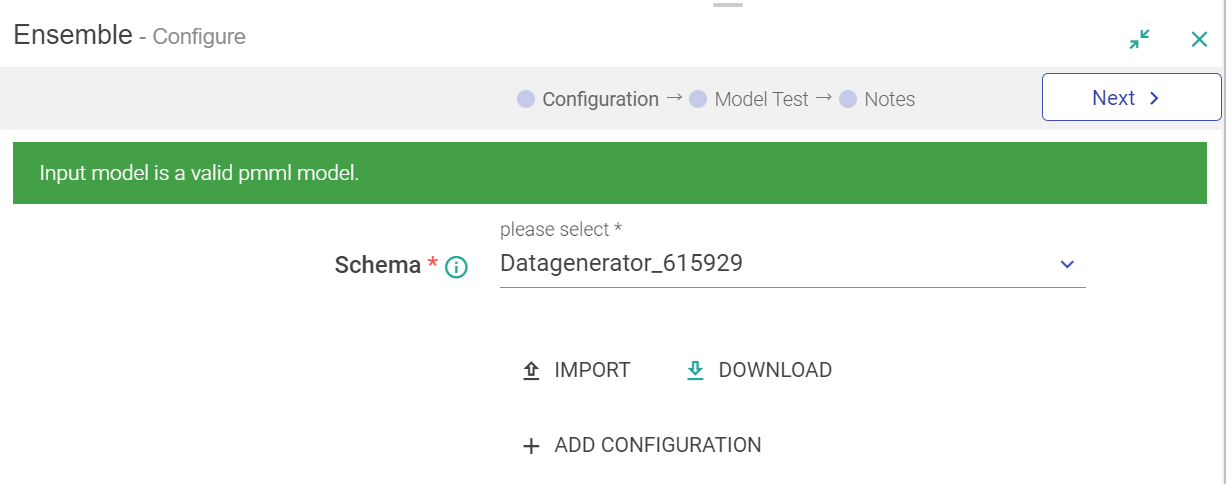
This analytics processor is used to analyze data through Ensemble model. Ensemble modeling is the process of running two or more related but different analytical models and then combining the results into a single score, which helps in improving the accuracy of predictive analytics and data mining applications.
Ensemble modeling offers one of the most convincing way to build highly accurate predictive models. Ensemble model combines multiple models together and delivers superior prediction power.
Configuring Ensemble Model
To add Ensemble model into your pipeline, drag Ensemble model to the canvas and right click on it to configure.
| Field | Description |
|---|---|
| Message | Select the message from the drop-down list on which analytics algorithm has to be applied. |
| Import | Enables to import the PMML file |
| Validate Model | Checks the validity of imported PMML file. |
| Download | Downloads PMML file created either using Gathr UI or Import option. |
| Add Configuration | Configure additional parameters in Key – Value pair. |
Input to this processor can only be provided as:
If you have a PMML file representing Ensemble, then you can import it. Click on Import button to load the file.
Once the model is imported, it is validated. Following checks will be performed:
The imported file must be a valid PMML file and it must have Ensemble model. If this check fails, then the model will not be loaded in the processor and Save** features will be disabled.
The features and output defined in the model must be present in the selected message with the data type expected by model. In case the message does not have certain attributes defined in model, the error message will explain you, which fields needs to be defined.
If above checks are met, then model can be saved for execution.
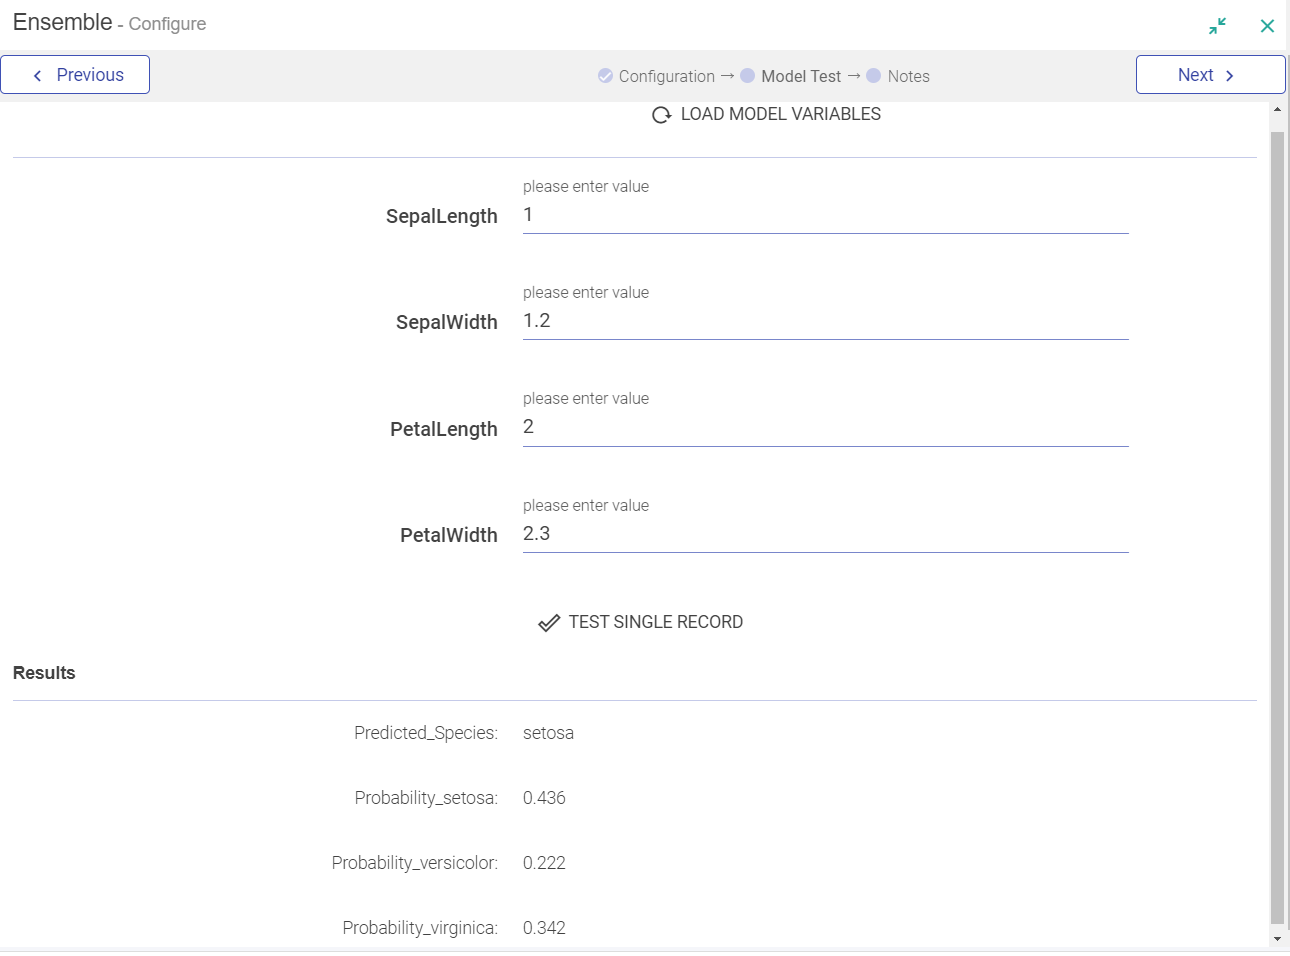
Once the model is loaded, you can test the model by clicking on Model Test tab.
If you click Load Model link, model features will appear on screen.
Add notes and save the configuration.
Neural Network
This analytics processor is used to analyze data through Neural Network model. A neural network is a powerful computational data model that is able to capture, represent complex input and output relationships.
Neural Networks are widely used for data classification, process past and current data to estimate future values.
Configuring Neural Network Model
To add Neural Network model into your pipeline, drag Neural Network model to the canvas and right click on it to configure.
| Field | Description |
|---|---|
| Schema | Select the message from the drop-down list on which Analytics algorithm has to be applied. |
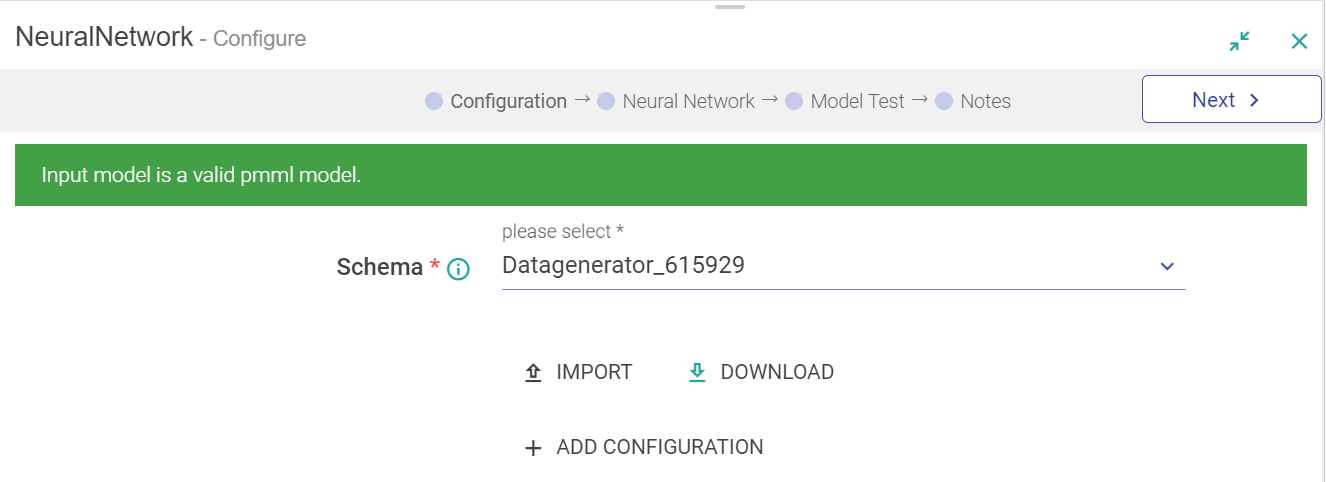
| Import | Enables to import PMML file. When the Model is Imported, two tabs are enabled – Import and Download. |
| Download | Downloads PMML file created either using Gathr UI or Import option. |
| Add Configuration | Configure additional parameters in Key–Value pair. |
Input to this processor can only be provided as:
- If you have a PMML file, representing Neural Network then you can directly import it. Click the Import button to load the file.
Once the model is imported, it shall be validated.
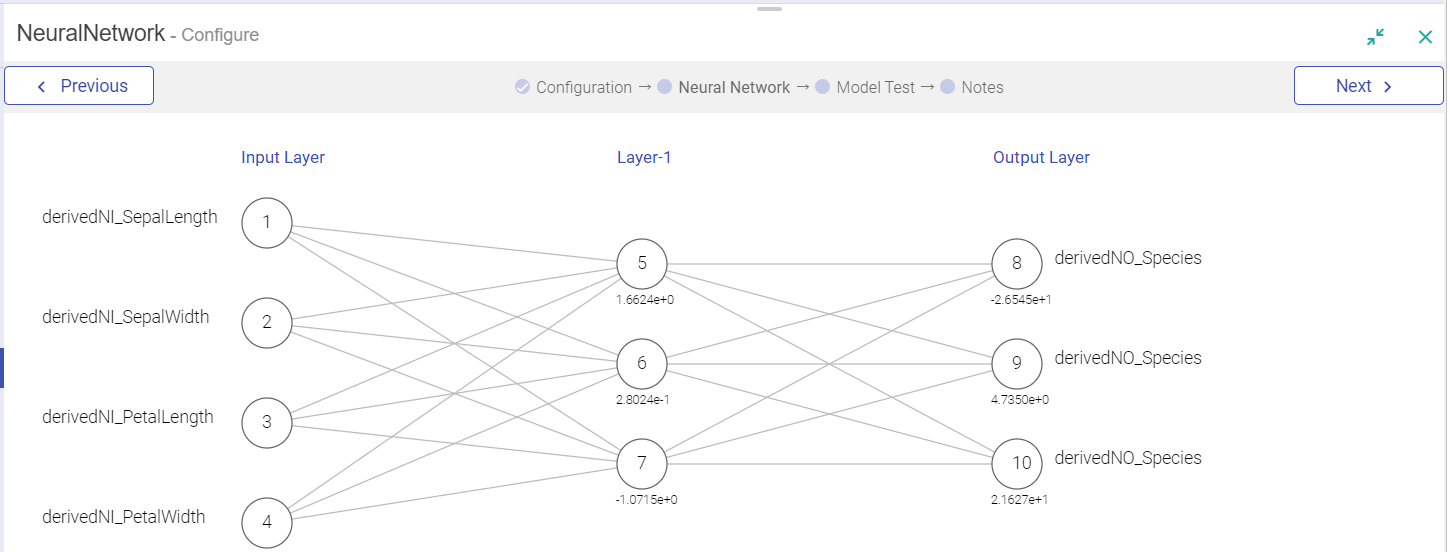
Once it is validated, you can click on View Model.
The Neural Network tab shows the graphical representation of the model. If you click on any weight or edge, you will be able to view the corresponding data.
We are able to visualize the Neutral Network. Weight specific to every edge is highlighted when you click on it.
Test Model
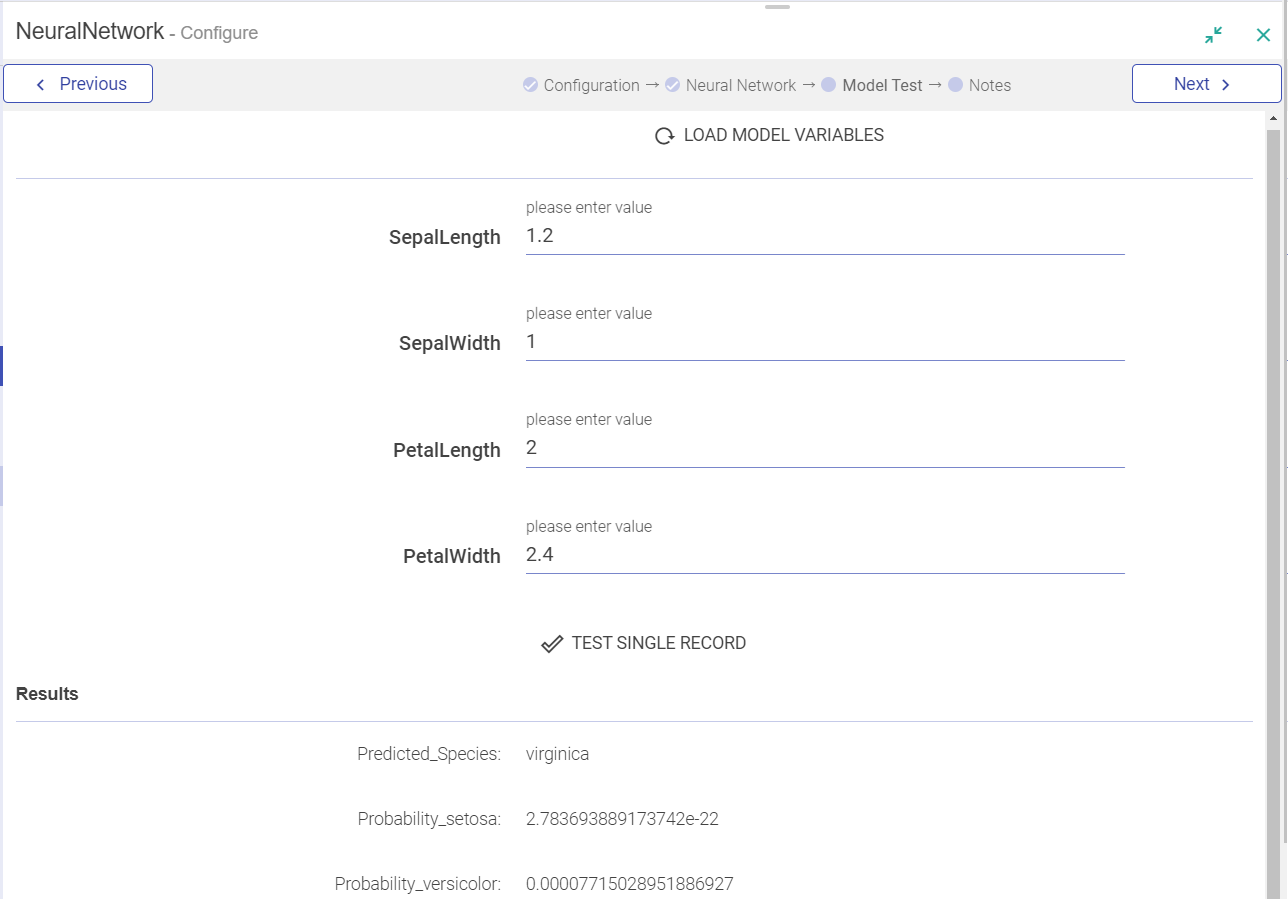
You can test the model by clicking on Model Test Tab. Click on Load Model button for loading the model fields.
Specify value for all the model features and perform a single record test by clicking on TEST SINGLE RECORD button. The system will evaluate the model for this input and will show all the output parameters on screen.
Tree Model
This analytics processor is used to analyze data through Tree model. Tree based learning algorithms are considered to be one of the best learning methods.
This model provides high accuracy, stability and ease of interpretation. They are adaptable at solving either classification or regression problems.
Configuring Tree Model
To add Tree Model into your pipeline, drag Tree Model to the canvas and right click on it to configure.
| Field | Description |
|---|---|
| Schema | Select the message from the drop-down list on which Analytics algorithm has to be applied. |
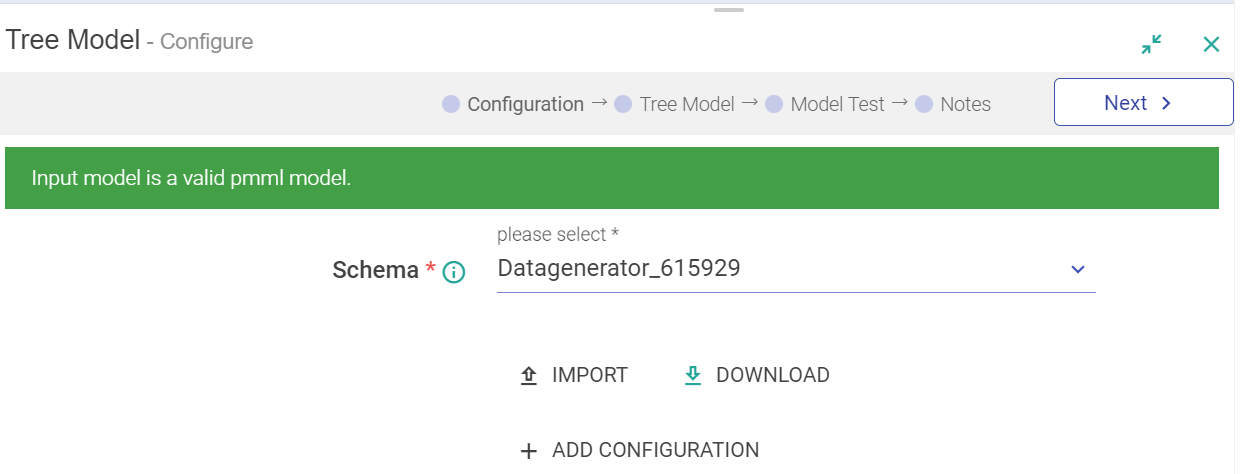
| Import | When the Model is Imported, two tabs are enabled – Import and Download. |
| Download | Downloads PMML file created either using Gathr UI or Import option. |
| Add Configuration | Configure additional parameters in Key – Value pair. |
Input to this processor can only be provided as:
- If you have a PMML file, representing Tree then you can directly import it. To do so you must choose Import Model as Yes and then click the Import button to load the file.
Once the model is imported, it is validated.
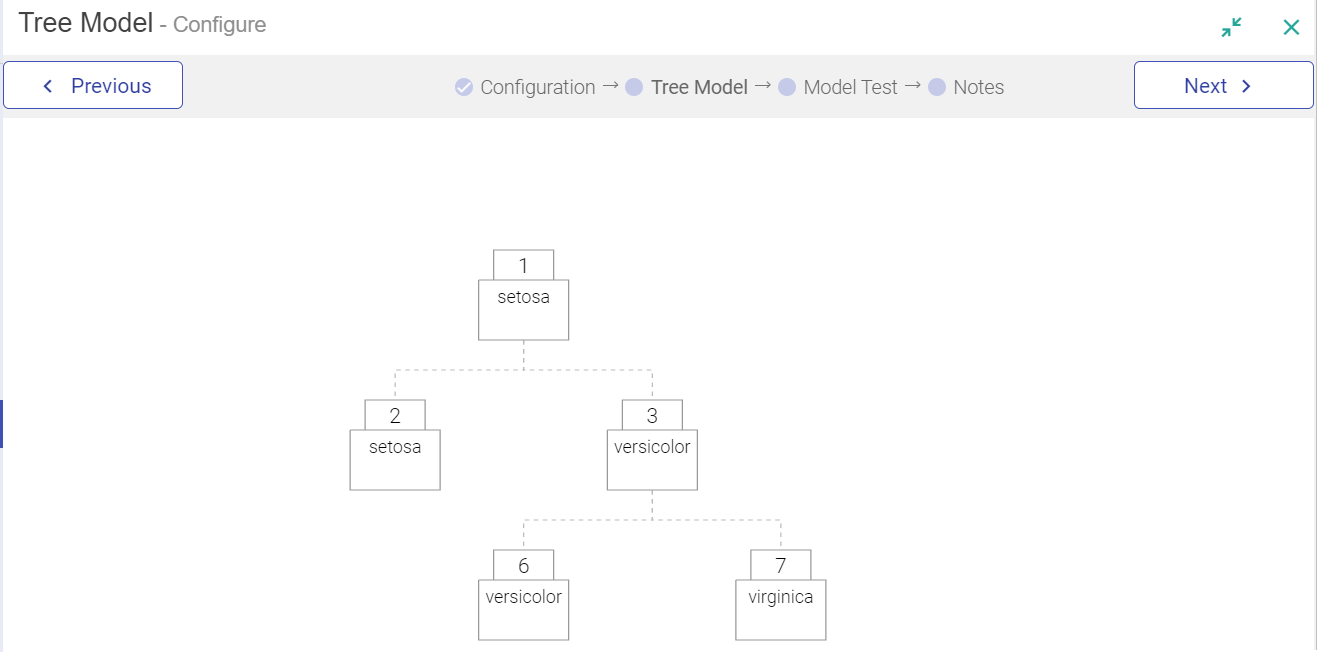
Tree Model tab is enabled and you can view Tree diagram of the model, as shown below.
After the Tree Model view, you can then test the Model.
Test Model
You can test the model by clicking on Model Test tab.
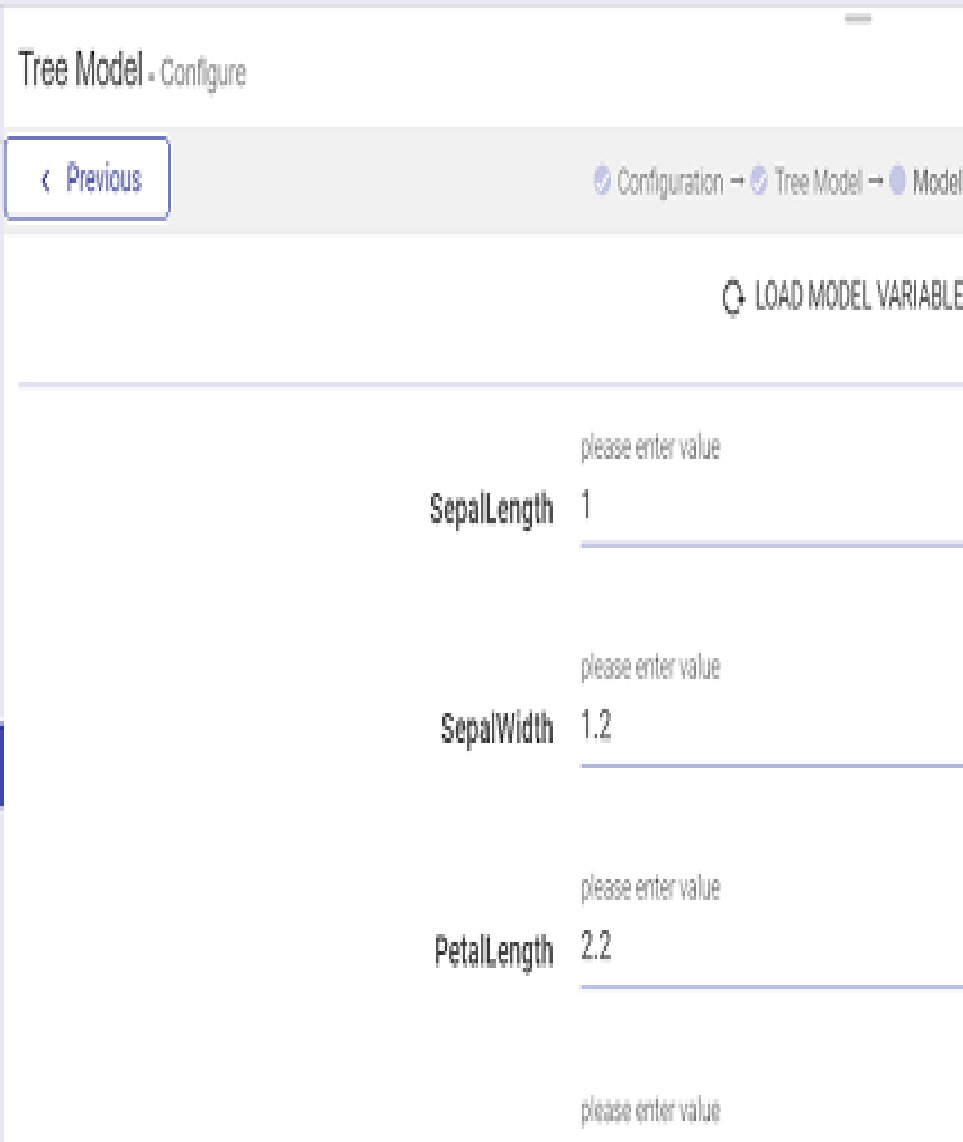
Specify value for all the model features and perform a single record test by clicking on TEST SINGLE RECORD button. The system will evaluate the model for this input and will show all the output parameters on screen.
If you have any feedback on Gathr documentation, please email us!
