Gathr Deployment on Azure
The objective of this topic is to assist the user to install Gathr on an Azure environment.
Hardware and Software Configurations
Create Azure VM, preferably on the same VNET and Subnet where the Azure Databricks cluster is running with the below minimal specification.
| Prerequisites | Details |
|---|---|
| Machine Type | Standard D8s v3 (8 vcpus, 32 GiB memory) |
| Disk Space | 100 GB (Min) |
| Operating System | Linux (Centos 7.9.2009) |
| sudo Access | Required during installation. |
| Internet Access | Optional [preferred during the installation. Otherwise, the required software packages and their dependency should be available on Azure VM]. |
Open the below ports in VM’s NSG:
| Serial No | Service | Source | Destination | Ports |
|---|---|---|---|---|
| 1 | Zookeeper | CIDR range of Databricks Cluster | Azure VM | 2181 |
| 2 | Gathr (Non-SSL/SSL) | CIDR range of User | Azure VM | 8090/8443 |
| 3 | RabbitMQ (Non-SSL/SSL) | CIDR range of User | Azure VM | 5672,15672/15671 |
| 4 | Elasticsearch | CIDR range of User | Azure VM | 9200-9300 |
| 5 | PostgreSQL | CIDR range of User | Azure VM | 5432 |
Note:
CIDR range of user: This means that the customer needs to whitelist the IP ranges where the user is trying to access the Web UI of Gathr, RabbitMQ, and Elasticsearch.
CIDR range of Databricks Cluster: This means the customer needs to whitelist the IP ranges of the Databricks cluster on Azure VM.
Prerequisites
Azure Portal Access
A virtual machine with the following resources should be available to setup Gathr:
Resource Group
Virtual machines
Virtual Networks
Subnet
Network Security Group
Azure Databricks
Below details are required to configure Azure Databricks with Gathr
Azure Databricks instance URL
Azure Databricks Authentication token
Azure Databricks DBFS Path
Gathr Installation specific prerequisites
The SSH access should be available for Azure VM to set up Gathr.
The Linux SSH user used for Gathr installation should have the sudo privilege.
Make sure the Gathr_Setup_bundle (tar.gz) and other artifacts should be downloaded from centralized location provided by the Gathr Support team and make it available on Azure VM.
Valid Gathr license file should be available during the installation (provided by the Gathr Support team).
Ensure the connectivity between Gathr VM, Azure Databricks cluster, and any external components (Hadoop, Kafka, Solr, etc.) if required.
The below-specified software should be installed on Azure VM as part of the Gathr installation.
| Prerequisites | Details |
|---|---|
| JAVA Open JDK | 1.8.0 |
| Gathr [Cloud Build] | 4.9.0 |
| RabbitMQ | 3.8.17 |
| Elasticsearch | 6.4.1 |
| Zookeeper | 3.5.7 |
| PostgreSQL | 10 |
RabbitMQ, Elasticsearch components are optional; however, pipeline monitoring and error handling features won’t be provided in Gathr if these are not available.
Setup
To setup Gathr, you should have sufficient privileges to create and manage the resources (Resource Group, Virtual machines, Virtual Networks, Subnet, Network Security Group, Azure Databricks) in Azure.
Create Virtual Machine
| Hardware/Software | Requirement |
|---|---|
| Machine Type | Standard D8s v3 (8 vcpus, 32 GiB memory) |
| Disk Space | 30 GB |
| Operating System | Linux (Centos 7.9.2009) |
| sudo Access | Required during installation |
| Internet Access | Optional [preferred during the installation] |
Steps to Create Azure VM
Type virtual machines in the search.
Under Services, select Virtual machines.
Select Create and then click Virtual machine on the Virtual machines page. The Create a virtual machine page opens.
In the Basics tab, under Project details, make sure that the correct subscription is selected and then create a new resource group. Type myResourceGroup for the name.*.
Under Instance details, type tomcatVM for the Virtual machine name, and choose CentOS Gen1 for your Image. Leave the other defaults. The default size and pricing are only shown as an example. Size availability and pricing are dependent on your region and subscription.
Under Administrator account, select Password.
Under Inbound port rules > Public inbound ports, choose to Allow selected ports and then select SSH (22) and HTTP (80) from the drop-down.
Leave the remaining defaults and then select the Review + create button at the bottom of the page.
On the Create a virtual machine page, you can see the details about the VM you are about to create. When you are ready, select Create.
When the deployment is finished, select Go to resource.
On the page for your new VM, select the public IP address and copy it to your clipboard.
Below are the ports that need to be opened in the VM Security Group
| Serial No | Service | Ports |
|---|---|---|
| 1 | Zookeeper | 2181 |
| 2 | Gathr (Non-SSL/SSL) | 8090/8443 |
| 3 | RabbitMQ (Non-SSL/SSL) | 5672,15672/15671 |
| 4 | Elasticsearch | 9200-9300 |
| 5 | PostgreSQL | 5432 |
Install Software
This section describes the steps required to install the prerequisite software on Virtual Machine launched on Cloud.
ssh into the Gathr VM to continue with the following steps
Install Java 8
Install Java 8
export JAVA\_HOME=/usr/lib/jvm/java-1.8.0-openjdk-1.8.0.312.b07-1.el7\_9.x86\_64

export PATH=$JAVA\_HOME/bin:$PATH
Set java home in. bashrc
Install RabbitMQ
This is an optional component. However, it is important as it is used for pipeline error handling in Gathr.
Install this package before installing RMQ:
yum -y install epel-release
yum -y install erlang socat
Download the package
wget https://www.rabbitmq.com/releases/rabbitmq-server/v3.6.10/rabbitmq-server-3.6.10-1.el7.noarch.rpm

rpm --import https://www.rabbitmq.com/rabbitmq-release-signing-key.asc

rpm -Uvh rabbitmq-server-3.6.10-1.el7.noarch.rpm
Start using this command:
systemctl start rabbitmq-server
Enable it with this command:
|systemctl enable rabbitmq-server|
To check the status, use this command:
systemctl status rabbitmq-server
Enable the plugins with this command:
sudo rabbitmq-plugins enable rabbitmq\_management
To create a test user:
rabbitmqctl add\_user test test
rabbitmqctl set\_user\_tags test administrator
rabbitmqctl set\_permissions -p / test ".\*" ".\*" ".\*"
Install Zookeeper
Install Zookeeper 3.5.7 as follows:
Copy the zookeeper tar file either from sax_bundle.
Extract it:
tar –zxvf apache-zookeeper-3.5.7-bin.tar.gz
Open /zookeeper-3.5.7/conf and edit zoo.cfg.
Set the IP and Port in
zoo.cfg file: server.1=IP:2888:3888
Start the zookeeper
/zookeeper-3.5.7/bin with ./zkServer.sh start.
Install Postgres 10
Install Postgres 10 as follows:
- Install Postgres repo as a root user into the system:
rpm -Uvh h[](https://yum.postgresql.org/10/redhat/rhel-7-x86_64/pgdg-centos10-10-2.noarch.rpm)ttps://yum.postgresql.org/10/redhat/rhel-7-x86\_64/pgdg-centos10-10-2.noarch.rpm
- Install Postgresql10:
yum install postgresql10-server postgresql10
- Initialize PGDATA:
/usr/pgsql-10/bin/postgresql-10-setup initdb
Start the Postgres: systemctl start postgresql-10.service
Login into Postgres: su - postgres -c “psql”
Change the Postgres password
postgres=#\password postgres
Settings for PostgreSQL
Login as a Postgres user: su – postgres.
cd /10/data and edit the pg\_hba.conf.
Add the IPs in IP4 to allow the permission:
host all all 0.0.0.0/0 md5
host replication postgres 10.1.2.0/24 md5
Edit the postgresql.conf and replace listen_address from localhost to *.
listen\_addresses = '\*'
Restart the postgres: systemctl restart postgresql-10.service
Install Elasticsearch 6.4.1
This is an optional component; however, it is important as it will be used for monitoring Gathr pipelines.
Install Elasticsearch 6.4.1 as follows
Copy Elasticsearch from sax_bundle.
Extract the bundle.
Open /elasticsearch-6.4.1/conf/elasticsearch.yaml and make these changes:
cluster.name: ES641

node.name: IP of the machine

path.data: /tmp/data

path.logs: /tmp/logs

network.host: IP of the machine

http.port: 9200

discovery.zen.ping.unicast.hosts: ["IP"]
Setting for Elasticsearch
max file descriptors [4096] for elasticsearch process is too low, increase to at least [65536]
max virtual memory areas vm.max_map_count [65530] is too low, increase to at least [262144]
For 1. Add this line in /etc/security/limits.conf
Sax is the user from which you are starting elasticsearch.sax soft nofile 65536 sax hard nofile 65536 sax memlock unlimitedFor 2. Run this command: sudo sysctl -w vm.max_map_count=262144
Start Elasticsearch in the background: nohup ./elasticsearch &
Install Gathr
Install and run in embedded mode. Copy the Gathr tar file to the Virtual Machine. Extract the tar.
Run this command to start Gathr in embedded mode:
cd bin
./startServicesServer.sh -deployment.mode=embedded
You can check the log files in these directories for any issues during the installation process.
To open Gathr use the below command:
_IP>:8090/Gathr
Accept the End User License Agreement and hit the Next button.
The Upload License page opens.
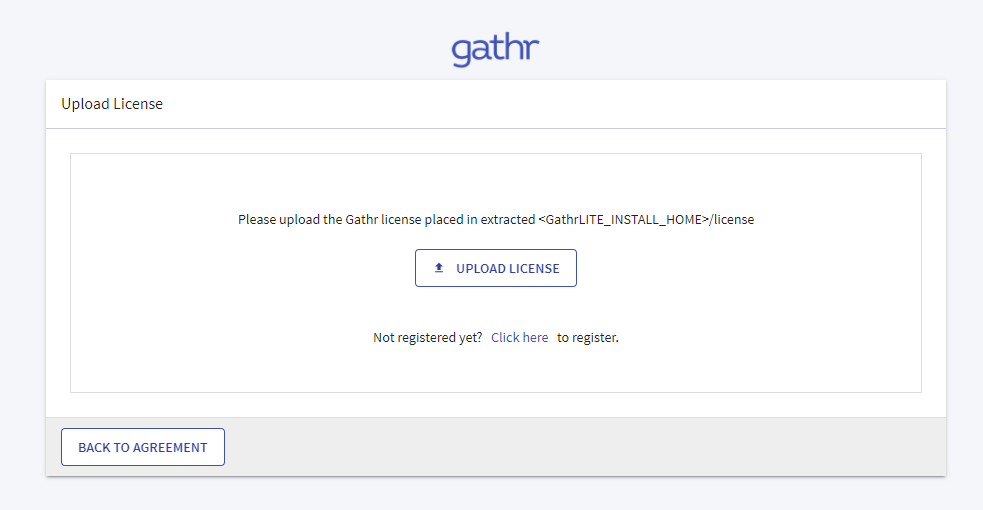
Upload the license and confirm.
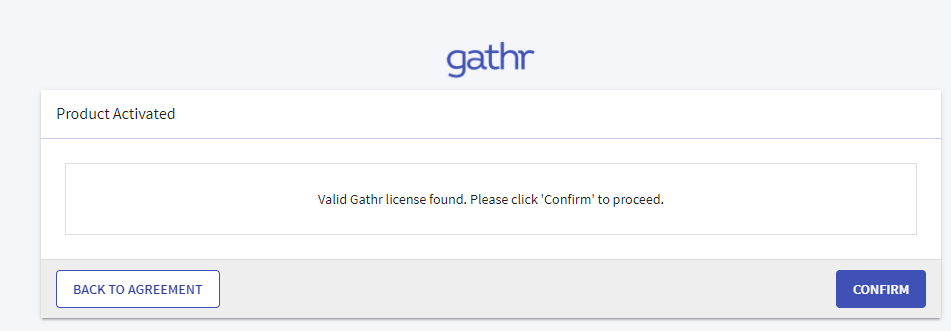
Login page is displayed.
Follow the sections given below to switch Gathr from embedded to cluster mode:
Login to Gathr using the default username & password.

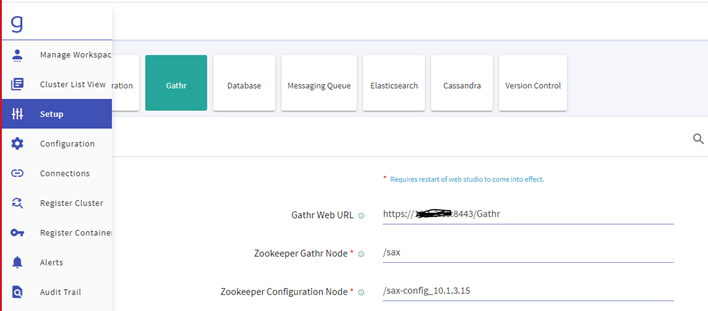
Navigate to the Setup » Gathr and update the below details:
Gathr Web URL
Zookeeper Gathr Node
Zookeeper Configuration Node
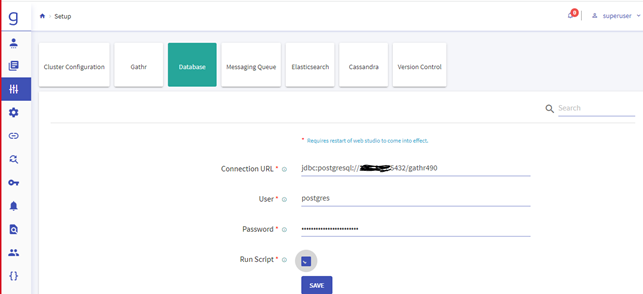
Navigate to the Setup » Database and update the below details.
Connection URL
User
Password
Run Script
Navigate to the Setup » Messaging Queue and update the below details:
Messaging Type
Host List
User
Password

Navigate to the Setup » Elasticsearch and update the below details:
Elasticsearch Connection URL
Elasticsearch Cluster Name
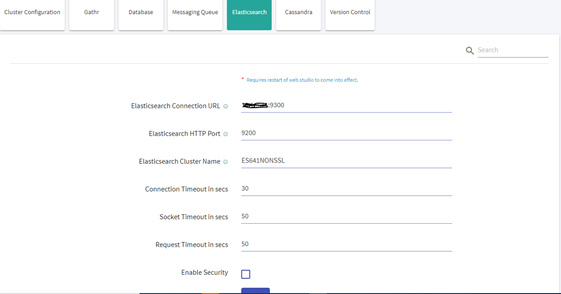
After updating the details, restart Gathr with -config.reload=true.

Copy Cloud Vendor-specific war
Copy Cloud Vendor-specific war file into tomcat
For Azure-Databricks:
cp <Gathrinstallationlocation>/lib/clusterMediator.war <Gathrinstallationlocation>/server/tomcat/webapps/
The war will get extracted in server/tomcat/webapps. Now stop tomcat and configure application files.
For Azure-Databricks:
cd <Gathrinstallationlocation>/bin

./stopServicesServer.sh

update <Gathr installation location>/server/tomcat/webapps/cluster-mediator /WEB-INF/classes/application.properties file

spring.datasource.url=jdbc:postgresql://<GathrPrivateIP>:5432/DBNAME
spring.datasource.username=username
spring.datasource.password=password
spring.datasource.driver-class-name=org.postgresql.Driver
Configure Cloud Vendor-specific details in YAML
For Azure-Databricks:
Configure Databricks details in yaml
File: (<Gathrinstallationlocation>/Gathr /conf/yaml/env-config.yaml)

databricks:

dbfs.jar.uploadPath: "/sax-databricks-jars "

mediator.address: "http://<GathrPrivateIP>:8090/cluster-mediator/"

isEnabled: "true"

authToken: "<authtoken>"

instanceUrl: "https://<databricks-instance-url>"
Copy jar & init-scripts on DBFS
curl 'https://<databricks-instance>/api/2.0/dbfs/put' -H "Authorization: Bearer <personal-access-token-value>" -F contents=@<Gathr installation location>/lib/spark-structured-sax-pipeline.jar

-F path="<sax metadata on dbfs path>/spark-structured-sax-pipeline.jar"

curl 'https://<databricks-instance>/api/2.0/dbfs/put' -H "Authorization: Bearer <personal-access-token-value>" -F contents=@$SAX\_BUNDLE/init-scripts.sh

-F path="<sax metadata on dbfs path>/init-scripts.sh"
Restart in Cluster Mode and upload license
cd <Gathrinstallationlocation>/bin

./startServicesServer.sh –config.reload=true
Steps to Restart Gathr
In case there are any updates to be done in configurations, you can restart Gathr by providing the below commands
./startServicesServer.sh -config.reload=true

./stopServicesServer.sh
Steps to Uninstall Gathr
Stop/Kill the Bootstrap Process.
Delete the Gathr installation directory and its dependencies (like RMQ, ZK etc)
Delete the Gathr database.
If you have any feedback on Gathr documentation, please email us!