Create a Workspace
A superuser can create several workspaces.
Below are the steps to create a workspace.
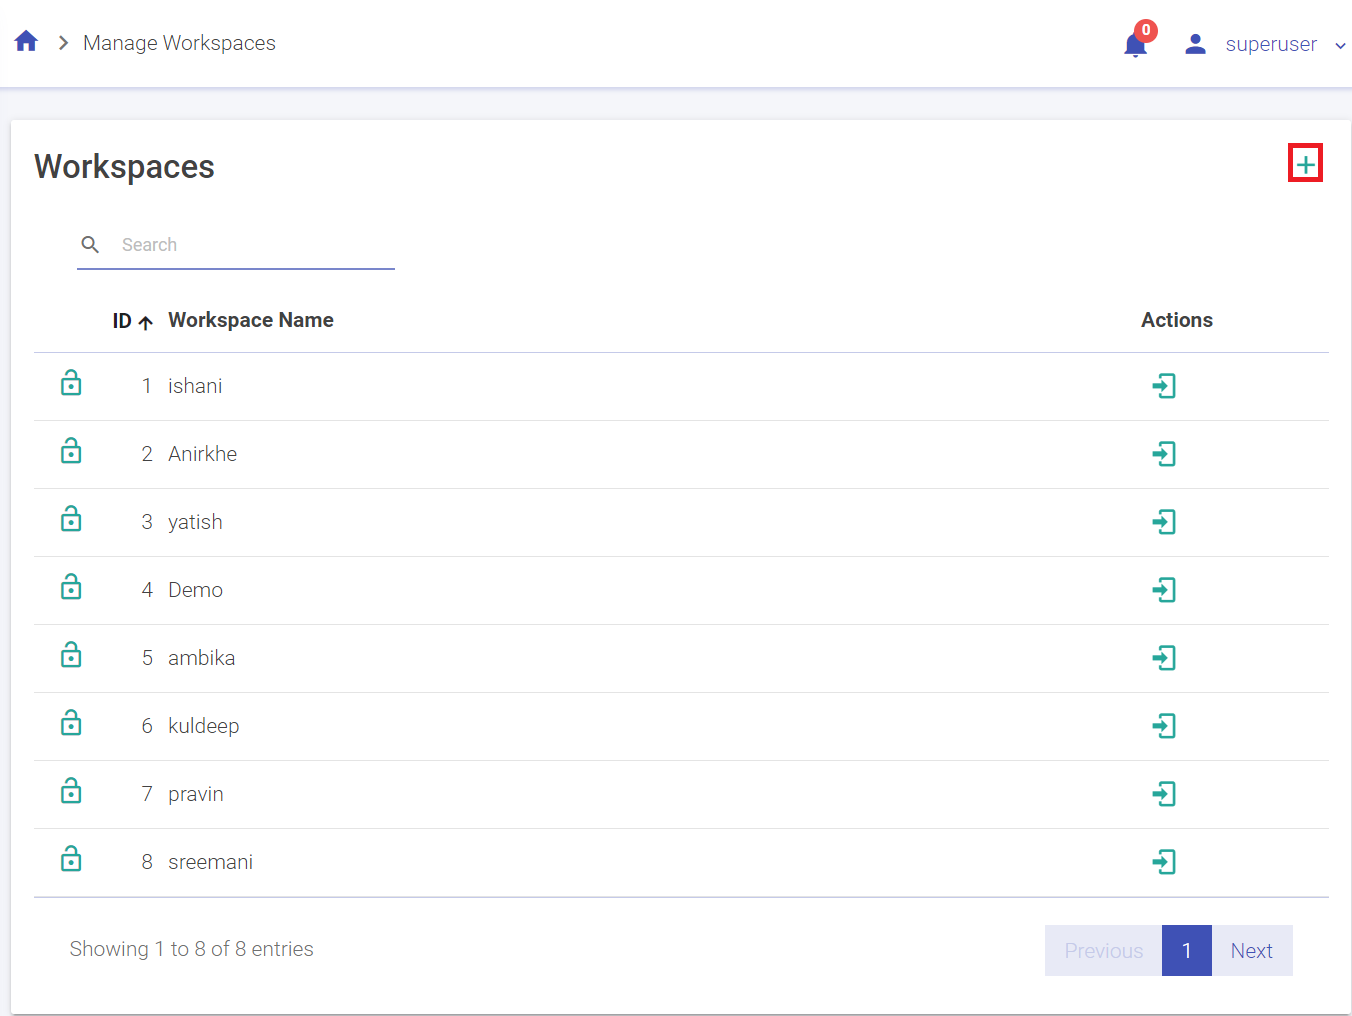
Go to Manage Workspace and click on Create New Workspace. (The plus sign on the top right corner)
Enter the details in the following tab.
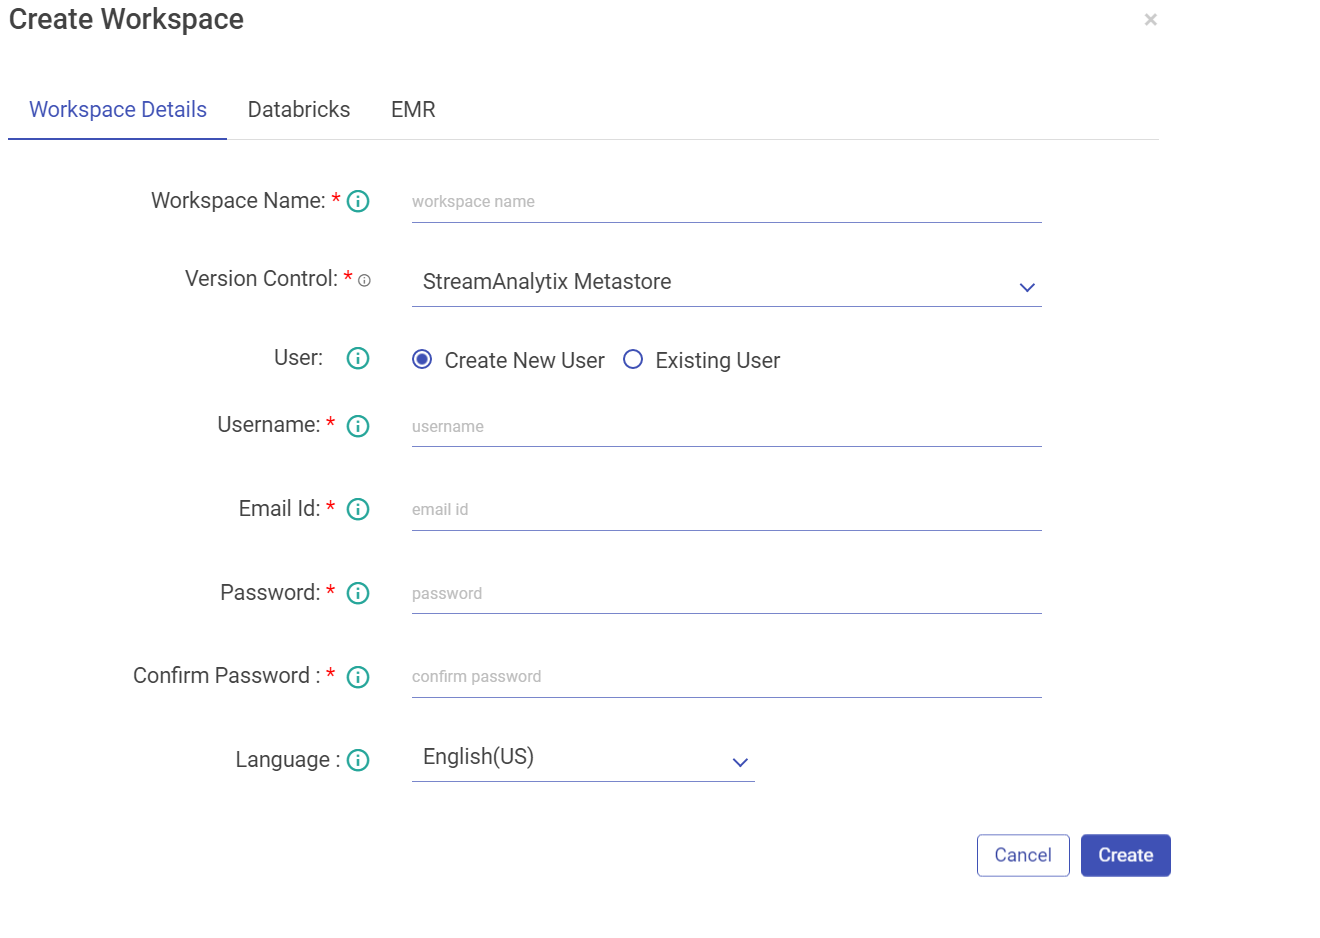
Property Description Workspace Name Enter a unique name for your workspace. Version Control User can select option for Version Control from the drop-down. Currently the below mentioned options are available:
- gathr MetaStore
- Bitbucket
- GitHub
-GitLab
User can opt for gathr MetaStore option (default) for Version Control and proceed further to fill other required details mentioned below.
If user selects Bitbucket option as Version Control, fill the below fields:
Git Login via. User can log in via. Credentials/SSH Keys. Upon selecting Credentials option, fill the below fields:
Bitbucket User Name Provide the Bitbucket user name. Bitbucket Password Provide the Bitbucket password. Click the Fetch Workspace button to fetch the Bitbucket Workspace. Upon selecting SSH Keys option upload the Git SSH Key file.
If user selects GitHub option as Version Control, fill the below fields:
Git Login via. User can log in via. Credentials/SSH Keys. Upon selecting Credentials option, fill the below fields:
Git User Name Provide the GitHub user name. Git Password Provide the GitHub access token or password. If user selects GitLab option as Version Control, fill the below fields:
Git Login via. User can log in via. Credentials/SSH Keys. Upon selecting Credentials option, fill the below fields:
Git User Name Provide the Git user name. Git Password Provide the Git password. C User A user can be of following types:
Create New User: Enter a user name.
If the user selects Create New User option, fill the below fields:
Username Enter a username that will be used to log in the Application. Email Id Enter an email id that will be used for any communication with the user. Password Enter a Password. Confirm Password Re-type the password. Language Choose the language, from English (US) and German (DE).
Click Create.
If the user selects Existing User option, in that case Assign User** by selecting users who can access the workspace.
While creating the workspace, configure Databricks Token details and credentials.
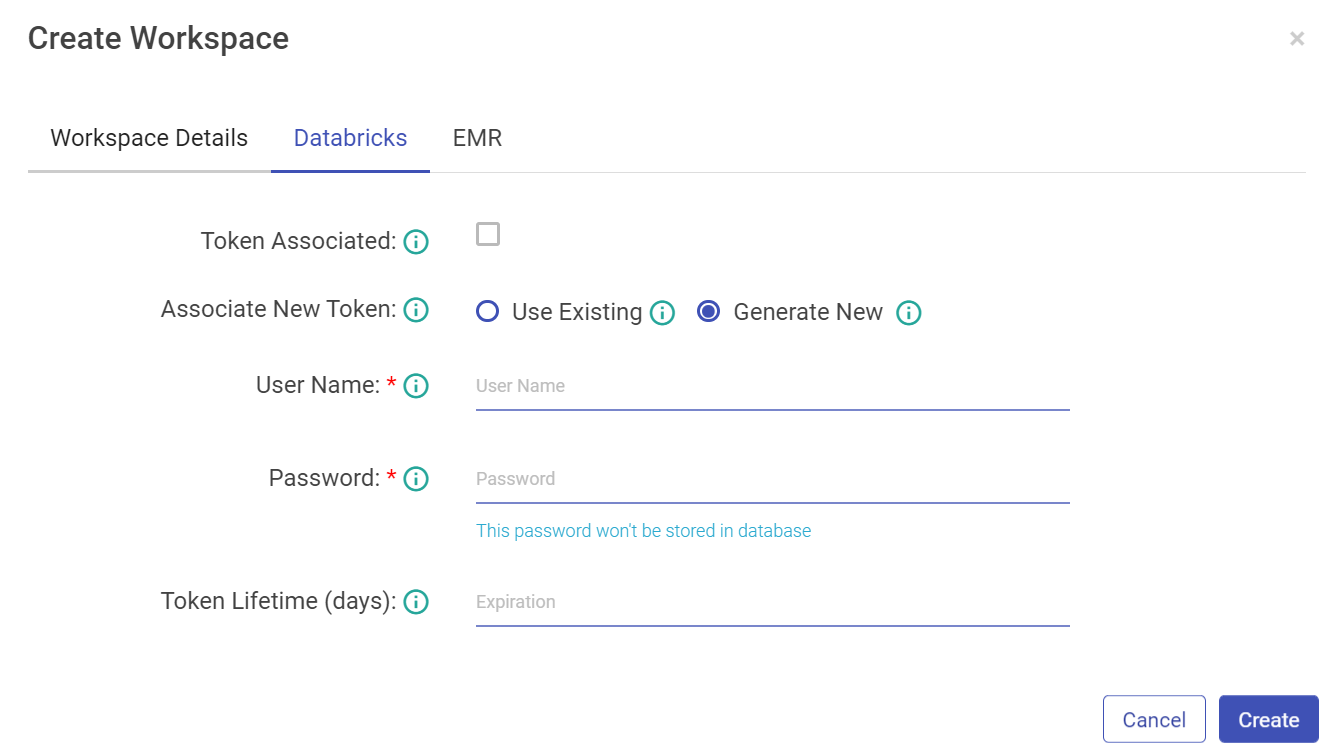
Property Description Token Associated If the Databricks user token is associated with gathr user or not. Associate New Token Associate a new Databricks user token.
Use Existing: Select this if you already have a databricks token_value.
Generate New: Select this option if you want to generate new databricks.
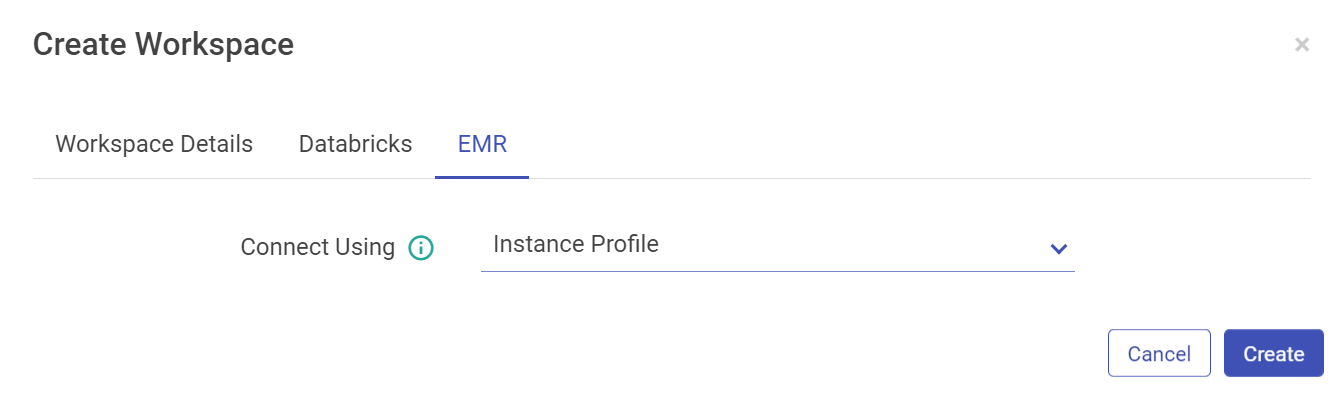
Username Provide Databricks username with which token_value is generated. Password Enter the password for Databricks username. Token Lifetime (days) Provide Databricks token_value. For EMR, you can configure using AWS keys or the Instance Profile.
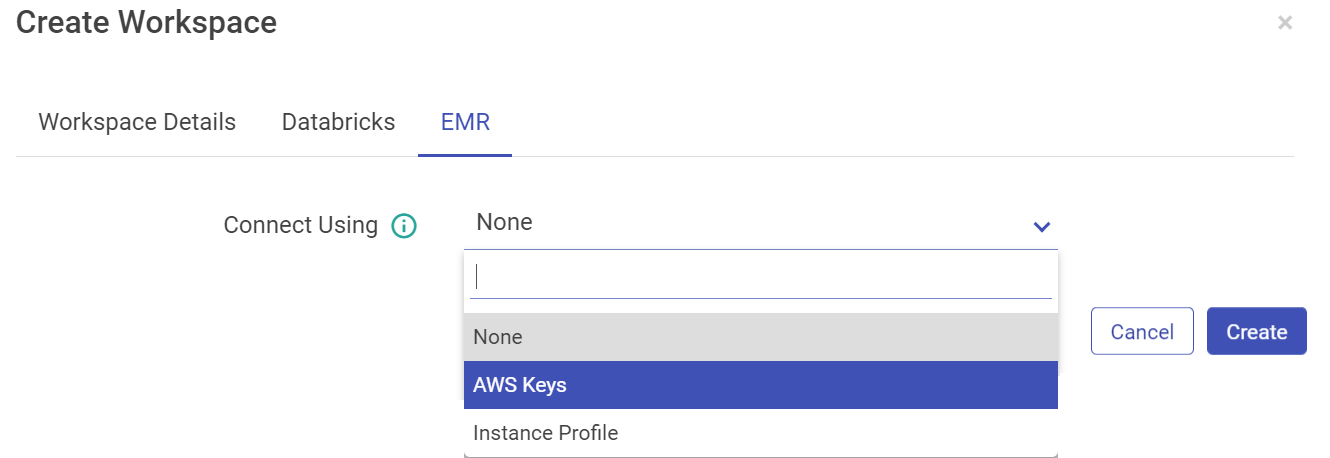
Configure with EMR cluster using AWS Keys:
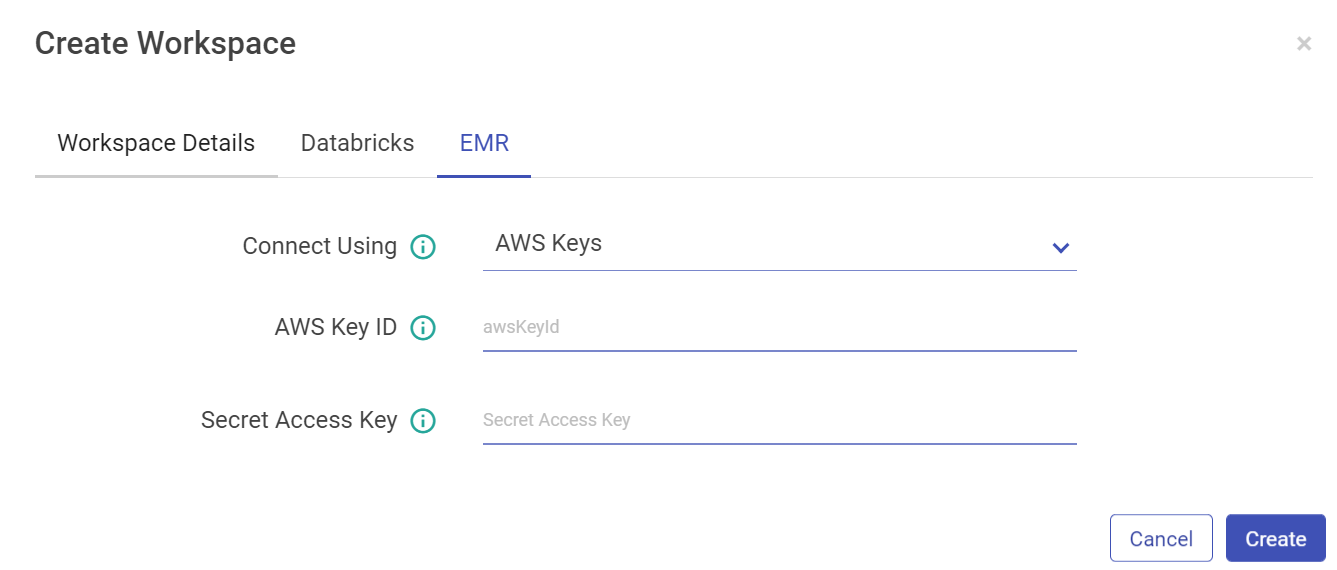
Property Description Connect Using Select AWS Keys from the drop-down if you want to configure EMR cluster using AWS Key ID and Secret Access Key. AWS Key ID AWS Key that will be used for all the communication with AWS. Secret Access Key Secret key corresponding to AWS key. Configure with EMR cluster using Instance Profile option:
 Users creation is based on Databricks and EMR access as well. There may be users that won’t have access to create a Databricks users, for them the Databricks tabs will be not be accessible and so will be the case for EMR users.
Click Create to save the changes and the new Workspace will be listed in the Manage Workspaces page.
If you have any feedback on Gathr documentation, please email us!