Configuring Cloudera to Support Lineage
For publishing lineage to Cloudera Navigator, configure Gathr with the following properties.
Configuration Properties
To go to the configuration properties, go To Superuser > Configuration > Others > Cloudera.
These properties are required to enable publishing of lineage to Cloudera Navigator:
| Property | Description |
|---|---|
| Navigator URL | The http URL to the Cloudera Navigator UI. |
| Navigator API version | The Navigator SDK API version. (read below) |
| Navigator Admin User-name | The Cloudera Navigator Admin user. |
| Navigator Admin user Password | The Cloudera Navigator Admin password. |
| Autocommit enabled | Specifies if auto commit of entities is required. |
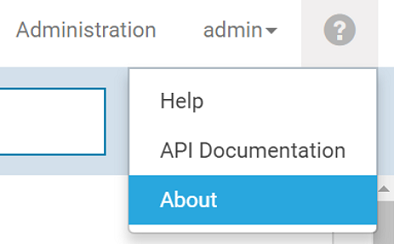
The Navigator API Version can be extracted from the Cloudera Navigator UI. To do so, click on the question mark, located on the top right corner of the web-page, next to user name. Select ‘About’.
Mention the Cloudera Navigator version as the Navigator API version, as shown in the image below:
Configuring Lineage in Data Pipeline
The next step to enable publishing Lineage to Cloudera Navigator is while saving the Pipeline.
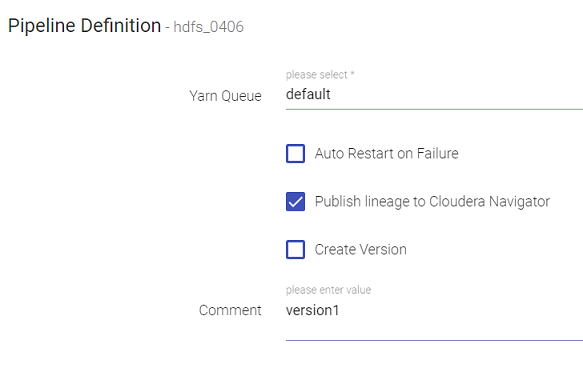
Click on the Publish Lineage to Cloudera Navigator check box available on the Pipeline Definition window as shown below:
You can publish Lineage for both – Batch and Streaming type of pipelines in Gathr.
The ‘Publish lineage to Cloudera Navigator’ checkbox is enabled by default for every pipeline.
You need to update the pipeline and start.
Viewing Pipeline Lineage on Navigator
The lineage of a pipeline is published to Cloudera Navigator once the pipeline is started.
Where the RabbitMQ Data Source configuration is as follows:
The Cloudera Navigator URL is as follows: with credentials (usually admin/admin).
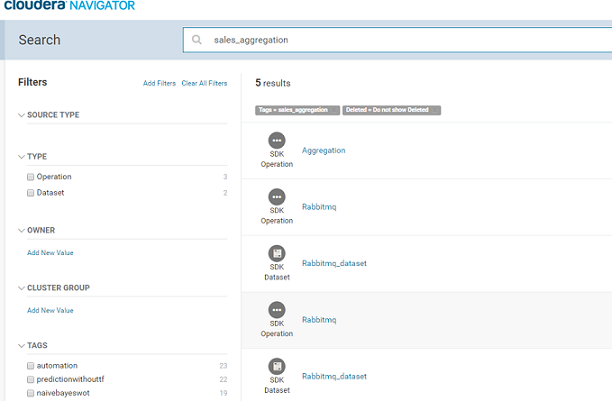
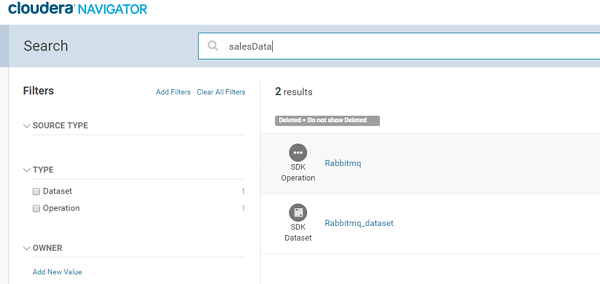
Once the pipeline is active, go to the Cloudera Navigator UI and search for the pipeline name ‘sales_aggregation’.
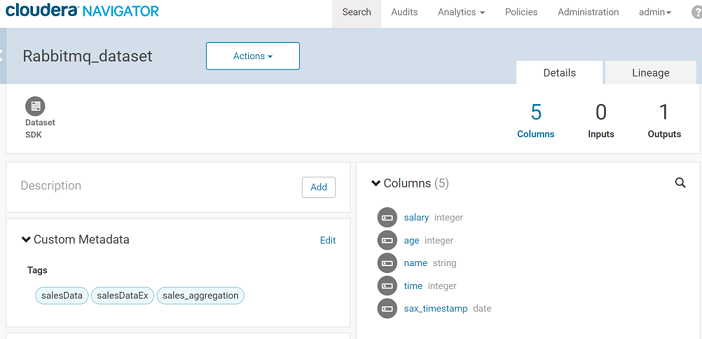
The components of the pipeline are listed as shown above. Please note the source and target RabbitMQ components are shown as two entities in Navigator – Rabbitmq and Rabbitmq_dataset. The Rabbitmq_dataset shows the schema of the data flowing in Gathr and the Rabbitmq shows the metadata of the actual RabbitMQ component.
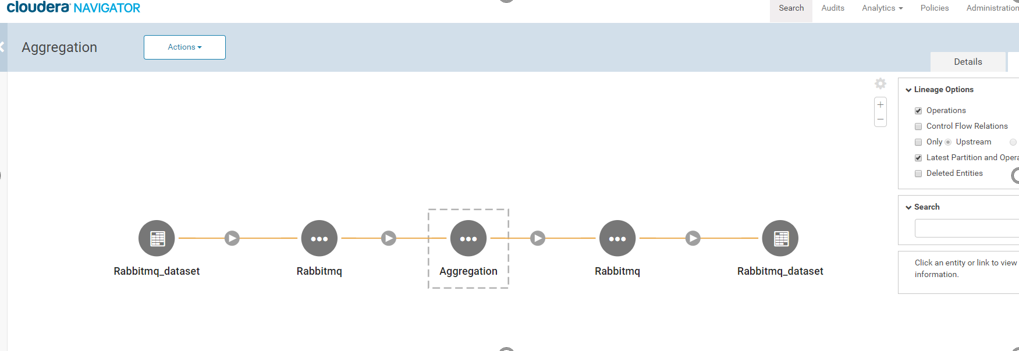
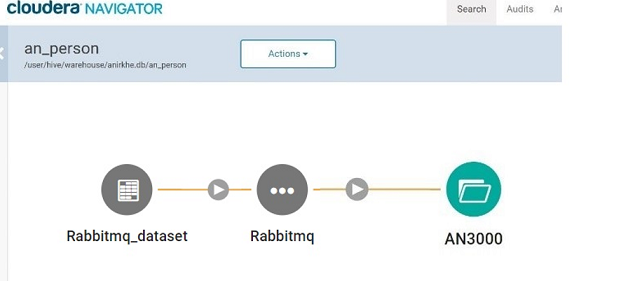
Click on ‘Aggregation’ entity listed above and once the ‘Aggregation’ entity page opens, click on ‘Lineage’ tab, as shown below:
Similarly, you can go to Cloudera Navigator search page and search by RabbitMQ Data Source’s queue name or exchange name and view the lineage by clicking on the RabbitMQ entity.
You can also view the schema of the message configured on the Data Source using the ‘Details’ tab xof the RabbitMQ entity.
These are ‘Columns’ of the entity.
Publishing lineage to Cloudera Navigator helps you easily integrate with the existing entities.
Consider a pipeline that processes data from RabbitMQ or Kafka, enriches the data and inserts the resultant data in a hive table.
Now, an external job (not a Gathr pipeline) reads from this Hive table and does further processing of data. If lineage is published by this external job as well, you will be able to see a combined enterprise lineage on Cloudera Navigator.
Viewing Lineage of HDFS and Hive
The lineage of HDFS and Hive Data Sources and emitters are native entities in Cloudera Navigator if the configured HDFS path or Hive table already exists.
The lineage of native HDFS entity is shown in green and the lineage of native Hive entity is shown in yellow.
If the HDFS path or Hive table does not exist, the lineage is represented by creating a custom dataset which is a Grey dataset.
If you have any feedback on Gathr documentation, please email us!
