Projects Introduction
Projects allow the users to create and organize Datasets, Models, Applications, Data Validations, Processor Groups, Pipelines, Workflows, Alerts, Import Export Entities and Version Control within a logical Workspace.
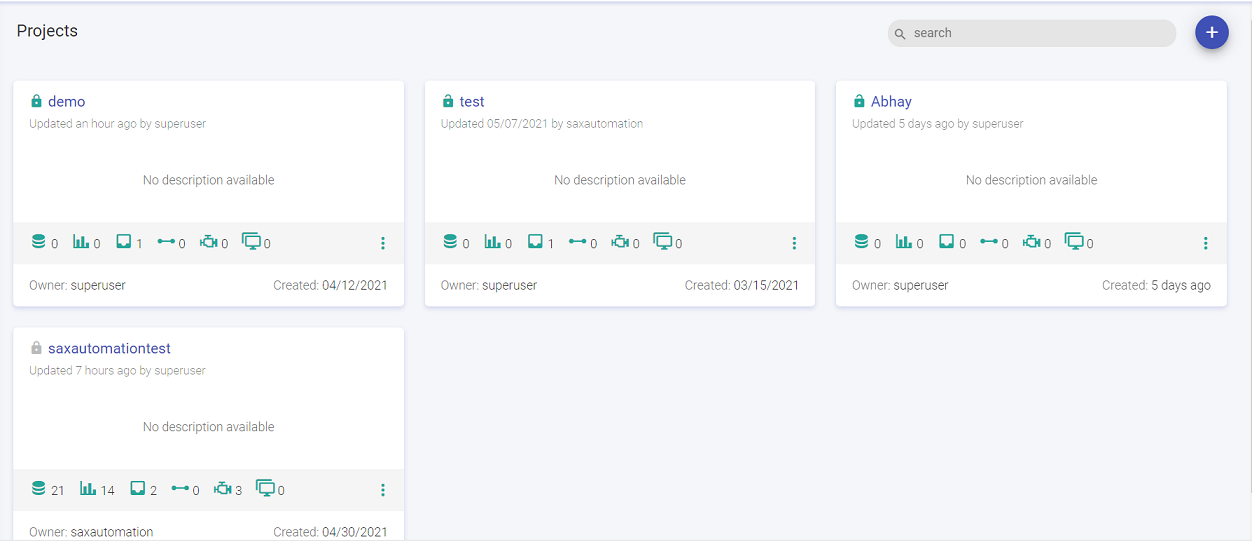
The user lands at the Projects summary page by clicking on the Projects option from the workspace menu.
All the Projects that are visible for the users will get displayed on the Projects summary page with details like Project name, visibility option, last updated, description and tags added to a Project (if any), Project components with their counts, Project owner and created details. The user has an option to Open or Delete a Project and work with the Project components as per the assigned roles and permissions.
The Project visibility (public/private) settings can also be updated by the Project owner from the Project tile itself.
Note: To understand about the assigned roles and permissions with which workspace users can perform different operations within projects, see My Roles tab given in the Manage Users option.
Create Project
To create a new Project do as follows:
Click the + icon at the top right of the Projects listing page.
In the create New Project tab, fill the necessary details as shown below.
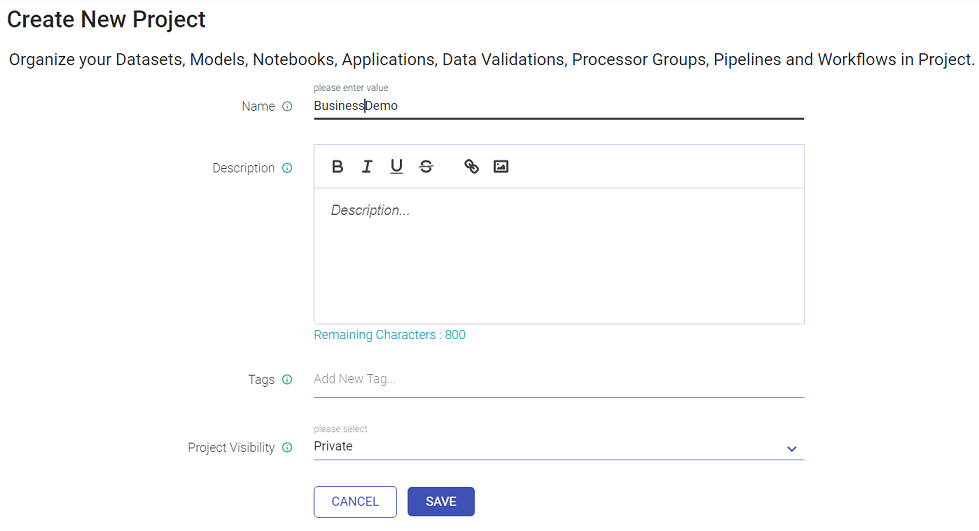
To create a new project, enter the below mentioned fields:
Field Description Name Provide a unique name for the Project that is to be created. Description Enter the description of the project to be created. Tags The user can mention associated tags for the project. Project Visibility Private by default. The user has an option to choose between the Project visibility from Public/Private.
Public: Project will be visible to all and can be used by any user in the workspace.
Private: Project will be visible only to the Project’s owner and the created components will be with the scope as Project.
Version Control Select one of the below options to control versioning of the Project:
None: Versioning will take place at the database level on the local machine.
Gathr Managed: Gathr will create a new repository to manage project versions as per the version control system selected during the Gathr setup.
Custom: User needs to provide an existing repository to manage project versions. Provide the Git repository URL. The user can VALIDATE it.
Note: This parameter will only be visible in the UI, if the superuser has enabled version control in Gathr setup as well as in the Workspace configuration.
Repo Url If the version control option is selected as custom, user will have to mention the Repo Url path and VALIDATE. Branch Name After successful validation of the Repo Url, the user will be able to view the branches of the entered Repo URL. Click Save to create the new Project.
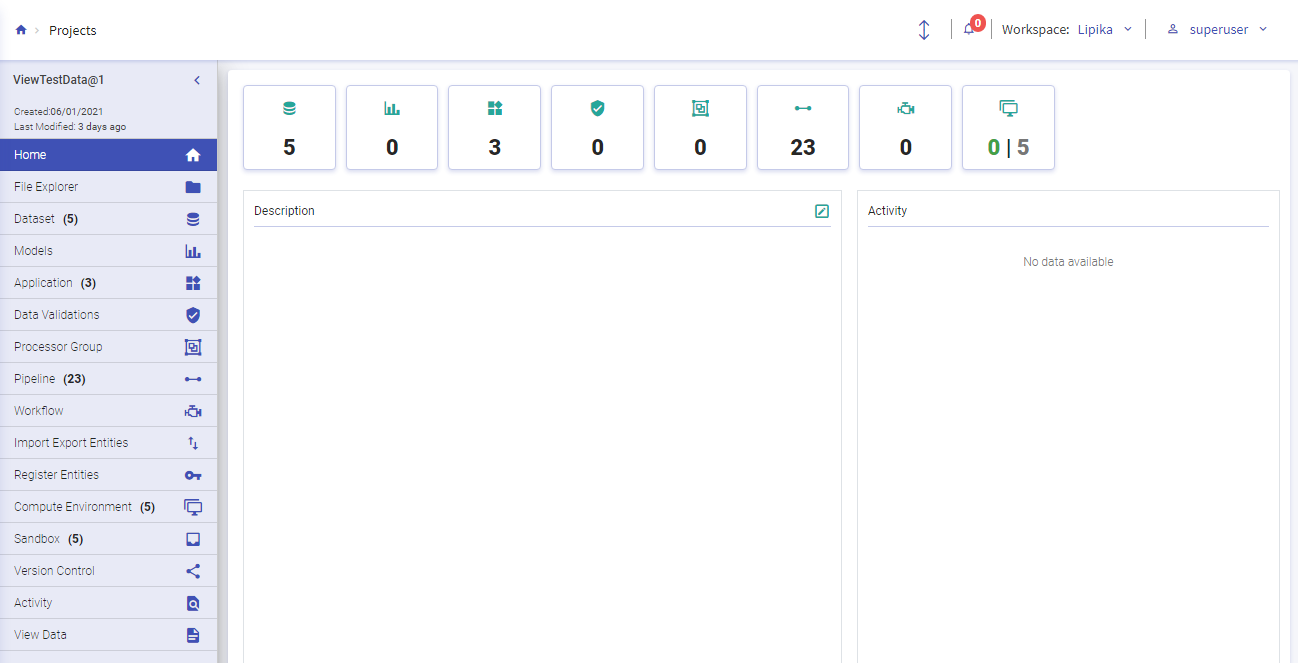
The user will land at the Project summary page.
To open/delete an existing project, click on the ellipse of the existing project tile and click Open/Delete. User can also click the Project name mentioned on the project tile to open the project.
Project Home Page
In Gathr, the user can create Datasets, Models, Applications, Processor Groups, Pipelines, Workflows, Compute Environment and Sandbox within a project.
The count of all the components that are created within the Project will get updated in the counts tab.The user can add and edit the description and will be able to view the Activity logs of the past seven days in the Home page.
File Explorer
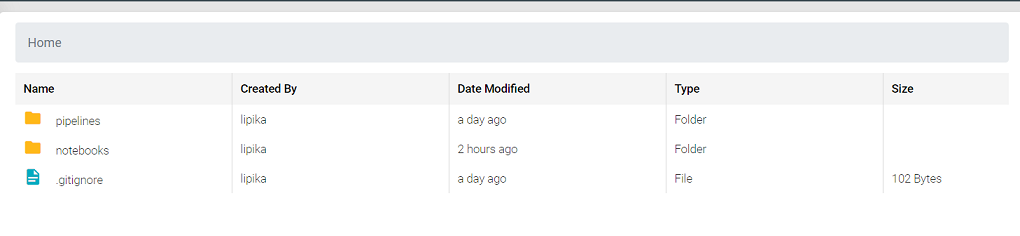
In the file explorer page, the user can see a folder-view structure for Notebooks.
| Field | Description |
|---|---|
| Name | Upon double clicking Notebooks folder, the created Notebooks will be enlisted. |
| Created By | Displays the creator of the Notebook. |
| Date Modified | The last updated Notebook date will be displayed. |
| Type | The file type will be displayed. |
| Size | The size of the notebook file will be displayed here. |
If you have any feedback on Gathr documentation, please email us!