Manage Databricks Clusters
User has options to create interactive clusters, perform actions like start, refresh, edit and delete clusters, view logs and redirect to spark UI.
Given below is an illustration of the Databricks Interactive Clusters page followed by the steps to create a cluster.
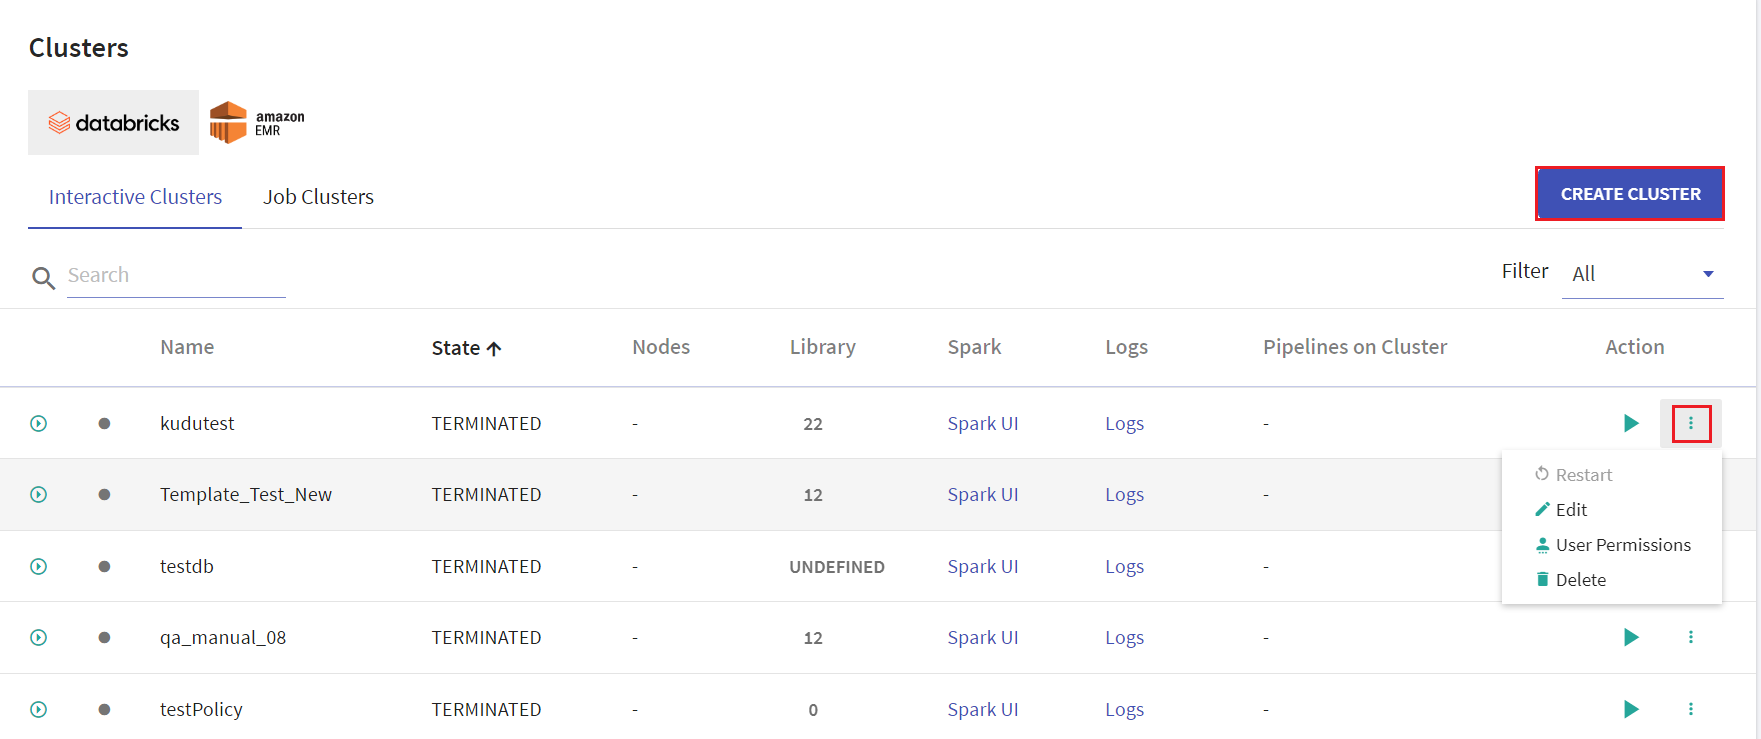
On the listing page under Action tab, user has options to start the cluster. Upon clicking the ellipses, under Action tab the available options are: Restart, Edit, User Permissions and Delete.
User has option to manage permissions of the existing Databricks clusters. Upon clicking User Permissions, the below screen will open:

There are four permission levels for a cluster: No Permissions, Can Attach To, Can Restart, and Can Manage thereby enabling the cluster to be accessed by a set of users with specific permissions.
Note: User must comply with the below mentioned prerequisites for User Permissions in Databricks account:
Admin to enable below mentioned toggles for the workspace in its settings:
Under Access Control, ‘Control Jobs, and pools Access Control’ toggle must be enabled.
Under Access Control, ‘Cluster Visibility Control’ option must be enabled to allow listing of only those clusters to the user for which it has any permission.
Access control is available only in the Premium plan. To see the plans, refer to AWS Pricing.
On the listing page, click CREATE CLUSTER to create Databricks cluster. Provide the below fields:
| Field | Description |
|---|---|
| Cluster Policy | Option to select the cluster policy created in Databricks to configure cluster that defines limits on the attributes available during the cluster creation. Default value is unrestricted. User have an option to download the cluster policy in the local system. |
| Cluster Name | Provide a unique name for the cluster. |
| Cluster Mode | Select Cluster node from the below options available: -Standard -Single Node The Cluster Mode option is not editable on Databricks interactive cluster. |
| Databricks Runtime Version | Provide the Databricks runtime version for the core components that run on the clusters managed by Databricks. |
The below option will be available upon selecting Single Node as Cluster Mode
| Node Type | Provide the node type, if Single Node option is selected as Cluster Mode. |
| Driver Type | Select the driver type from the drop down list. The available options are: - Same as worker - Pool - Memory Optimized If the Driver Type option is selected as Pool, then the Worker Type must also be Pool. Once the created cluster is associated with the pool and the cluster is created successfully, the pool can be utilized in configuring a job. |
| Worker Type | Select the worker type from the drop down list. |
| Terminate After | Provide value in minutes to terminate the cluster due to inativity. |
The below options will be visible upon selecting Standard as Cluster Mode
| Enable auto-scaling | This option is unchecked by default. Check the checkbox to enable auto-scaling the cluster between minimum and maximum number of nodes. |
Provide value for below fields if auto scaling is enabled:
| Minimum Workers | Provide value for minimum workers. |
| Maximum Workers | Provide value for maximum workers. |
| Workers | If auto scaling is unchecked, then provide value for workers. |
| On-demand/Spot Composition | Provide the value for on-demand number of nodes. |
| Spot fall back to On-demand | Check the option to use the Spot fall back to On-demand option. If the EC2 spot price exceeds the bid, use On-demand instances instead of spot instances. |
Databricks Interactive Clusters
Given below is an illustration of the Databricks Interactive Clusters page followed by the steps to create a cluster.
Click CREATE CLUSTER to create Databricks cluster. Provide the below fields:
| Field | Description |
|---|---|
| Cluster Name | Provide a unique name for the cluster. |
| Cluster Mode | Select Cluster node from the below options available: -Standard -Single Node |
| Databricks Runtime Version | Provide the Databricks runtime version for the core components that run on the clusters managed by Databricks. |
The below option will be available upon selecting Single Node as Cluster Mode.
| Node Type | Provide the node type, if Single Node option is selected as Cluster Mode. |
| Driver Type | Select the driver type from the drop down list. |
| Worker Type | Select the worker type from the drop down list. |
| Terminate After | Provide value in minutes to terminate the cluster due to inativity. |
The below options will be visible upon selecting Standard as Cluster Mode.
| Enable auto-scaling | This option is unchecked by default. Check the checkbox to enable auto-scaling the cluster between minimum and maximum number of nodes. |
Provide value for below fields if auto scaling is enabled.
| Minimum Workers | Provide value for minimum workers. |
| Maximum Workers | Provide value for maximum workers. |
| Workers | If auto scaling is unchecked, then provide value for workers. |
| On-demand/Spot Composition | Provide the value for on-demand number of nodes. |
| Spot fall back to On-demand | Check the option to use the Spot fall back to On-demand option. If the EC2 spot price exceeds the bid, use On-demand instances instead of spot instances. |
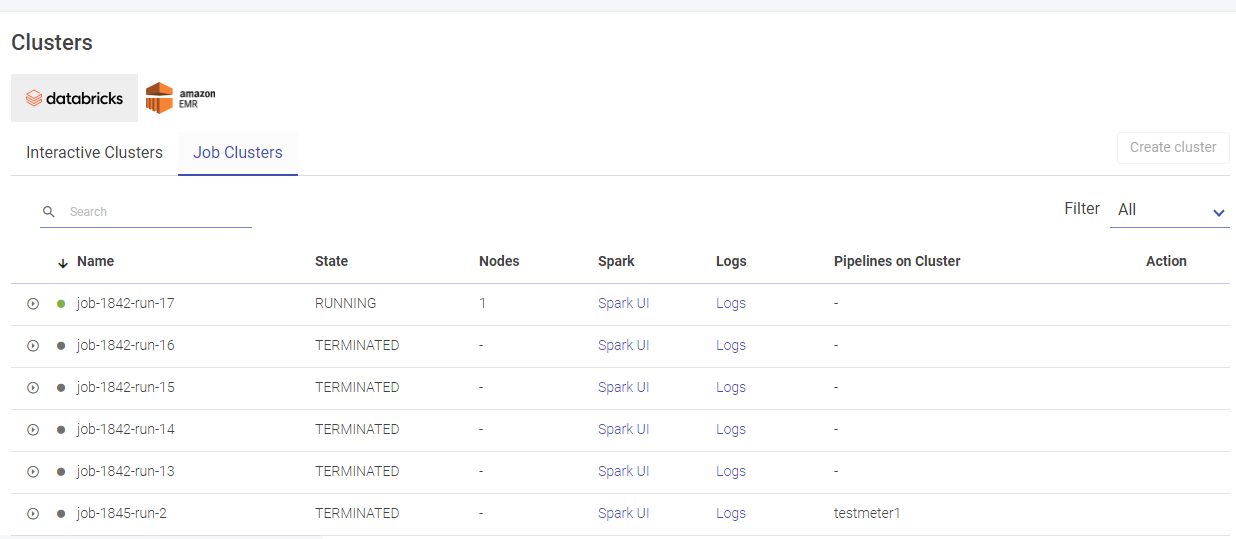
Databricks Job Clusters
Given below is an illustration of the Databricks Job Clusters page.
If you have any feedback on Gathr documentation, please email us!