Create Jobs
To create a job, click on the Create button at the top right of the screen.

Notes:
The user will land at the landing page where he can create a job.
The user is required to specify the name and can provide description of the validation that is to be created.
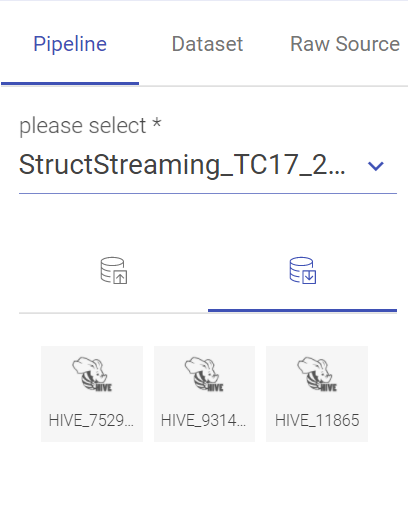
The user can drag and drop the entities (pipeline/dataset/raw source) from the right pallet in the source (entity 1) and target (entity 2) boxes respectively.
The user can add and create validation(s) within a job by clicking on the Add+ icon at the top right of the screen.
Data Validation jobs that are created in one project cannot be accessed in any other project.
Entity Types
Entities are categories into 3 types which are acting as data sources.
Pipeline
Datasets
Raw Source
The user can create a validation for job by using:
| Field | Description |
|---|---|
| Pipeline | Pipelines that are created within the project are listed here as an entity. By selecting a particular pipeline its channel and emitter will be listed. |
| Dataset | The datasets that are created within the workspace or the project will be listed here as an entity. Note: Datasets with a project scope will not be listed as entities in any other project of a workspace for performing Data Validation jobs. |
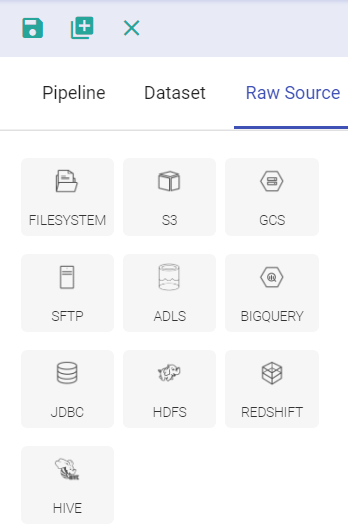
| Raw Source | The user can configure the entities (source and target) during run time. Note: The pipeline and datasets show the list of pre-configured channel and emitters called as entities. While the raw source are those entities that the user needs to configure on its own. If the user does not have a pre-configured entity the user can opt for raw source. |
By selecting the entity1 and entity source in the drag-drop window, the user will be required to mention the name, set configuration, specify the filter criteria and click validate.
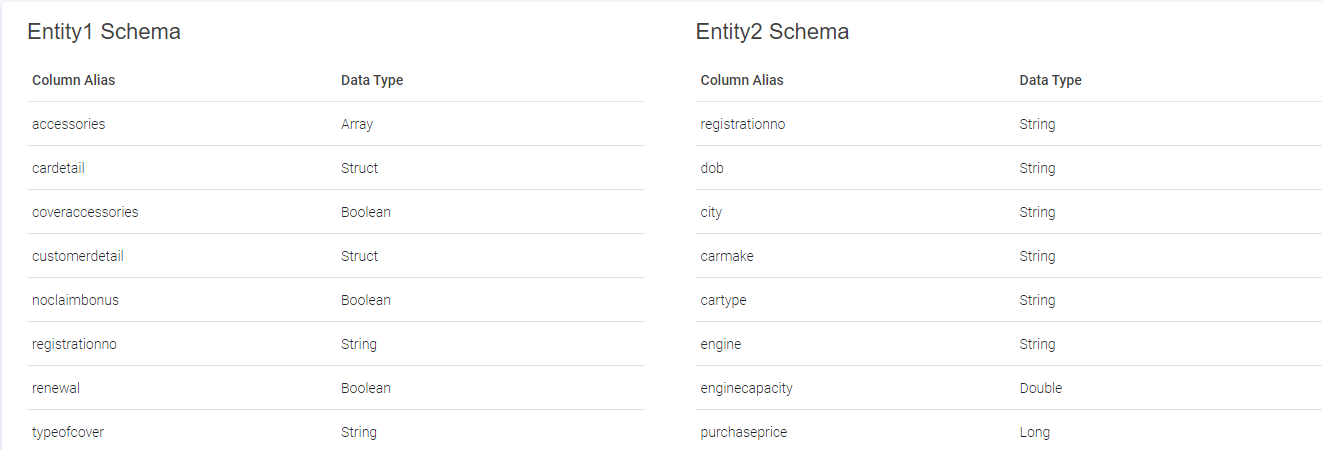
View both Schema
The user can view the schema of both the entities configured by the user.
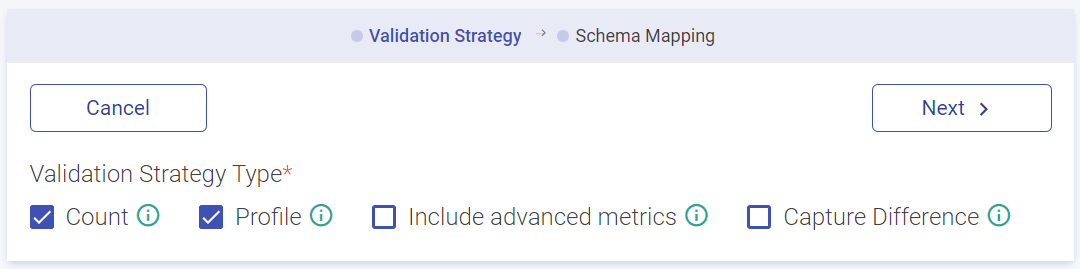
Selecting Validation Strategy
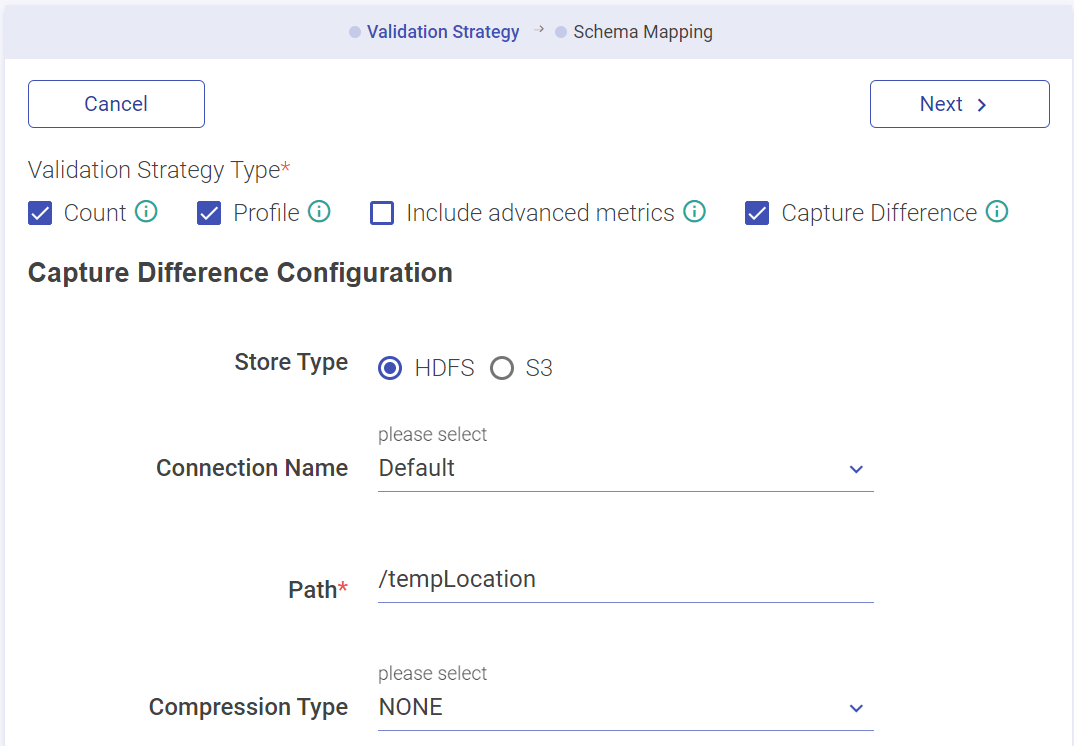
After selecting and configuring the source and target entities, the user can now validate and capture difference between two source entities. The user must select Apply Validation Strategy option. The validation strategy types are:
| Field | Description |
|---|---|
| Count | Provides the count of all the records in across both the entities. For the validation to pass the counts must match. |
| Profile | The user gets an aggregated profile stats of all the mapped columns. The user needs to map schema of two entities for a profile column comparison. |
| Capture Difference | Row to row value based comparison to capture the difference between records. Note: The record difference captured is stored in HDFS or S3. |
Note: If the user opt for profile or capture difference validation strategy types, then the schema mapping section gets enabled as well.
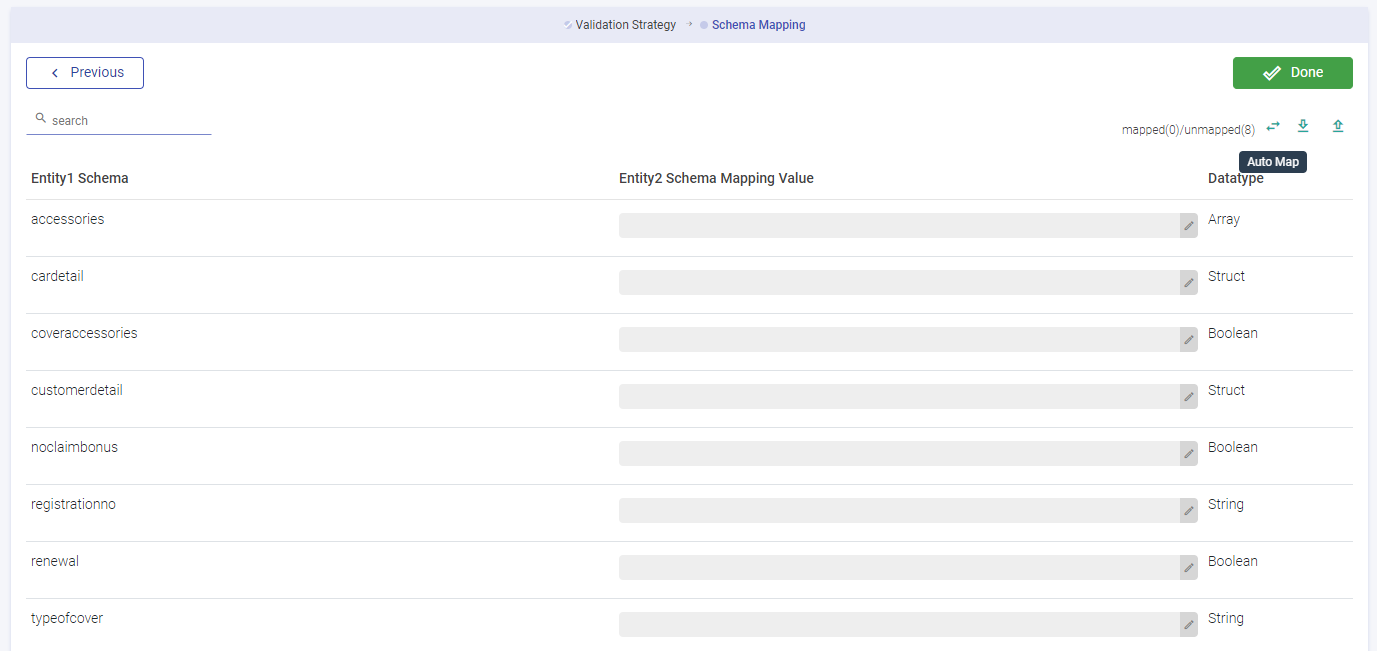
Schema Mapping
While a profile is selected, a column wise metrics can be generated. The user can map the schema against two entities (columns). If all the columns are identical, then auto map option will be active.
Or else, the user can drag and drop the data against the two entities columns. Click Done and save the job.
Note: If the user choses profile strategy or capture difference strategy or both, he would be required to provide schema mapping.
| Field | Description |
|---|---|
| Job Name | Shows the job name. |
| Execution Mode | Sequential: All the validations within a job will run in sequential order one after the other. Parallel: All the validations will run parallelly. |
| Log Level | It controls the logs generated by the pipeline based on the selected log level. Trace: View information of trace log levels. Debug: View information of debug and trace log levels. Info: View information of trace, debug and info log levels. Warn: View information of trace, debug, warn and info log levels. Error: View information of trace, debug, warn, info and error log levels. |
After saving the job by clicking at the save button, the user will land at the data validation listing page.
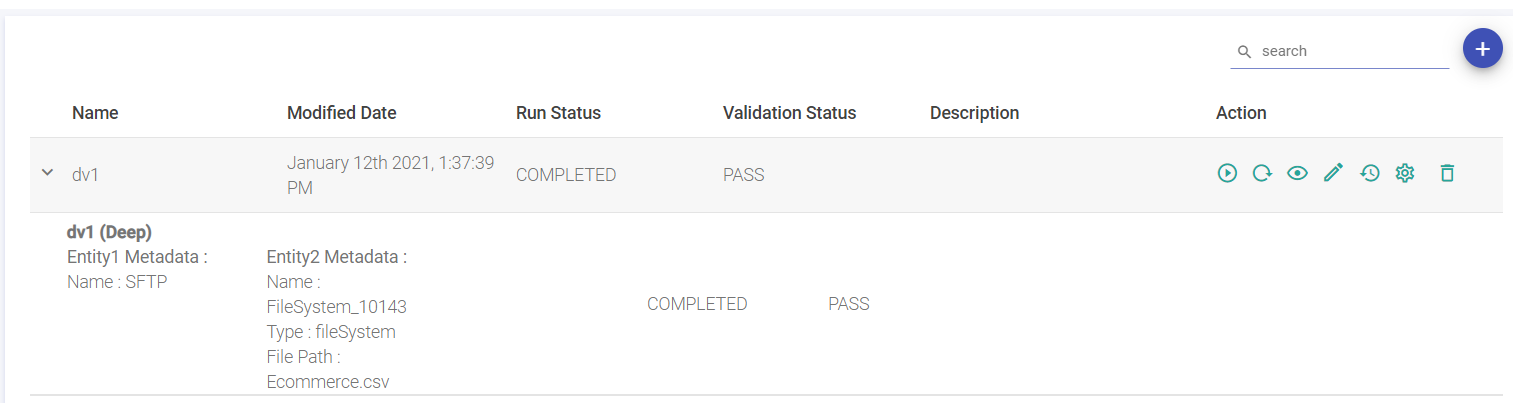
Now, under the action column of the particular created job, click on the Play button to run the job.

Other options available are View Results, Edit, History (option to view the Job history), Configure Job, and Delete.
Now, click on the view results icon under the action column.
Results Page
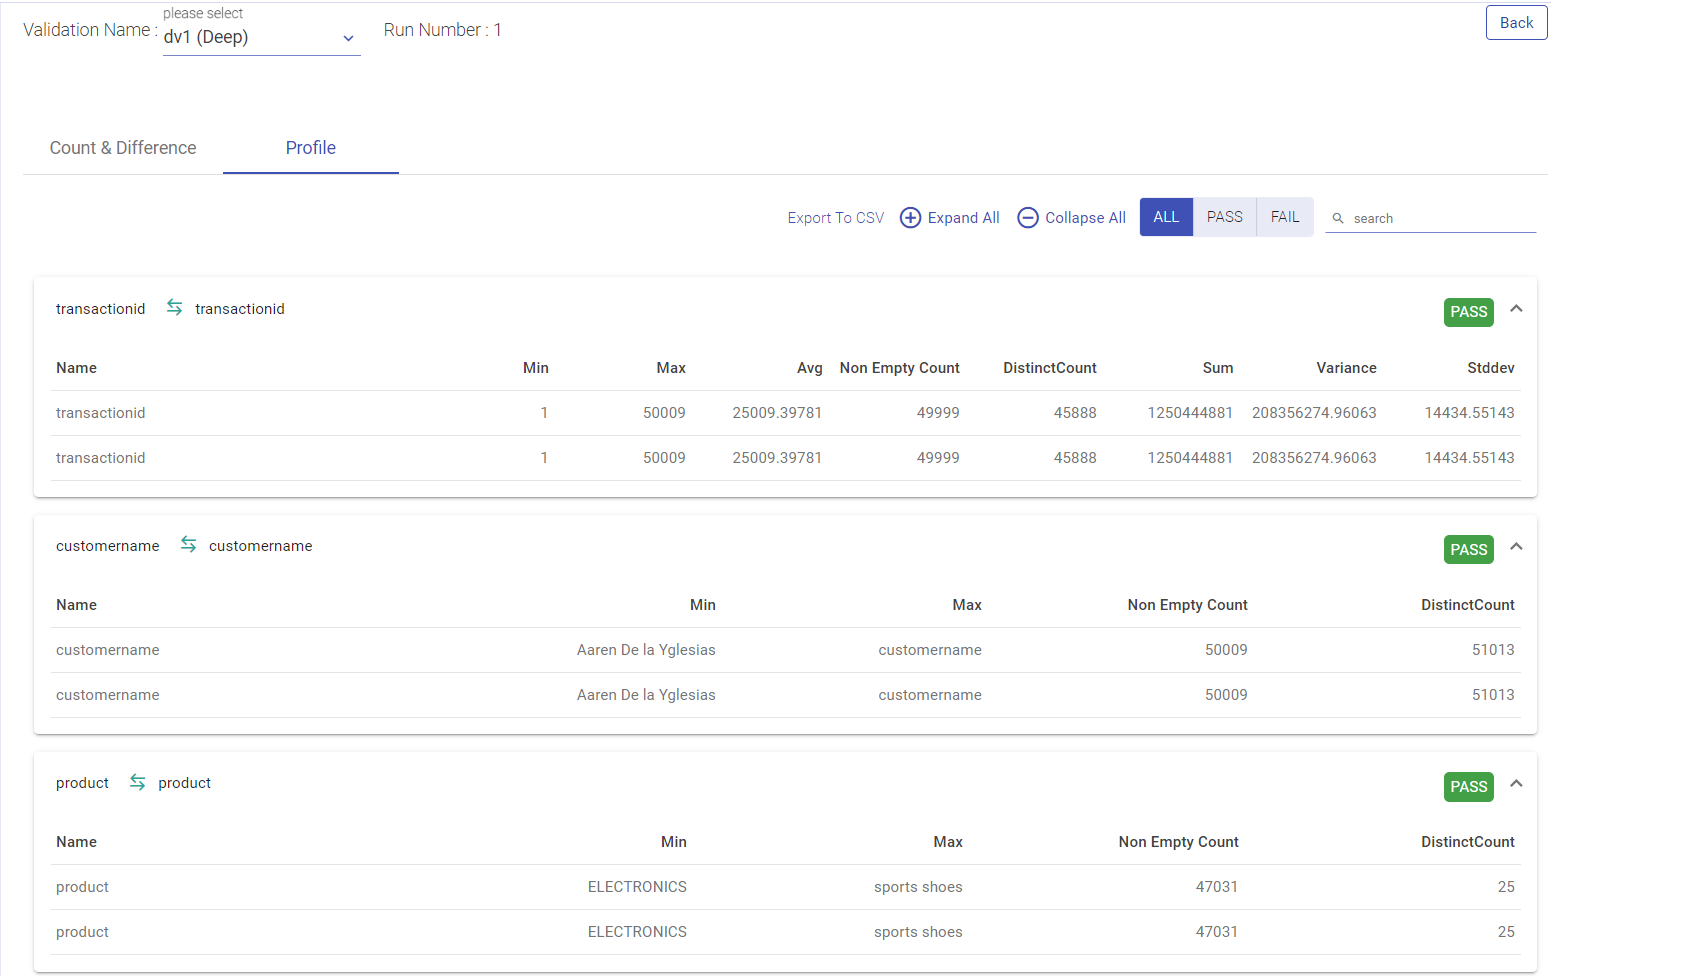
| Field | Description |
|---|---|
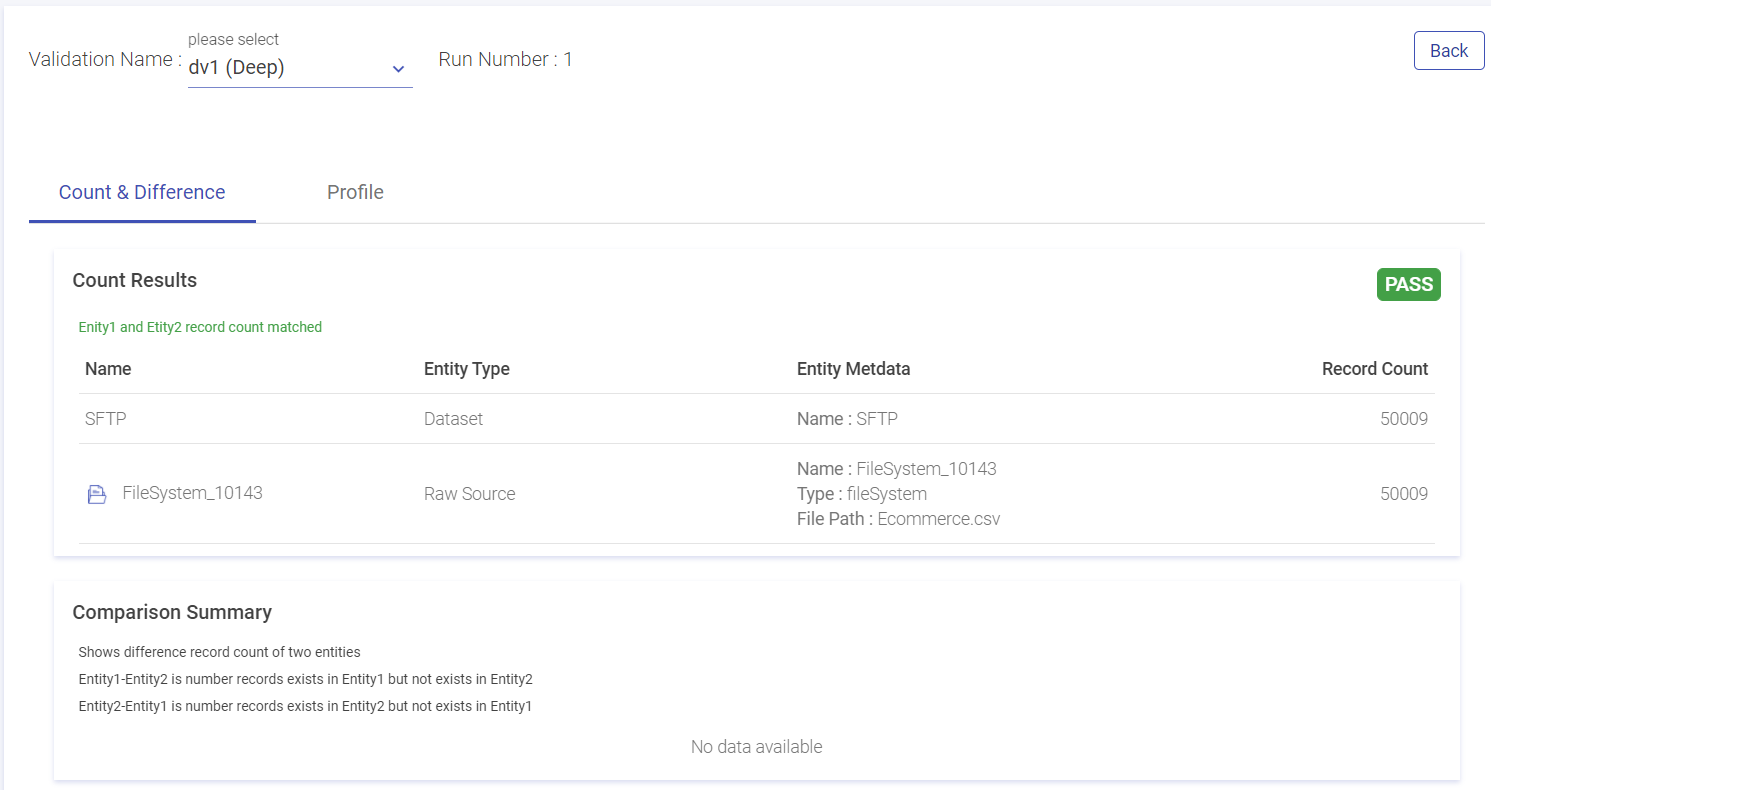
| Validation Name | The user can see result of all the validations by choosing a validation Name drop down. Deep: If the user has opted for count validation strategy type, the validation type will show as shallow. Shallow: If the user has opted for capture difference or profile, the validation type will show as deep. |
| Run Number | The number of times a validation runs is reflected here. |
| Count and Difference | Under the count and difference tab, the count result is reflected after matching the count record in the entities. The user can view the name, type, meta data and total matched/unmatched record count. |
| Capture Difference Summary | If the difference count between the entities is zero, then the validation and capture difference would be pass. If the difference count between the entities is zero, then the validation and capture difference would be pass, else it would fail It shows the count of “unidentical values” in 2 entities. Entity1 -Entity2: All the records that belong to Entity 1 but do not belong to Entity 2. Note: The user can view the mismatched entities via. the dump details path stored either in HDFS or S3 sinks. |
| Profile | It will show column wise aggregated stats of both entities of a validation. If any of the stat is different than the validation is failed, else pass. |
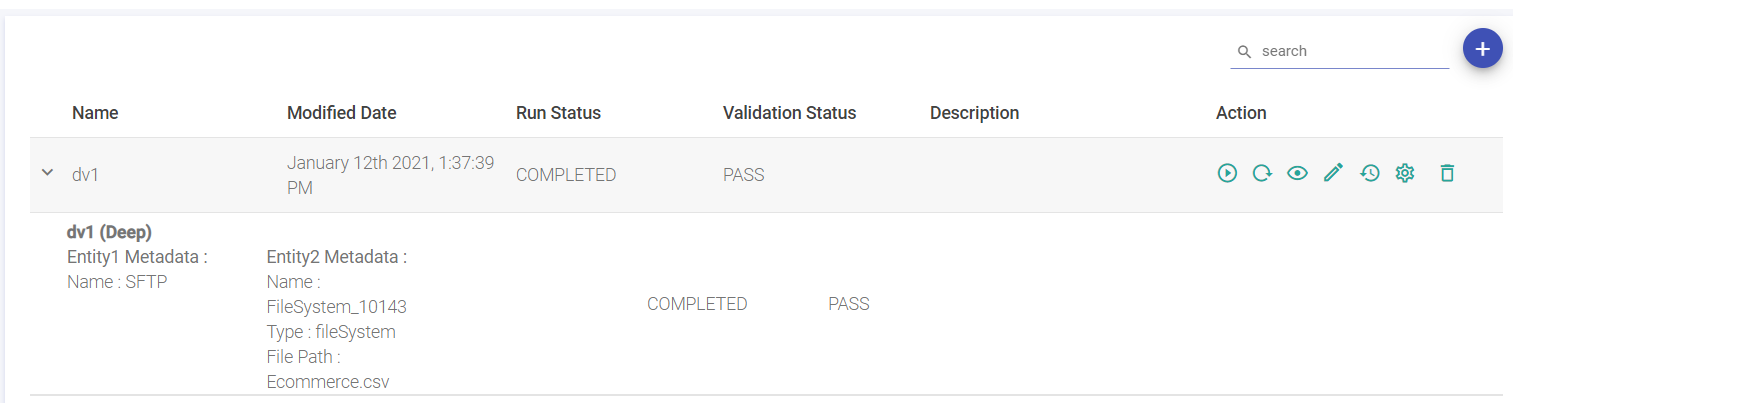
The user can see the Job History from the Action Column from the Data Validation listing page.

Configure Job
| Name | Description |
|---|---|
| Select Cluster | Select IBM Conductor cluster for job configuration. |
| Instance Group Name | Select Instance Group to configure spark job. |
| Spark Master Url | Master URL to submit or view spark job. |
SPARK CONDUCTOR EGO PROPERTIES
IBM Conductor EGO Configuration
| Name | Description |
|---|---|
| Executor Maximum Slots | Maximum number of executor slots. |
| Executor Idle Time | Specifies the duration (in seconds) for executor state to remain alive without any workload running on it. |
| Maximum Slots | Specifies maximum number of slots that an appication can get in master node. |
| Slots Per Task | Specifies number of slots that are allocated to a task. |
| GPU Max Slots | Specifes maximum number of slots that an application can get for GPU task in a master node. |
| Priority | Specifies the priority of driver and executor scheduling for spark instance group. Valid range is 1-10000. Default is 5000. |
To add Environment Variable, click the ADD ENVIRONMENT VARIABLE BUTTON. Option to ADD CONFIGURATIONS is also available.
Click CONFIRM once details are provided in the Configure Job window.
If you have any feedback on Gathr documentation, please email us!