Pipeline Management
Gathr provides tools, such as Auto Inspect, Upload Pipeline, Data Preparation, Download sample project, and Monitor, to manage pipelines at all the stages of its lifecycle.
Local Inspect
Local Inspect connection can be created at any time and from anywhere in the workspace. However, if you do not want to create a connection explicitly, the connection would be initialized automatically when you start Auto-Inspection. However, you can disconnect from it after the pipeline has been created. It is not mandatory for Local Inspect to be in initialized state for a pipeline to be edited and saved.
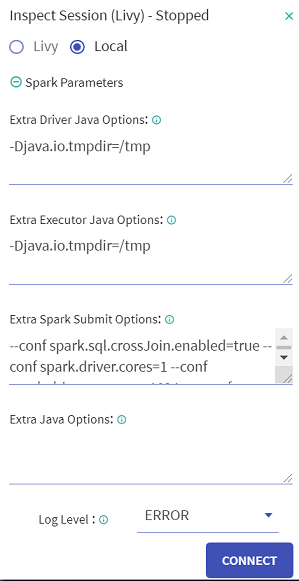
While connecting the Local Inspect session, you can specify additional extra java options by clicking the Spark Parameters option. This parameter is optional.
In Spark Parameter, you can supply Extra Java Options for the inspect JVM process. These parameters are disabled for a superuser.
Validations
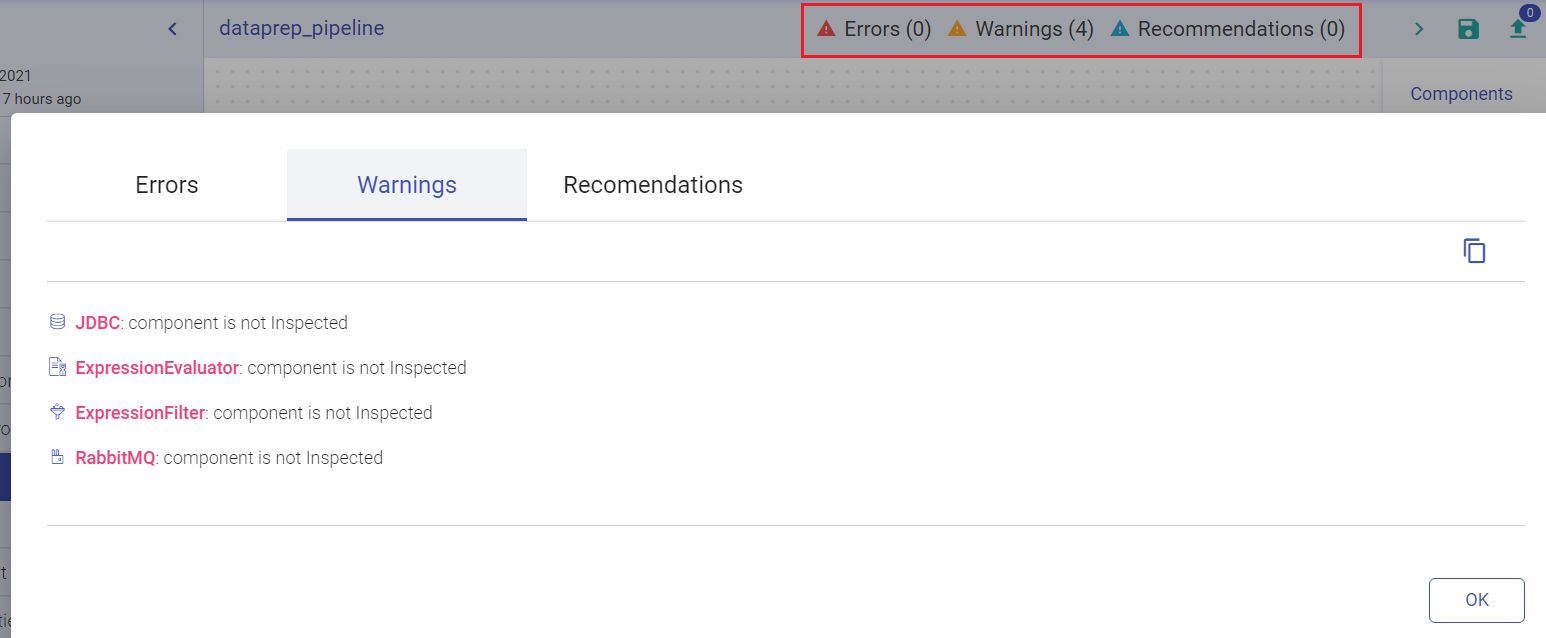
This section provides the notifications details while performing any unsupported operations in pipeline and you will be notified regarding this unsupported operation via the window shown below:
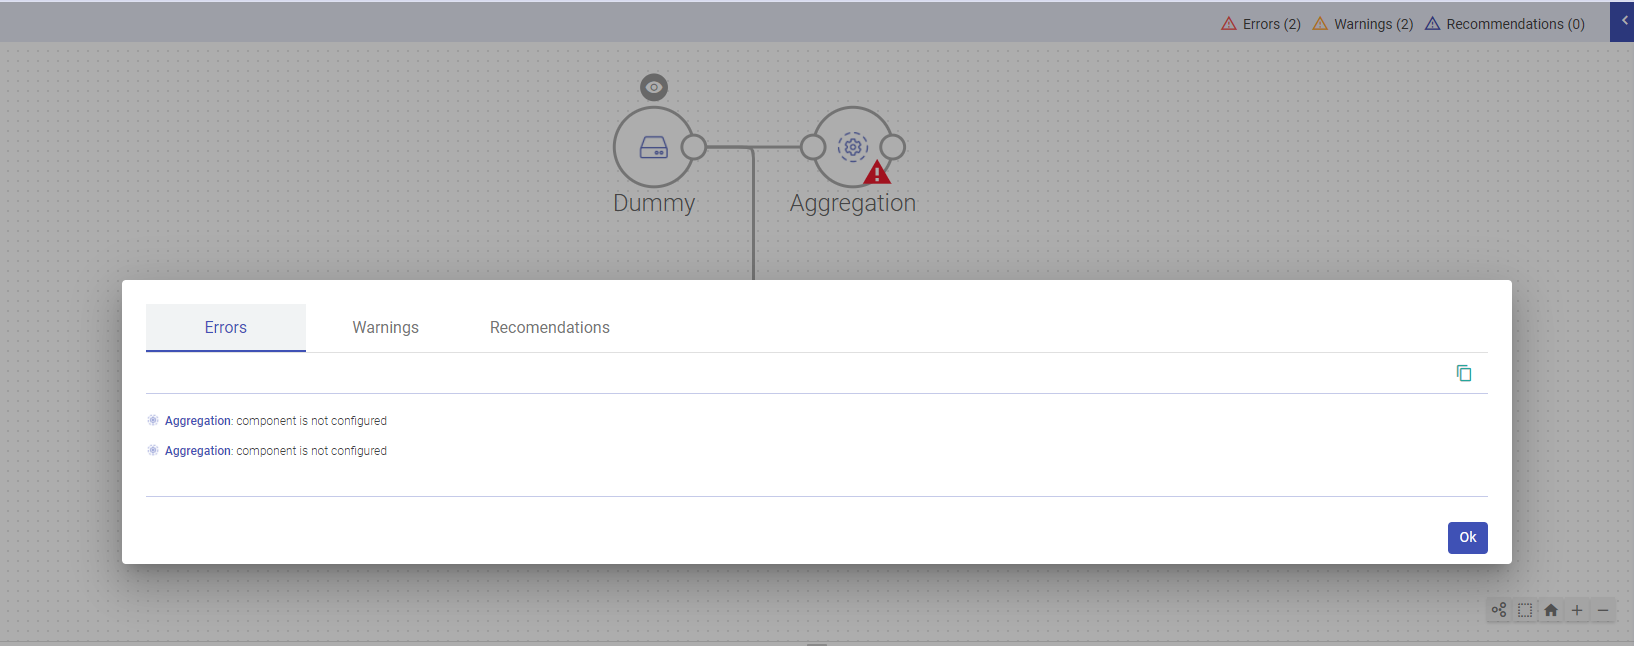
Any operation that will cause an Error, Warnings or Recommendations, will be listed under Pipeline Notifications.
Below mentioned are some of the change notifications that will be generated for the below processors:

Aggregation
Multiple aggregation operations on a streaming dataset are unsupported.
Distinct
Distinct is not supported to be used with streaming dataset.
Sort
Sorting is not supported on streaming datasets, unless it is with aggregation in complete output mode.
Dedup
Dedup is not supported after aggregation on a streaming dataset.
Limit
Limits are not supported with streaming datasets.
Union
Union is not supported between streaming and batch datasets.
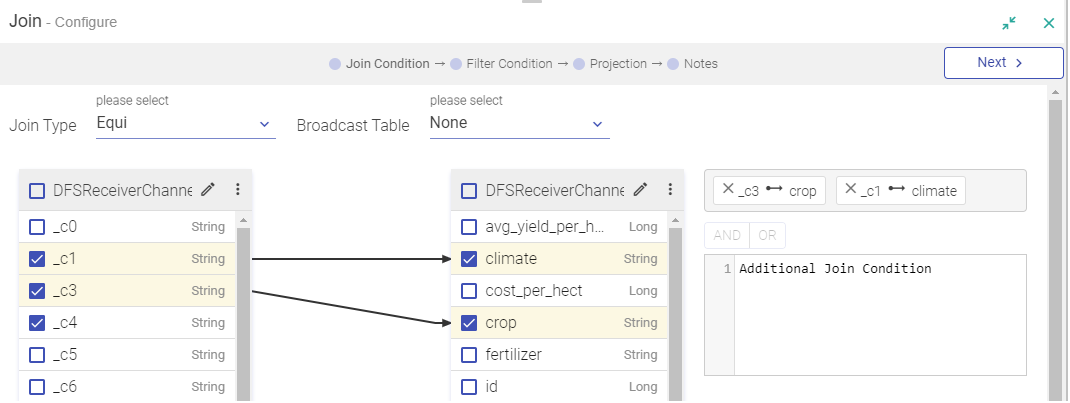
Join
List of Join operations in Spark:
| left Input | Right Input | Join Type | Supported or Not |
|---|---|---|---|
| Static | Static | All Types | Supported |
| Stream | Static | Inner | Supported |
| left Outer | Supported | ||
| Right Outer | Not Supported | ||
| Full Outer | Not Supported | ||
| Static | Stream | Inner | Supported |
| left Outer | Not Supported | ||
| Right Outer | Supported | ||
| Full Outer | Not Supported | ||
| Stream | Stream | Inner | Supported |
| left Outer | Supported | ||
| Right Outer | Supported | ||
| Full Outer | Not Supported | ||
| Static | Static | All Types | Supported |
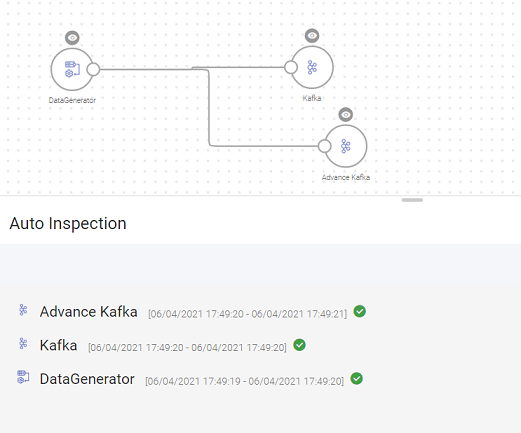
Auto Inspection
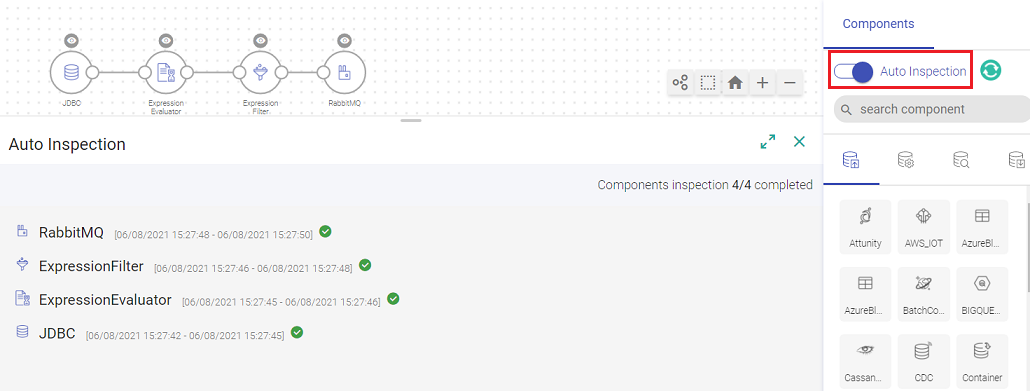
When your component is inspect ready, slide the Auto Inspect button.
Auto Inspection lets you verify the component’s data with the schema as per the configuration of the component. This happens as soon as the component is saved.
Auto inspect is done manually therefore while editing the pipeline, you can choose to not inspect the pipeline. When you edit a pipeline, auto inspect will be off by default.
While editing, you can add/remove new components in the pipeline without auto inspect.
You can auto inspect the properly configured components of the pipeline if the pipeline is not entirely configured.
Also, the auto inspection can be stopped at any point, even while schema is being detected, and pipeline can be saved even if the inspection hangs or inspect fails.
Clicking on this button stops the auto-inspection of an existing pipeline.

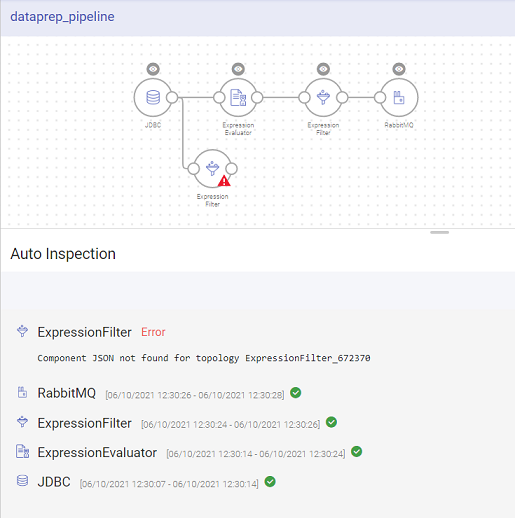
If one of the components is not configured, the auto inspect will run for the configured components only. The auto inspect window will show a notification in Red for the unconfigured component.
A single component can be inspected by clicking on the eye icon on top of the components as shown below:
If a pipeline is saved without inspection, the pipeline tile on the data pipeline homepage will show the warning icon of not being inspected. Once you click on the exclamation mark, it shows the pipeline notifications.
Once the data is loaded from the source it is automatically played through the pipeline. During auto inspect, if the schema gets changed due to any configuration changes, it will not reset the next components however it will show an exclamation mark.
This is how the corresponding configuration, logic and results from each operator is validated while the pipeline is being designed.
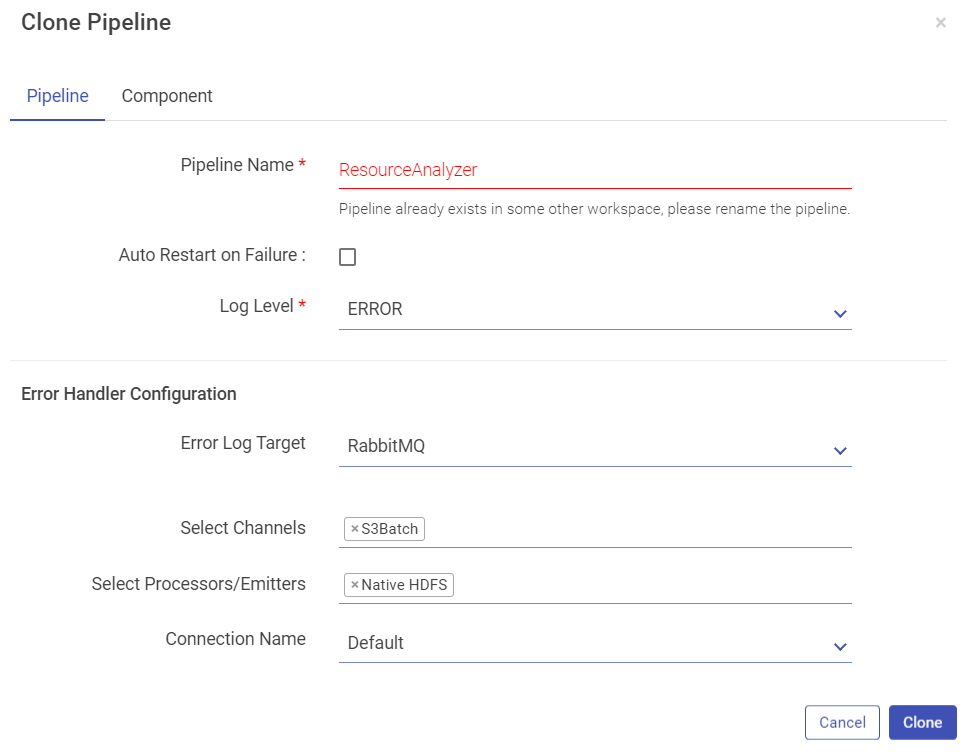
Clone Pipeline
Clone pipeline functionality helps you to create a new pipeline from an existing pipeline by giving it a new name. Typically when configuring the pipeline for newer possibilities, it is very useful to take an existing pipeline and clone it.
Select Clone Pipeline on the pipeline tile.
A pop-up window with pipeline configuration details opens.
Edit the cloned pipeline’s configuration as per requirement, under the tab Pipeline.
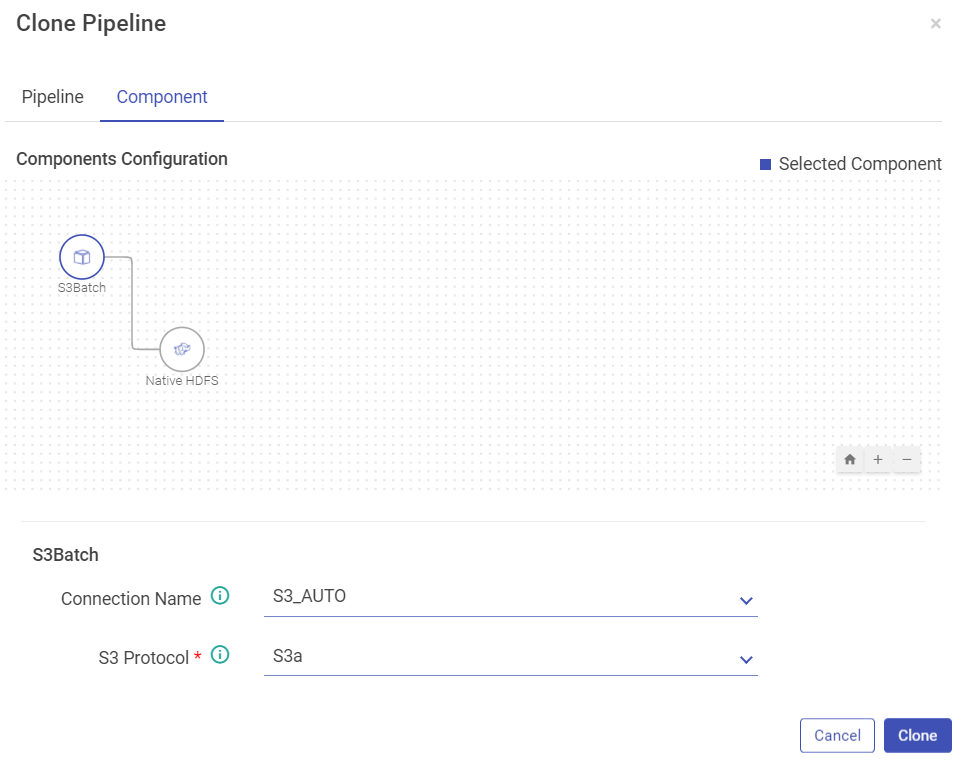
Under the Component tab, you can edit the component’s connection details.
Provide a unique name to your cloned pipeline as shown below:
Below shown is the component tab:
Data Preparation in Gathr
Data preparation is the process of collecting, cleaning and organizing data for analysis. Prepare the data with operations and expressions to generate customized data. Graphs and statistics are also used to present the prepared data.
To perform data preparation, configure a data source (for example, Kafka). Once the data source is configured and saved, you can run inspection on the columns of the schema that are reflected in the Data Preparation window. This allows you to build the pipeline while you are interacting with the data.
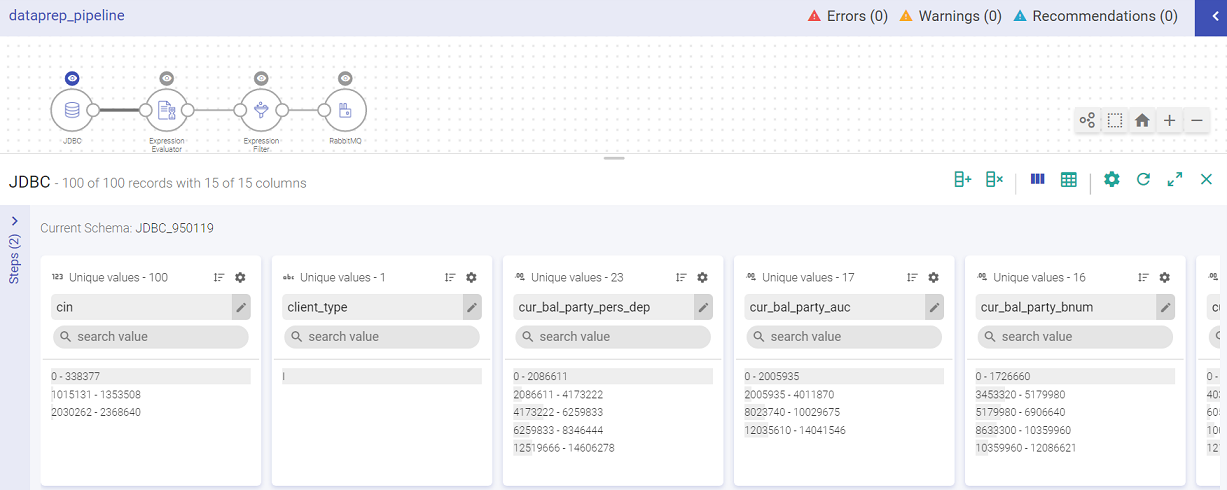
To perform Data Preparation, click on the eye icon of any component (Data Source, Processor or Emitter). A sub-section on the pipeline canvas opens with the component’s schema displayed in Data Preparation window.
In the example below, an Agriculture data file is uploaded. It holds information about crop, soil, climate, pests, season, average_yield, cost, high_production_state, crop_wastage and fertilizer.
By default, the data is displayed in Summary view with Profile Pane on the screen.
Data Pane: The schema takes the form of columns and is divided in records (as shown in the records). You can apply operations on an entry of a column or any possible combination, corresponding to which a new expression is added, which keeps creating your pipeline as in when you apply more actions.
The data preparation window has the following options:
| Property | Description |
|---|---|
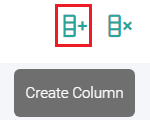
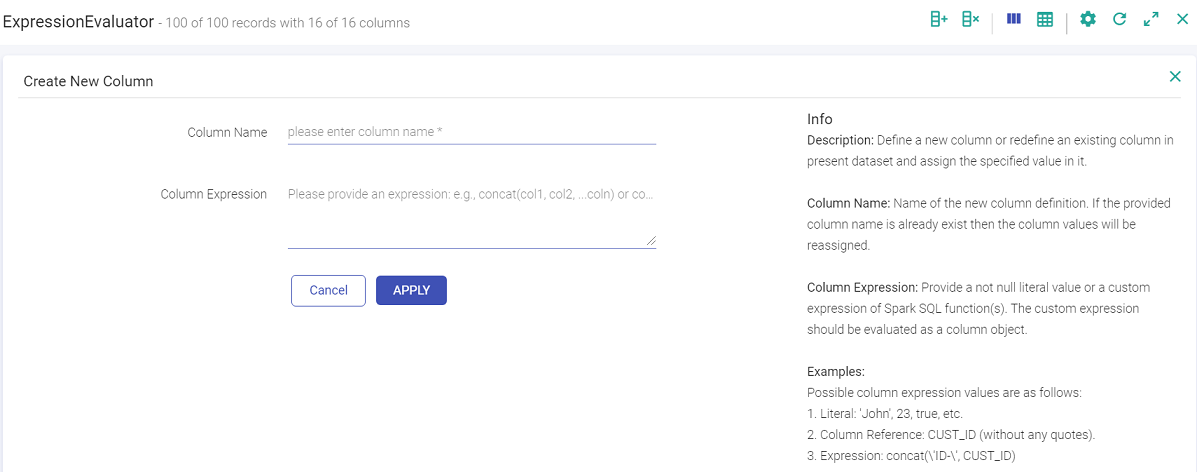
| Create Column | Create a new column by clicking on Create Column button:
You can specify the column name, expression, and a new column will be created with the given values. |
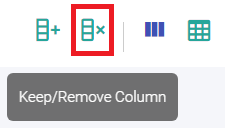
| Remove Column | Remove the columns, which are no longer required. Click on the Keep/Remove button and selected columns will be kept/removed respectively.
|
| Profile Pane | Click on the Profile Pane button. The profile pane shows distribution of data in each column. It allows to create an interactive data pipeline. The bar graphs corresponding to the values in each column will be shown in tabular format. |
| Data Pane | Click on the Data Pane button. This pane shows the data in its original form. You can arrange the columns in ascending and descending order by clicking on the column headers. |
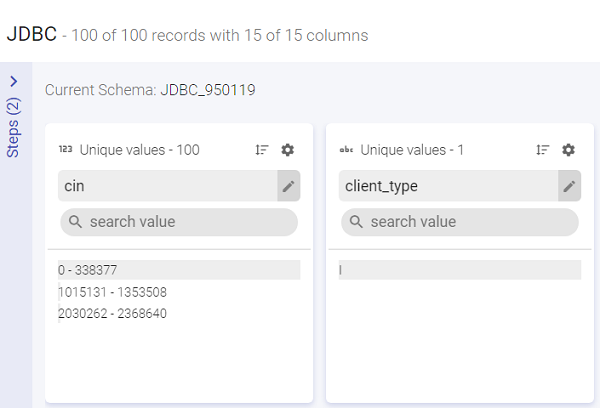
| Display Columns | Select the columns, which are to be displayed. The columns will not be removed from the dataset schema, but not displayed in data preparation window. |
| Reload Inspect | Clicking on this button reloads the auto-inspect data for the selected component type. |
| Maximize | This button is used to maximize the auto inspect window. |
| Close | This button is used to close the auto inspect window. |
| Search value | Searches particular value(s). |
Data preparation window has type2 more views: Summary View and Detailed View.
Summary View shows the summary of number of records out of total records and also the columns in each record. It also shows the name of the current schema.
The Detailed View shows details of a selected column value and its corresponding rows.
Detailed View has eight sections. All the sections are displayed and explained below:
| Number | Field | Description |
|---|---|---|
| 1 | Data Type of the Column | Shows the data type of the column. Each data type is denoted uniquely by numbers-123 for Numeric, abc for String. |
| 2 | Unique Value | This represents the count of distinct values of the column across all the records. |
| 3 | Sort | This option allows you to sort all the records on basis of a specific column by Count (Ascending or Descending) and Sort by Domain (A to Z or Z to A). |
| 4 | Operations | Operations that can be performed on the respective column of the schema. |
| 5 | Column Name | Name of the column. It is an editable field. |
| 6 | Search Value | Allows you to search for a record. |
| 7 | Scrubber | Corresponding to the unique values of a column is a scrubber. The scrubber is only available when there are more than 10 unique values. The scrubber’s height can only accommo¬date 50 records therefore, if the records are above 50 then, it shows the highest value in a batch. |
| 8 | Records | All the values/records of the column are listed. |
An important and elaborate section amongst the ones mentioned in the table above is Operations.
Operations
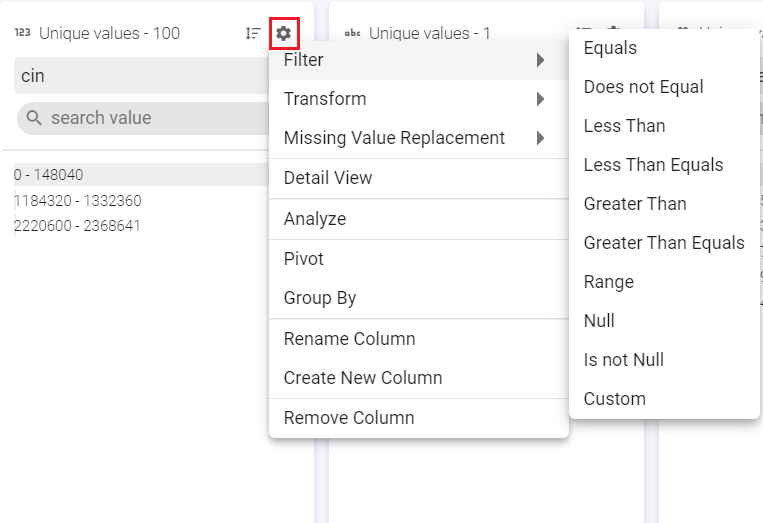
This option is at the top right of the column. The gear icon, which opens a sliding window, shows a list of operations (shown in image below) that can be performed on the respective column of the schema.

Whenever any operation is applied on a column (s), a step is created and reflected in the left section of Data Preparation Window. Also, a processor is added to the pipeline, depending on the operation applied.
These data preparation processors are defined below in the Data Preparation Processors section.
a. Filter
Filter the values based on a set of criteria (shown in image below) such as, Equals, Contains, Regex match and so on. Custom filter can be used for a custom value.
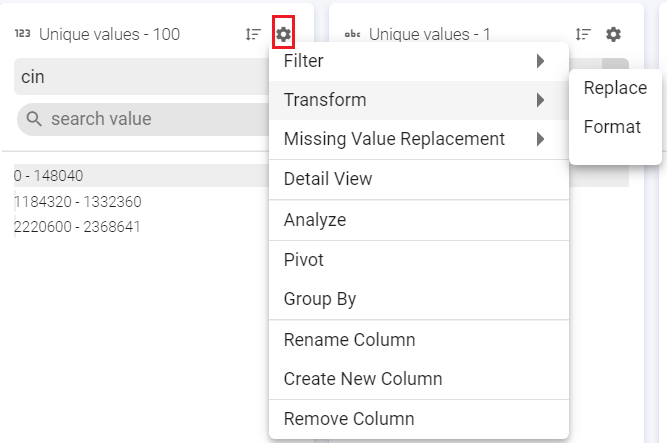
b. Transforms
Filter the values based on a set of criteria (shown in image below) such as, Equals, Contains, Regex match and so on. Custom filter can be used for a custom value.
c. Missing Value Replacement:
Replace the missing or null values with either Literal or Expression value.

Literal: Replaces Null and/or empty string values with a specified string literal.
Expression: Replaces Null and/or empty string values with a specified expression value.
d. Analyze
Under Analyze, you can view the Null values of the selected column.
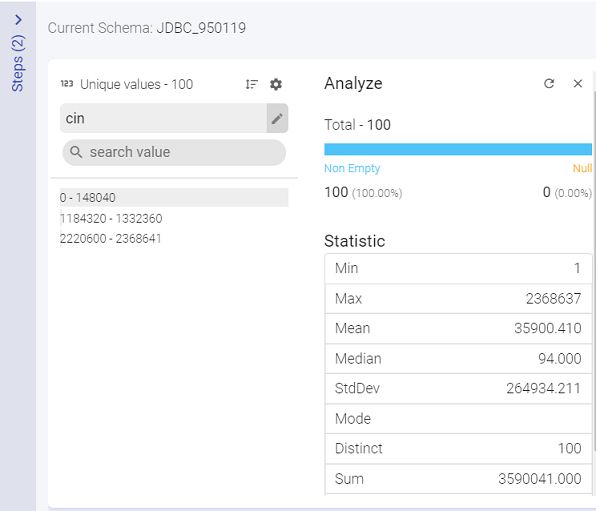
Under Statistics, you can view the mathematical statistic/value of the entire column in the form of:
Minimum
Maximum
Mean
Median
Standard Deviation
Mode
Distinct
Sum
Range
e. Pivot
Pivot operation is a kind of aggregation where type1 (or more) of the grouping columns has its distinct values transposed into separate columns.
Original Data
| A | B | C | D |
|---|---|---|---|
| apple | type 1 | small | 1 |
| apple | type 1 | large | 2 |
| apple | type 1 | large | 2 |
| apple | type 2 | small | 3 |
| apple | type 2 | small | 3 |
| banana | type 1 | large | 4 |
| banana | type 1 | small | 5 |
| banana | type 2 | small | 6 |
| banana | type 2 | large | 7 |
Pivot Operation in Gathr
Pivot column – C
Grouping fields – A, B
Pivot values – small, large
Type of aggregation – Sum
Aggregation Column - D
Pivoted Data:
| A | B | large | small |
|---|---|---|---|
| apple | type 2 | null | 6 |
| banana | type 2 | 7 | 6 |
| apple | type 1 | 4 | 1 |
| banana | type 1 | 4 | 5 |
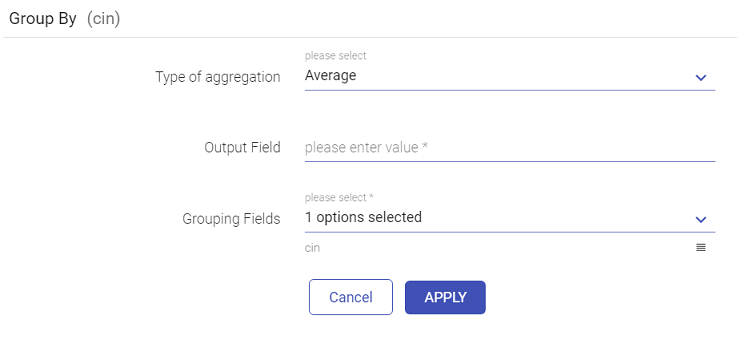
g. Group By
You can apply aggregation on a column using Group By operation and save the output in a field with or without grouped columns.
h. Rename Column
Rename the column name.
i. Create New Column
Create a new column using this filter.
j. Remove Column
Remove the selected column.
Data Preparation Processors
Data Preparation operations add following processors in your data pipeline:
Expression Filter
Expression Evaluator
Rename
Select
Drop
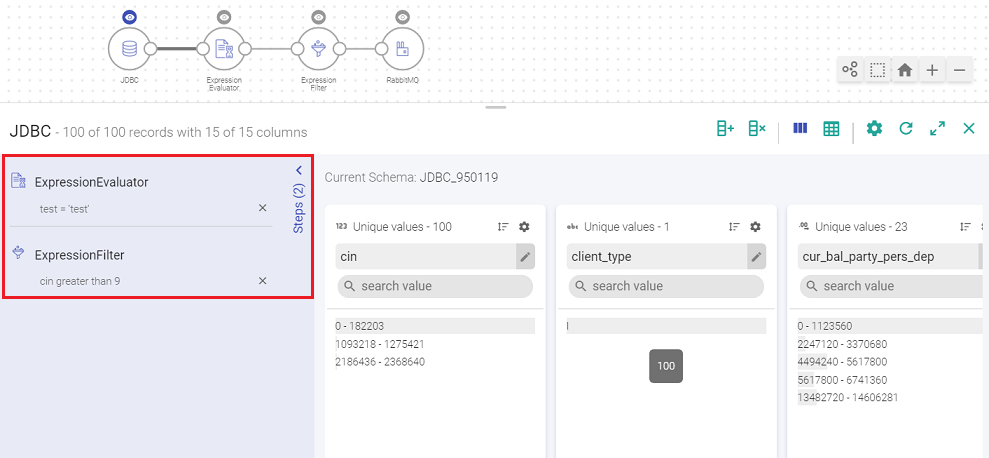
Data Preparation steps appear on left side of inspect window, as a sliding panel.
The data preparation operations when performed keep getting added to the data pipeline and are reflected in data preparation steps.
Even when data preparation steps are added manually in a pipeline, they are reflected in data preparation steps.
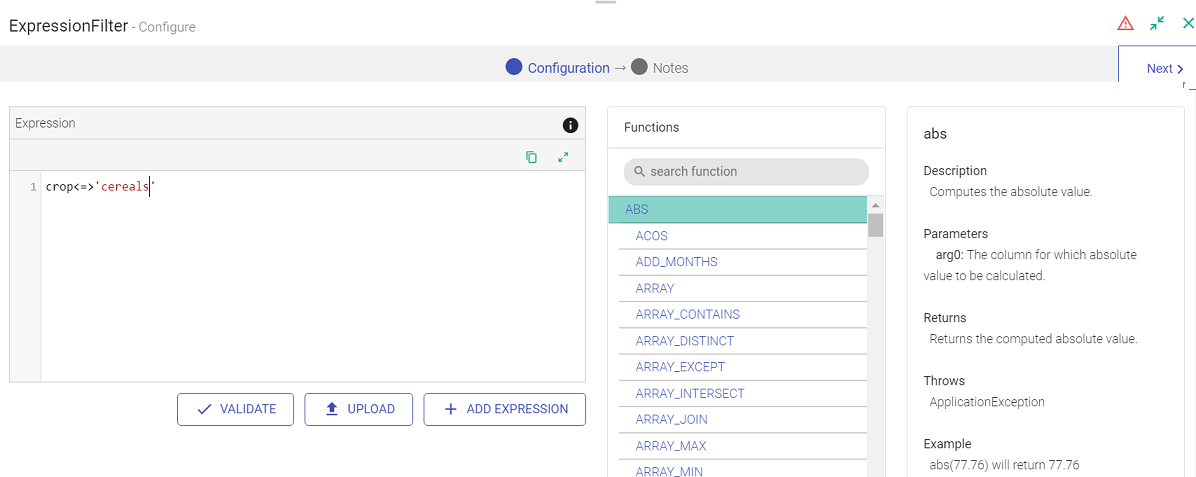
Expression Filter:
Expression Filter enables filter operations on the data column.
This processor gets automatically added on the canvas once you apply the filter operation.
For example, let us add the filter criteria as “crop” equals “cereals”.
| Field | Description |
|---|---|
| VALIDATE | Validates the expression specified. |
| UPLOAD | Expressions can be uploaded using this option. |
| ADD EXPRESSION | Additional expressions can be added using ADD EXPRESSION button. For example, if you want to filter out “wheat” from the given crops, you can write the following expression: crop <=> ‘wheat’ |
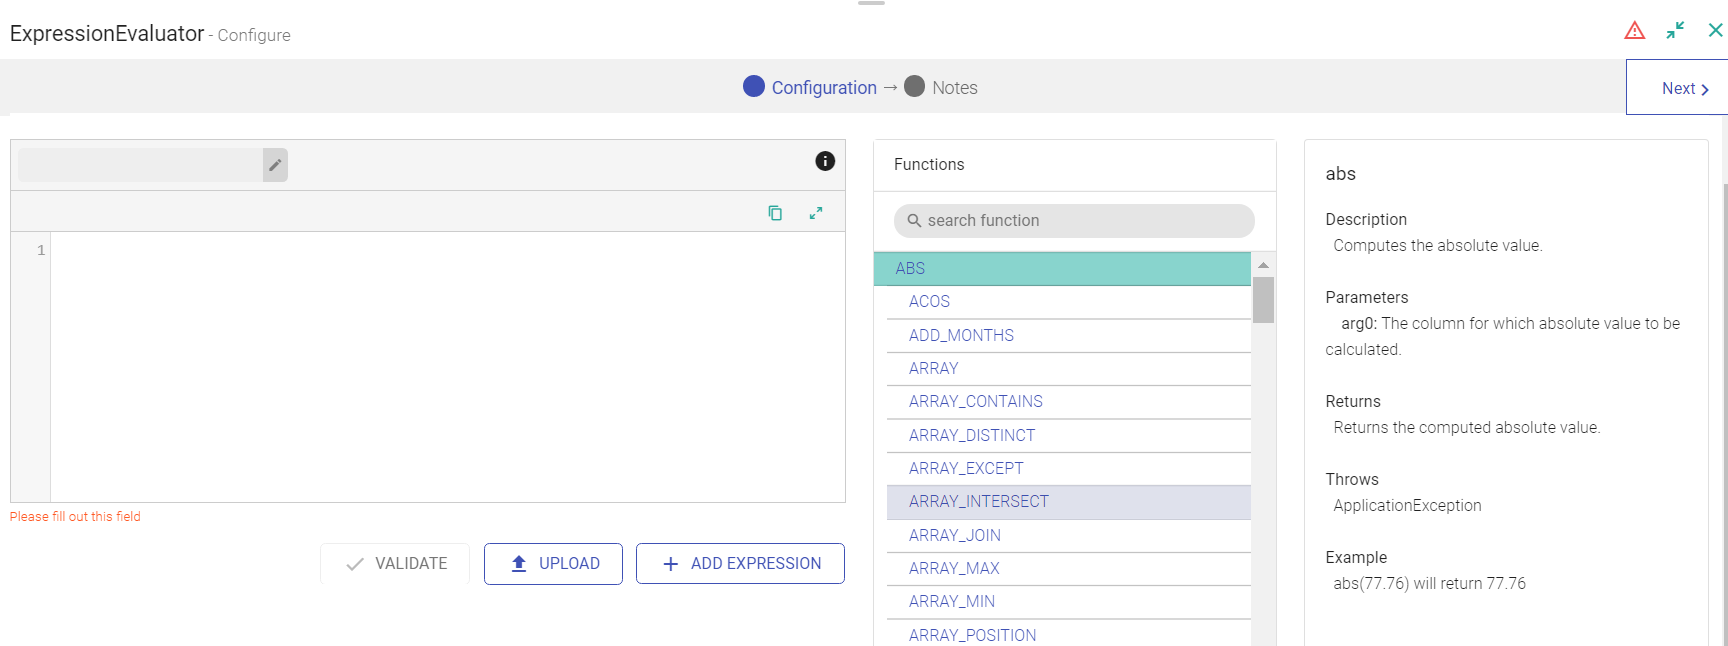
Expression Evaluator
Expression Evaluator is used when you want to perform transform operations on the data columns. This processor gets automatically added on the canvas once perform any transform operation on the data columns.
| Field | Description |
|---|---|
| VALIDATE | Validates the transform expression corresponding to the operation applied. |
| UPLOAD | User can upload expression file. |
| ADD EXPRESSION | Additional expressions can be added using ADD EXPRESSION button. For example, write below expression to change the column name Soil to uppercase. Expression: Upper(soil) |
Scheduling
To execute a workflow periodically, click on the Scheduling tab and select any of the following option to schedule.
To access the Scheduling Tab, go to the Data Pipeline home page and click on the ellipsis.
The user can schedule a Batch Data Pipeline in fixed intervals through the Scheduling option. The pipeline can be scheduled by using two options i.e., Normal Scheduler and Cron Scheduler
Normal Scheduler
To schedule a pipeline using the Normal Scheduler option, follow the below steps:
| Field | Description |
|---|---|
| Schedule | User can schedule the pipeline for Days, Hours or Minutes. Days: The user can specify the number of days for which the data pipeline scheduling can be set. Hours: The user can specify the number of hours for which the data pipeline scheduling can be set. Minutes: The user can specify the number of minutes for which the data pipeline scheduling can be set. |
| Number of Days | The user can specify the number of days for which the data pipeline scheduling can be set. |
| Repeat Count | The user can specify the number of times a pipeline has to be repeated. |
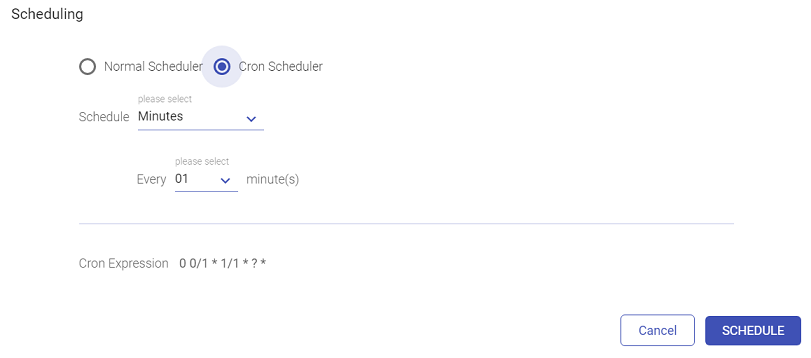
Cron Scheduler
The user can schedule a pipeline for the below mentioned time frames:
Minutes
Hourly
Daily
Monthly
Yearly
If Monthly is selected, then you can choose from within the options shown below:
SCHEDULE/UN-SCHEDULE: This action will Schedule/un-schedule any scheduled workflow/pipeline and mark all the coordinated actions as terminated that are in running or waiting state.
The History of the pipeline run can be viewed under the History tab:
| Field | Description |
|---|---|
| Validate | Validates the transform expression corresponding to the operation applied. |
| ADD EXPRESSION | Additional expressions can be added using ADD EXPRESSION button. |
Auto Inspect Subsequent Sections
Whenever a column is either modified or removed in a component, a message will appear asking whether you want to auto-update subsequent components or not. When you click on Yes, the pipeline auto-updates the subsequent components and will stale all those components that will get impacted by the modification or removal of a particular column from the previous component.
As shown, Expression Evaluator is being updated:

A Warning will be displayed for the components that fail auto-update operation:

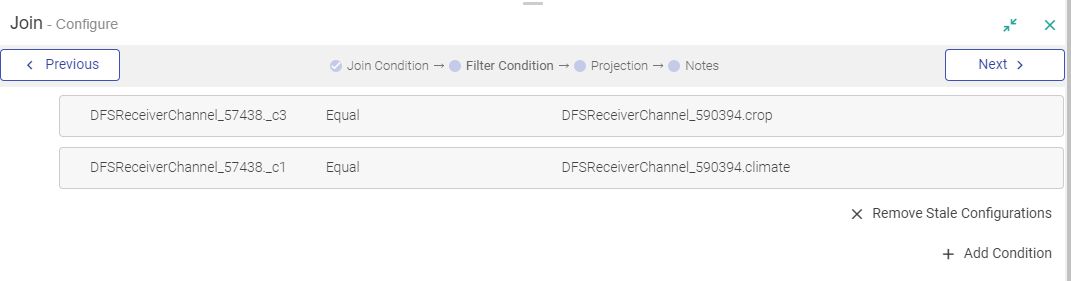
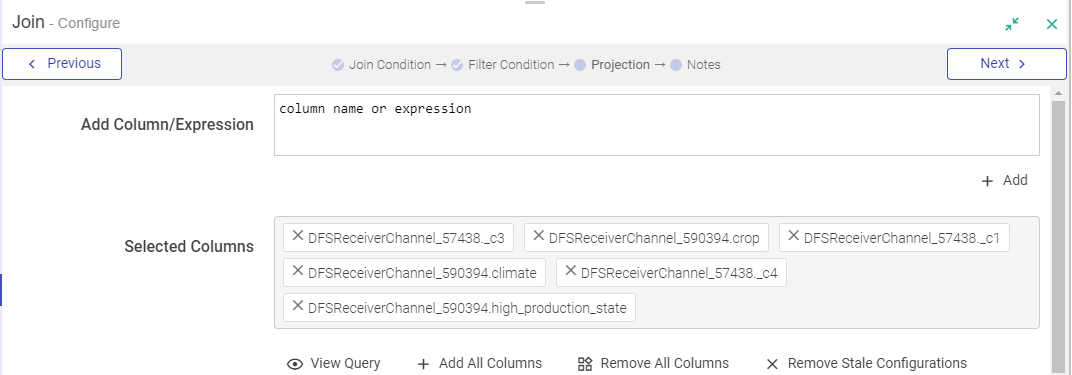
Remove Stale Configuration
In a Join Processor, if any field is removed from the source dataset, then that field will be marked in Red. Also in case the same field is used in any condition.
You can remove all red columns by clicking REMOVE STALE CONFIGURATIONS and in the projection pane of join processor.
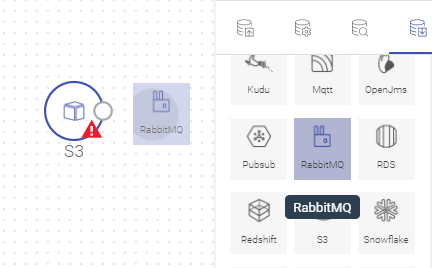
Auto-connect Components
Drag, drop and connect a component with auto-connect feature.
Drag a component near an existing valid component, and as the dragged component gets closer to the available component on canvas, they are highlighted. Drop the component and it will be connected to the data pipeline.
For example: In the following image, RabbitMQ component was dragged near S3 and S3 is highlighted. Once RabbitMQ is dropped near S3, both the components will get auto-connected.
Version Control
Version control allows you to create a version of a data pipeline.
Gathr supports version control system with Gathr Metastore.
The pipeline versions will get saved in underlying database of Gathr.
A Working Copy is the current version of the copy or the first (0) version of the copy.
The pipeline editing is performed on the working copy, always.
To create a version:
First way is when you re-save an edited pipeline, you get an option to Create Version.
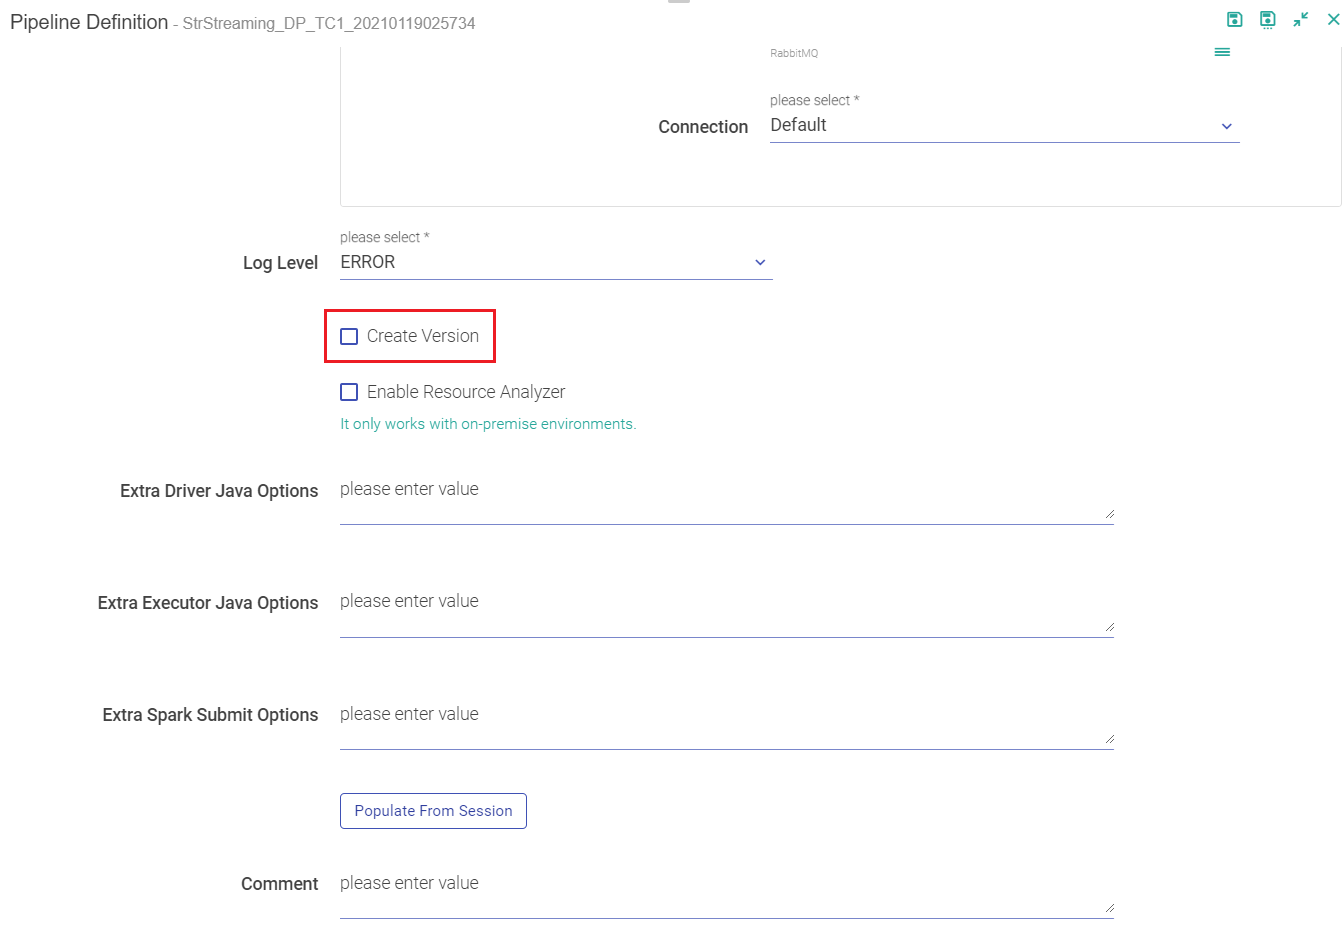
Second way to enable version on your pipelines is when you edit and save the pipeline. Amongst the option of saving the pipeline is Create Version and Switch Version button.
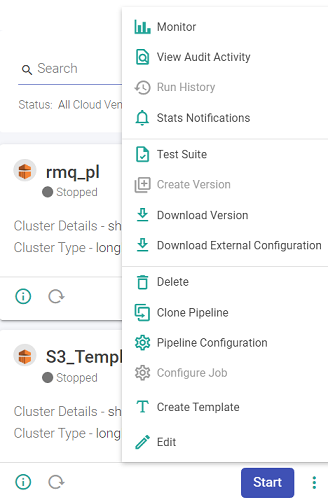
Third option to create a version is by the pipeline tile.
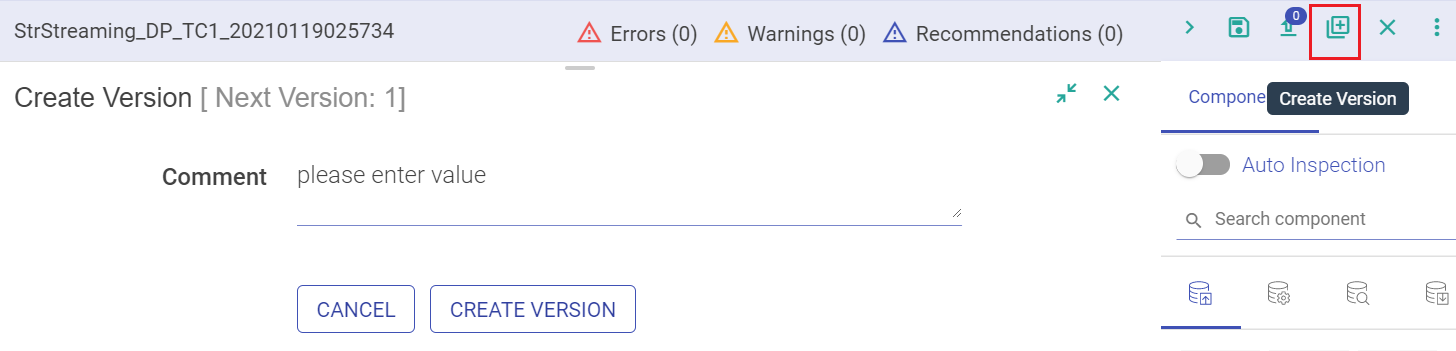
For option 2nd and 3rd, the window show below opens.
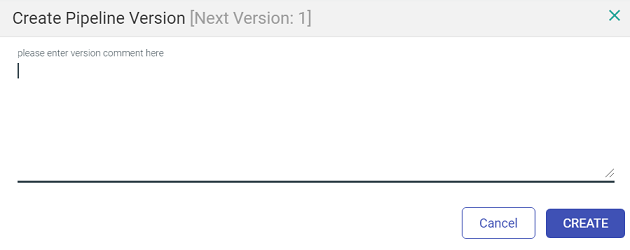
Mention a description or a comment for the version and click on Create Version. Once you save the version, the last version on the pipeline changes from ‘Working Copy’ to Version 1.
When user selects any one of the options to create the Pipeline versions, there will be a notification displayed stating “Version added in Queue for creation” followed by “Version creation completed”.
A pipeline remains a working copy as long as no other version is created. Once you save a version, next to the title ‘Create Subsystem version’, is the notification of the next version that will be created.
Switch Version
If you want to switch the version of a pipeline, click on Switch Version on the pipeline editor page and choose a version. It will change the pipeline as per the selected version.
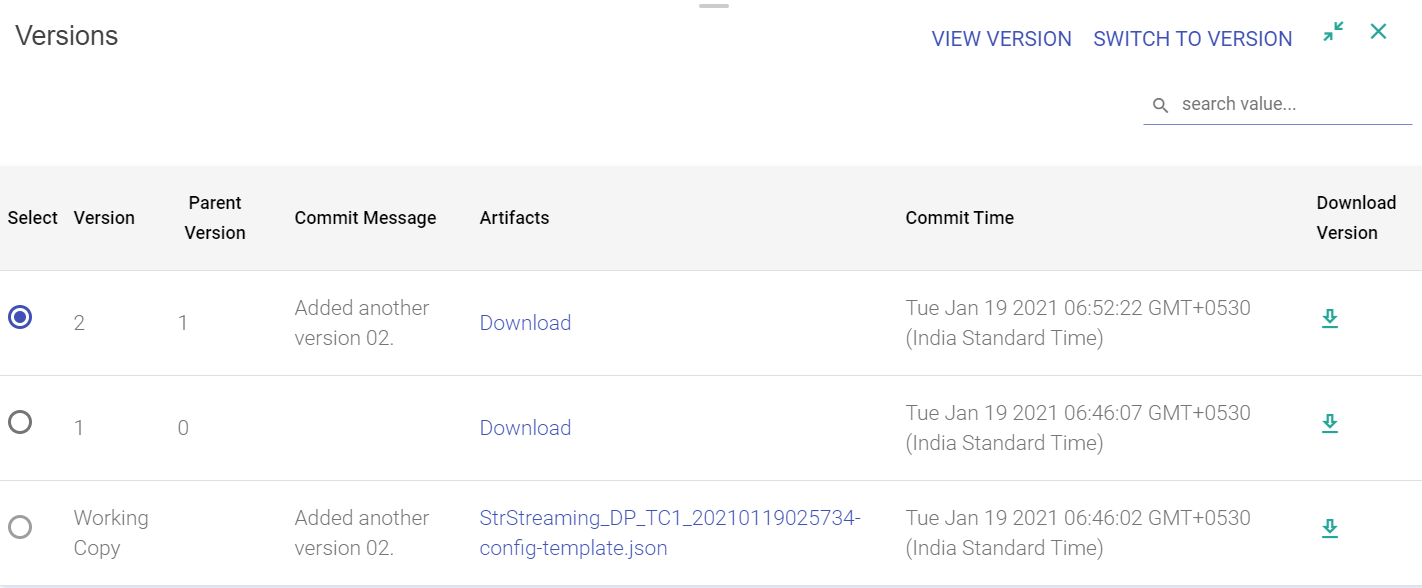
It is the Working Copy that is loaded to a newer version. Editing is always performed on the Working Copy of the pipeline.
Download Version
Download Version from pipeline tile allows you to download a version of the pipeline.
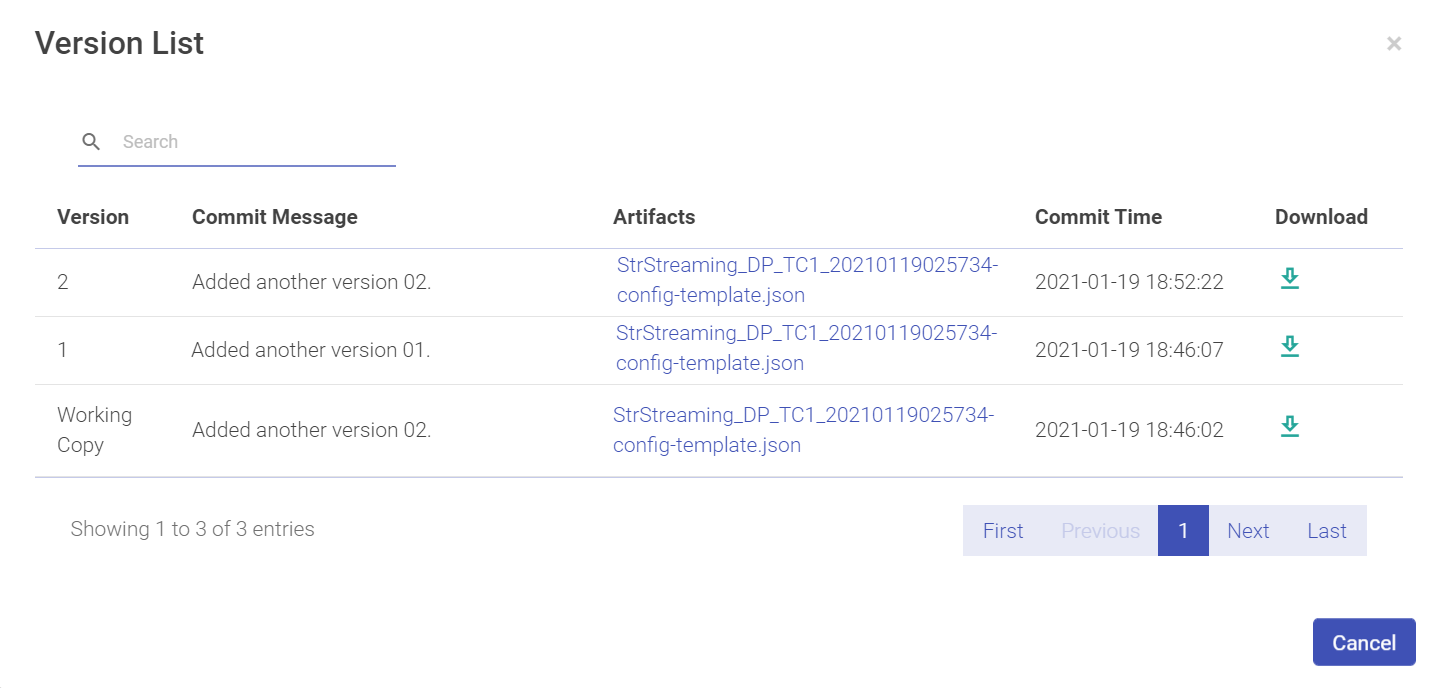
Click on the Download arrow to download the pipeline.
| Property | Description |
|---|---|
| Version | Version number of the pipeline. |
| Commit Message | Commit message description. |
| Artifacts | The artifact uploaded. |
| Commit Time | The commit time that the pipeline was committed as a version. |
| Download | Download the pipeline. |
Download/Upload Pipeline
Download Pipeline
A pipeline can be downloaded along with its component’s configurations such as Schema, Alert configuration, and Registered entities.
Upload Pipeline
A pipeline can be uploaded with its component configurations such as schema, alert definitions and registered entities.
To upload a pipeline, click on the Upload Pipeline button on the Data Pipeline-home page.

If there is any duplicity in the pipeline components, a confirmation page will appearas shown below:

Click on Create Version button to see the Exported Pipeline Details page that provides the details of the pipeline and the environment from where it was downloaded.
Click on Overwrite button and the existing pipeline will be overwritten with the current configuration of the pipeline, which was uploaded.
To create a new pipeline, click New Pipeline.
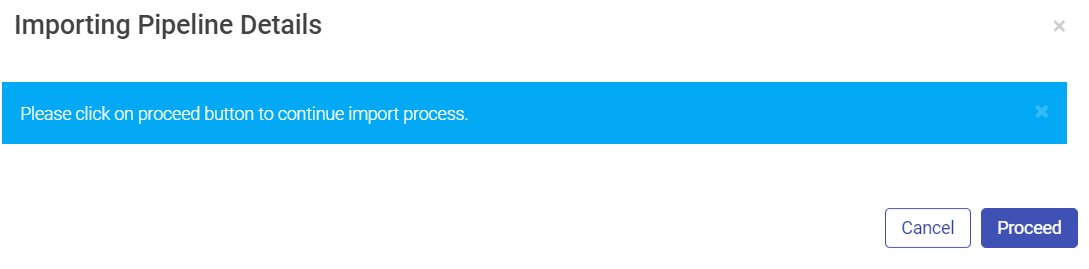
Click on Proceed, and update the pipeline configuration details. Once the configuration is completed, upload the pipeline and it will get listed on the Pipeline page.
If you have any feedback on Gathr documentation, please email us!