Template as Component in a Pipeline
In certain scenarios the user might require a pipeline with similar data flow pattern at multiple times. In case if the user requires to change a few processors in the existing pipeline, then the option of using Processor Group functionality is used. However, Gathr provides its users with option to change all components (source, processor, emitter) by using Template as Component feature.
A pipeline Template may contain multiple flows, therefore user will be allowed to select partial flow of template to be changed/edited of its pipeline.
Key Functionality:
User can utilize a Template as channel, processor and emitter.
User can choose the part of a template that is to be used in pipeline as per requirement.
In case if a template is updated, the effective changes will reflect once the pipeline is started.
User will be notified via. an alert/email whenever the changes in a template are applied.
Steps:
On the Pipeline canvas, user has an option to utilize the listed templates that are created in the existing workspace within the pipeline.
Drag and drop any data-source or use a template as a data-source, processor or emitter.
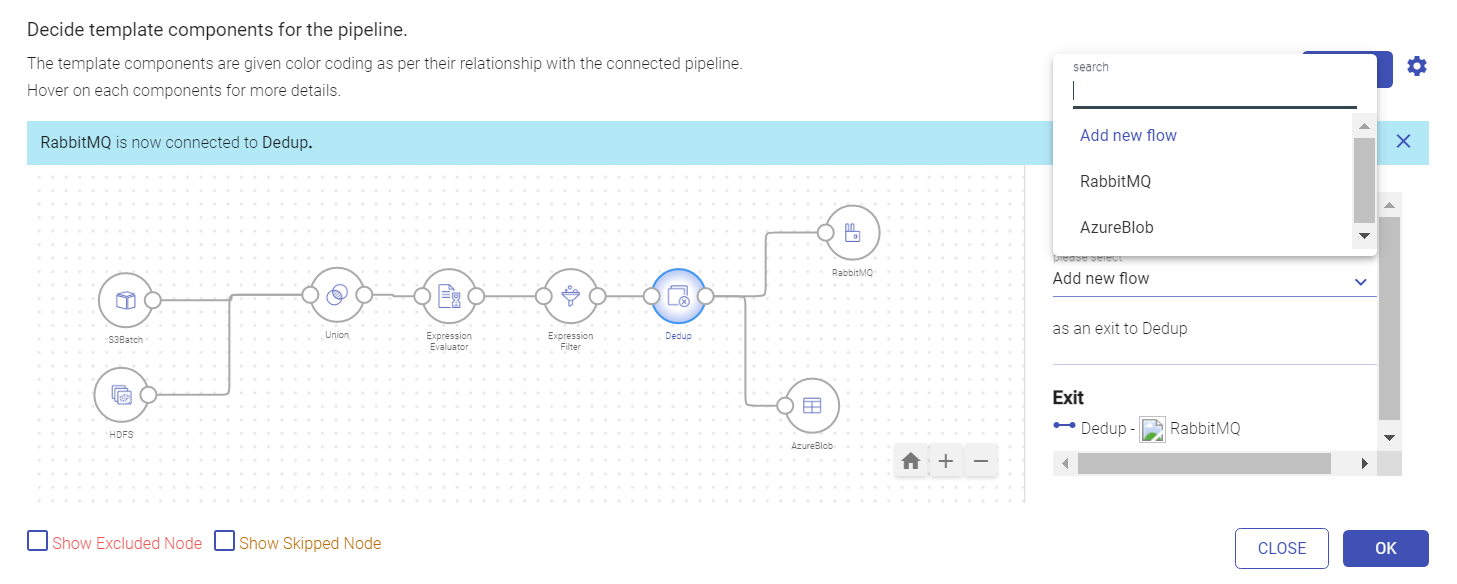
As shown in the below image, for an instance; once any component (source/processor/emitter) is connected to the Template, then the window opens displaying the template view.
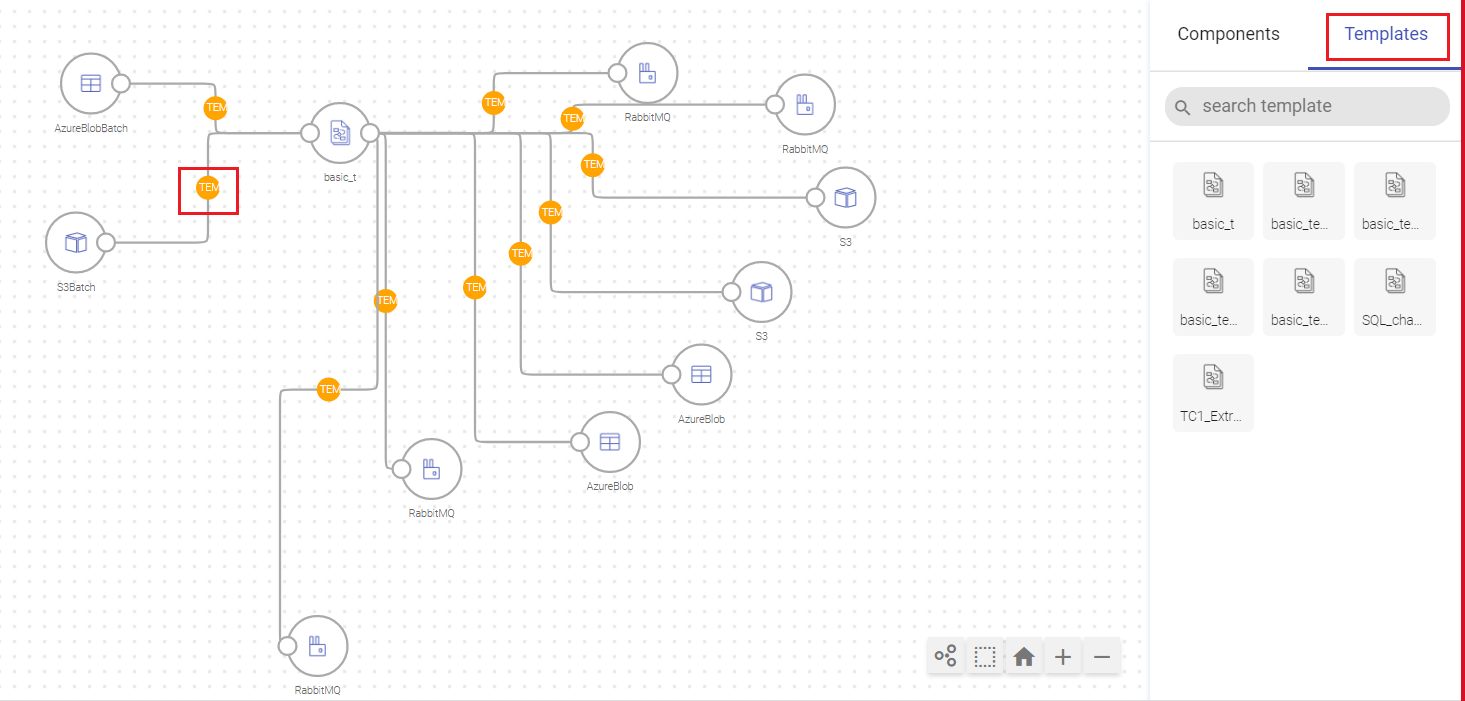
Upon clicking the Temp icon, the template flow will appear.
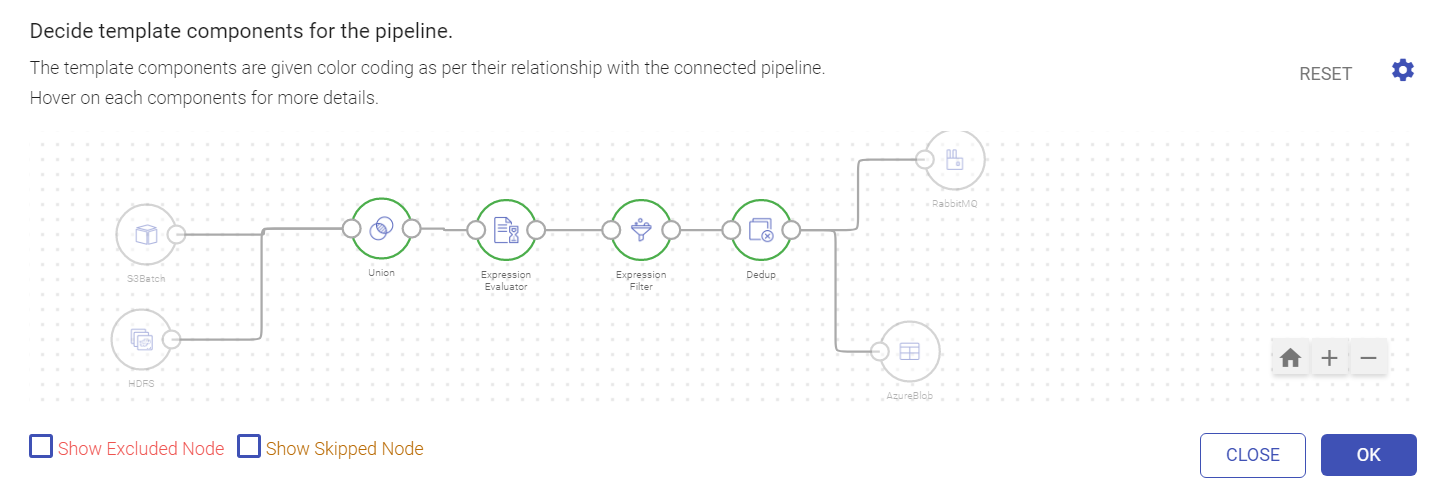
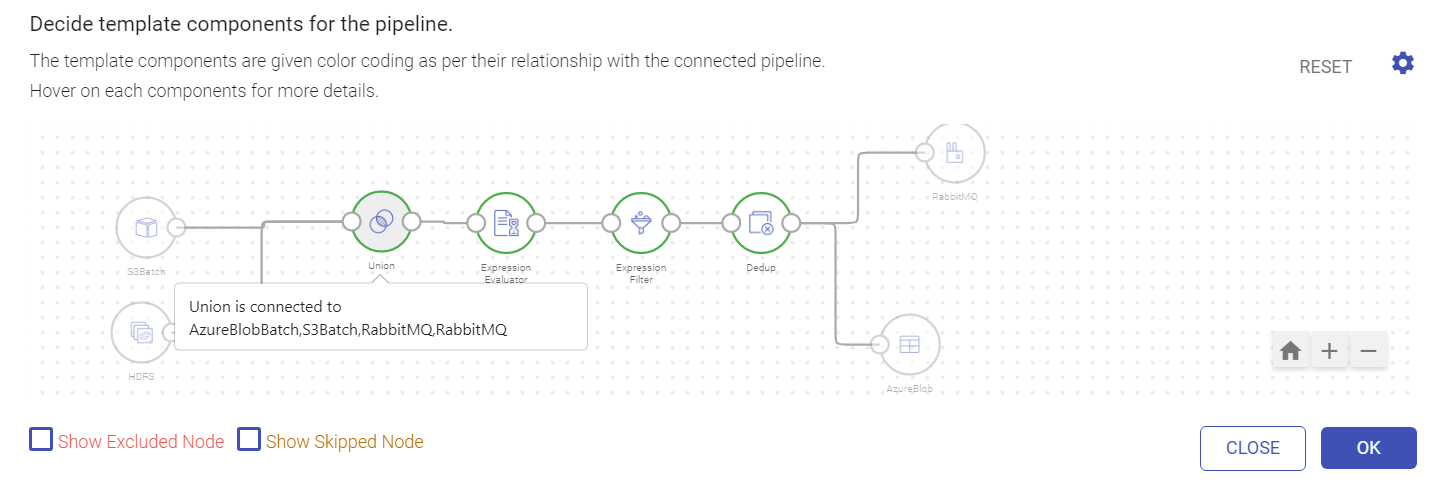
The window appears reflecting the template’s components details. Now, select the component in the template that needs to be connected to the component on the pipeline canvas. i.e., Select a template component and the flow next to it will adjoin < pipeline_component_name>. For example, in the image, Union has been selected as an entry point and is connected with Azure Blob Batch, S3 Batch, Rabbit MQ, RabbitMQ components in the pipeline canvas.
Configure Template as Component
Click on the template to configure it.
Customize Template
User has an option to customize the template. Right click on the template and select Customize option:
| Field | Description |
|---|---|
| Key | Name of the parameter. |
| Value | Value associated with the parameter is reflected. The value can be edited by hovering over the value and clicking Edit. An editable window opens where the value can be edited and saved. |
| Default Value | The default value of the parameter is reflected. |
| Action | In case of external configuration, the key used will be reflected in red color. Download sample JSON to update the external configuration of the parameter. Please add <template_name> as prefix if template component name is used in the configuration. For an example, suppose an SQL processor is externalized and has query “select * from S3BatchChannel_101494” and s3 batch is template component then in that case you will have to replace S3BatchChannel_101494 with template name followed by ‘_‘and S3BatchChannel_101494 so the resultant query will be “select * from <templatename>_S3BatchChannel_101494”. |

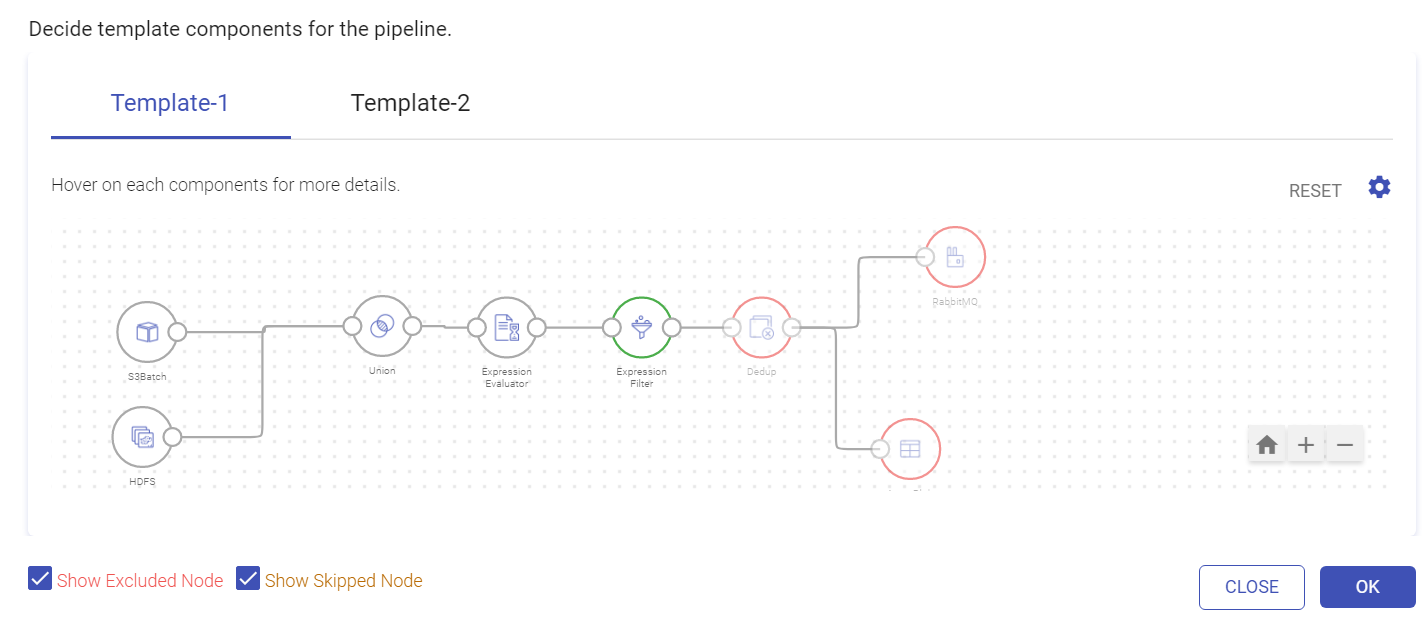
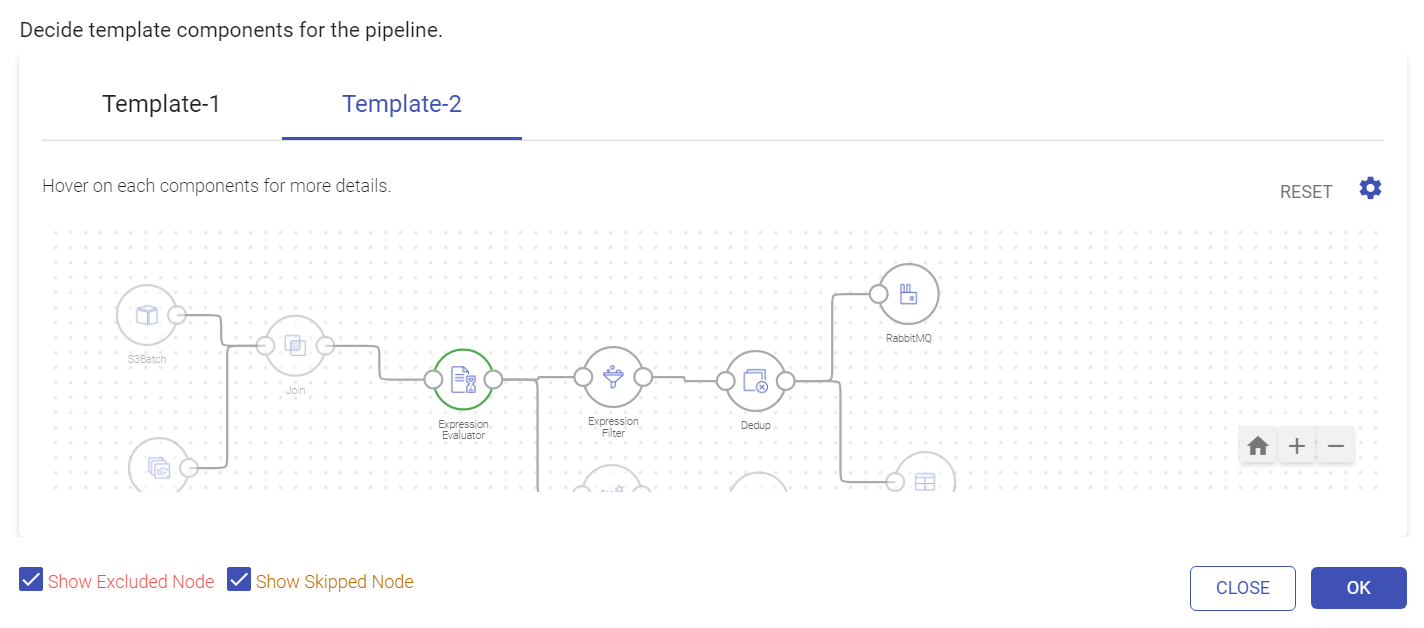
On the template flow window, right-click the component that needs to be terminated or skipped from the template flow. The options available upon right-clicking are: Terminate Succeeding Flow, Terminate Preceding Flow, Skip Component.
The template components are given color coding as per their relationship with the components present in the pipeline.
User has an option to skip component. Template component can be skipped from data flow when used in pipeline as template as component.
Upon terminating the succeeding or preceding flow the terminated components will be grayed out while the skipped component will be reflected in brown color.
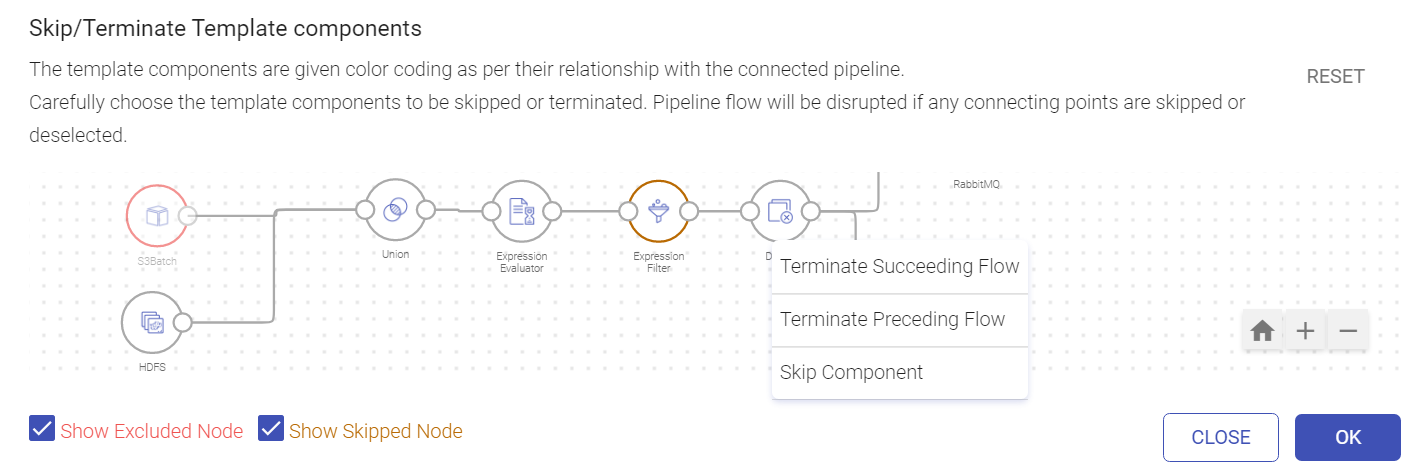
Color coding is as follows:
| UI Legends | Description |
|---|---|
 | The template component(s) reflected as red are terminated from the pipeline flow along with the chosen succeeding or preceding components in template flow. |
 | The template component(s) in brown are skipped from the pipeline flow. However, its succeeding/preceding component(s) will be included in the flow unless you choose to terminate the succeeding/preceding component(s) or skip them from the flow. |
After the template has been customized as per requirement, select the processor(s) and join it with the template.
Once the template flow opens, select the exit point component that will mark as the end point of the template.
As shown below, Dedup is selected as an exit point and is connected with the pipeline component. You can Add new flow or replace an existing flow from the exit point (example: Dedup). If you select any existing flow, it will not be the part of your pipeline.
Select Email will be replaced as pipeline component. The pipeline flow will not consider suffixed components (i.e. Email Filter, Email Evaluator and others marked in red) from the Template flow as shown in the reference image. All the components in red color are terminated from the pipeline flow.
In certain scenario the option to pair two templates by connecting them in serial order is required. In that case, option to select another template and pair it with the pipeline is available.
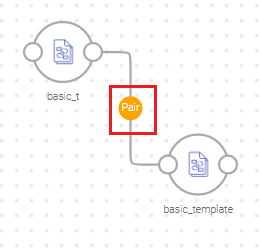
Upon clicking Pair, the window appears showing details of both Template 1 and Template 2. In Template 1 the exit point of the flow is selected and in Template 2 the entry point of the template flow is selected.
- Template as component and Processor Group cannot be used in the same pipeline.
- When user connects two templates in a sequence, then only a single stream of data can flow between the connected templates.
Entry point: Multiple inputs can be provided using Union, Join (only two) and SQL processors. Likewise, for Exit point: Multiple exit points can be provided using Add New Flow option.
Using SQL and Router processor as exit point, if user selects Add new flow option, then provide the query name.
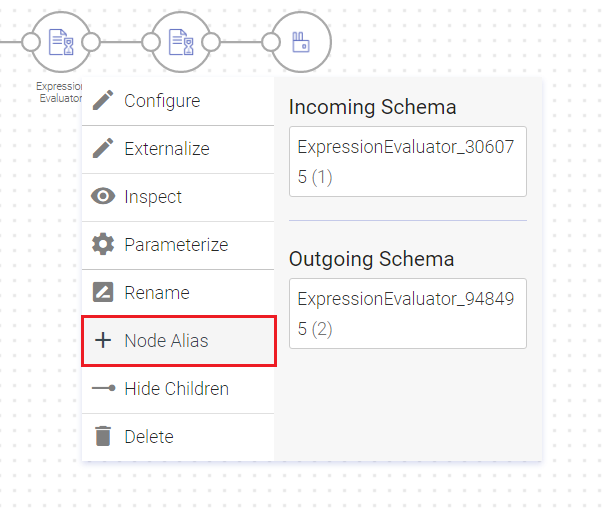
Node Alias
In gathr, while using template as a component within a pipeline, you select connecting point to connect it with pipeline’s component.
For an example in certain scenario, you may want to update a particular template that is utilized in a pipeline. In that particular template you may want to remove the component that is a connecting point for the pipeline.
The pipeline in that case will not be able to find the missing/removed component in the updated template.
Thus, with Node Alias option, you can handle the scenario of missing template component by creating a Node Alias of the pipeline’s connecting point component.
Therefore, upon removing the component of the template which is also the connecting point of a pipeline, the user will have to assign new component to that alias so that the pipeline can connect to the newly defined component. Below are images explaining steps for Node Alias.
In template component, click upon the component and select Node Alias:
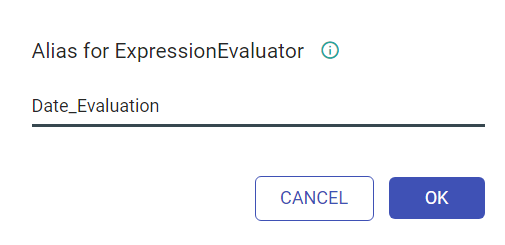
Provide details of Alias and click OK.
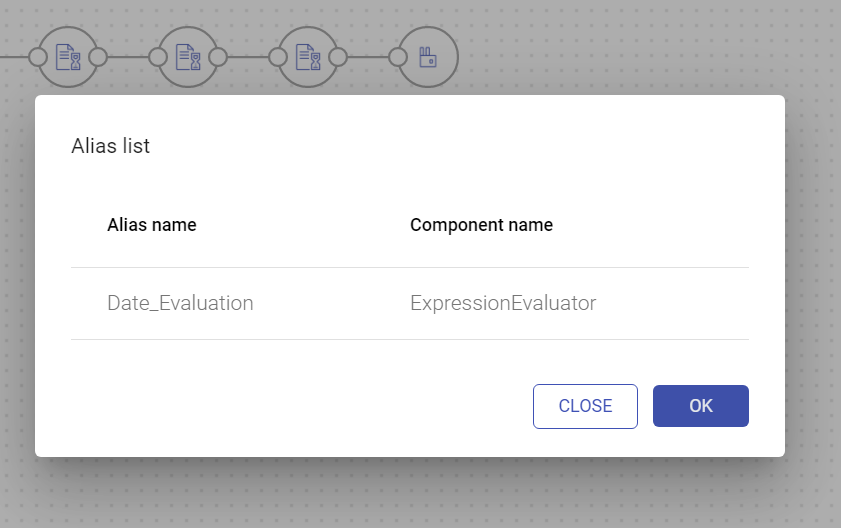
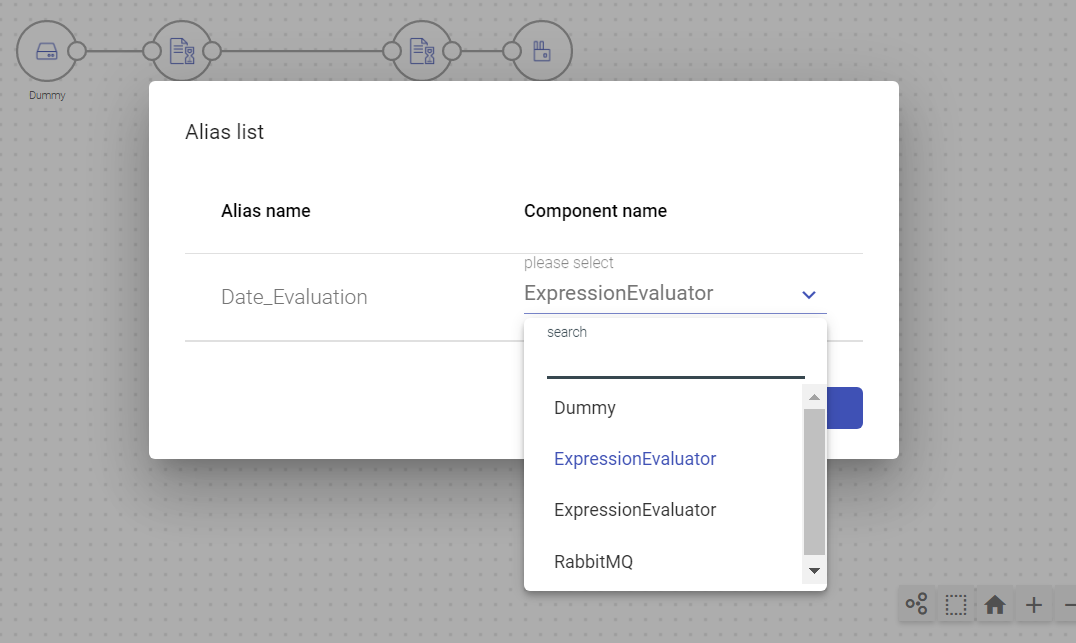
On the template canvas, click the ellipses at the top right of the screen to see the Alias List.

The Alias name and Component name is reflected in the Alias List window.
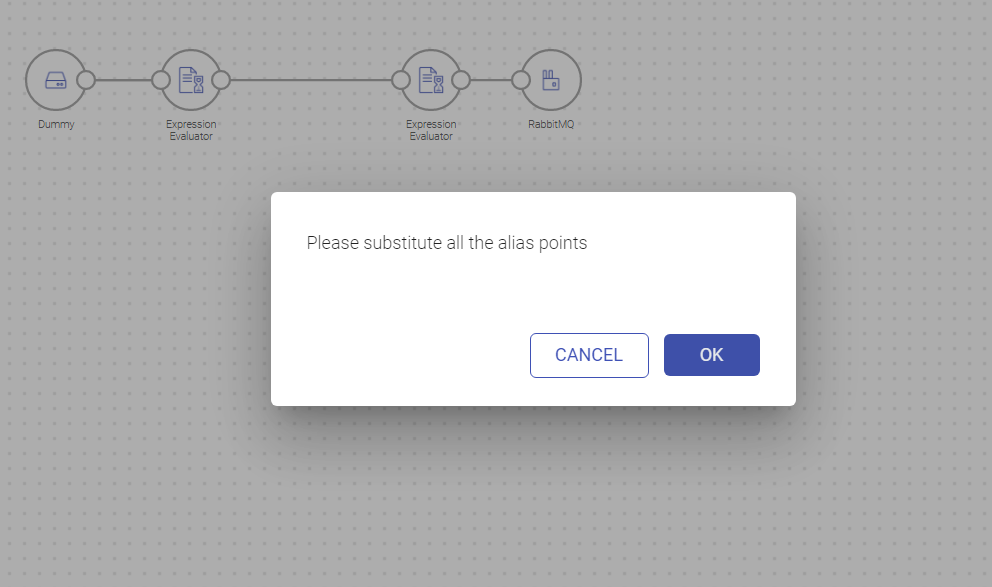
As shown in the below images, the selected component in Alias List can be connected with the template flow that will be used as connecting point in the pipeline.
If you have any feedback on Gathr documentation, please email us!