Tags
Under the Tags tab, the user will be able to add customized tag names for each commit.
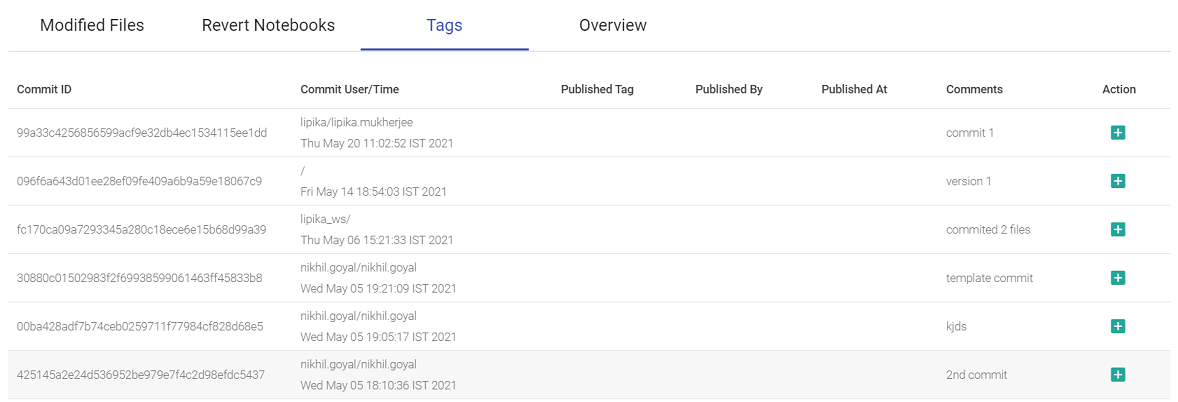
The information that is displayed on the Tags tab and the user actions that can be performed are explained below:
| Field | Description |
|---|---|
| Commit ID | The unique ID associated with each commit will get displayed. |
| Commit User/Time | The Gathr username and Git username along with the timestamp when the commit was done will get displayed. |
| Published Tag | The tag name that is added by the user for a commit will get displayed. |
| Published By | The details of the Git user who has created the tag will get displayed. |
| Published At | The timestamp when the tag was added will get displayed. |
| Comments | If a tag is not added, then the original commit message will get displayed. But, once a tag is added, the commit message will be replaced by the new message that the user provided while adding the tag. |
| Actions | This column provides user with certain set of actions that can be performed on the listed commits. |
Actions
The actions available on the Tags tab are explained further.
Add Tag
The user can add custom tags for any of the listed commit(s) using Add Tag option.
After providing a custom tag name and message, the user can click on CONTINUE option to complete adding the desired tag for the commit.
Checkout tag to a new branch
Once a custom tag is added, the user has an option to checkout that commit to a new branch in the repository.
After the new branch is created, all the listings in version control options (Modified Files, Revert Notebooks, Tags and Overview) will get populated according to the new branch created.
All branches available in the repository can be toggled from the overview tab.
Delete
The user can delete a custom tag name that was created, by clicking on the Delete option.
Also, delete action will not impact any new branch that is created using Checkout tag to a new branch option. As described earlier, all branches available in the repository can be toggled from the overview tab.
If you have any feedback on Gathr documentation, please email us!