Manage Databricks Clusters
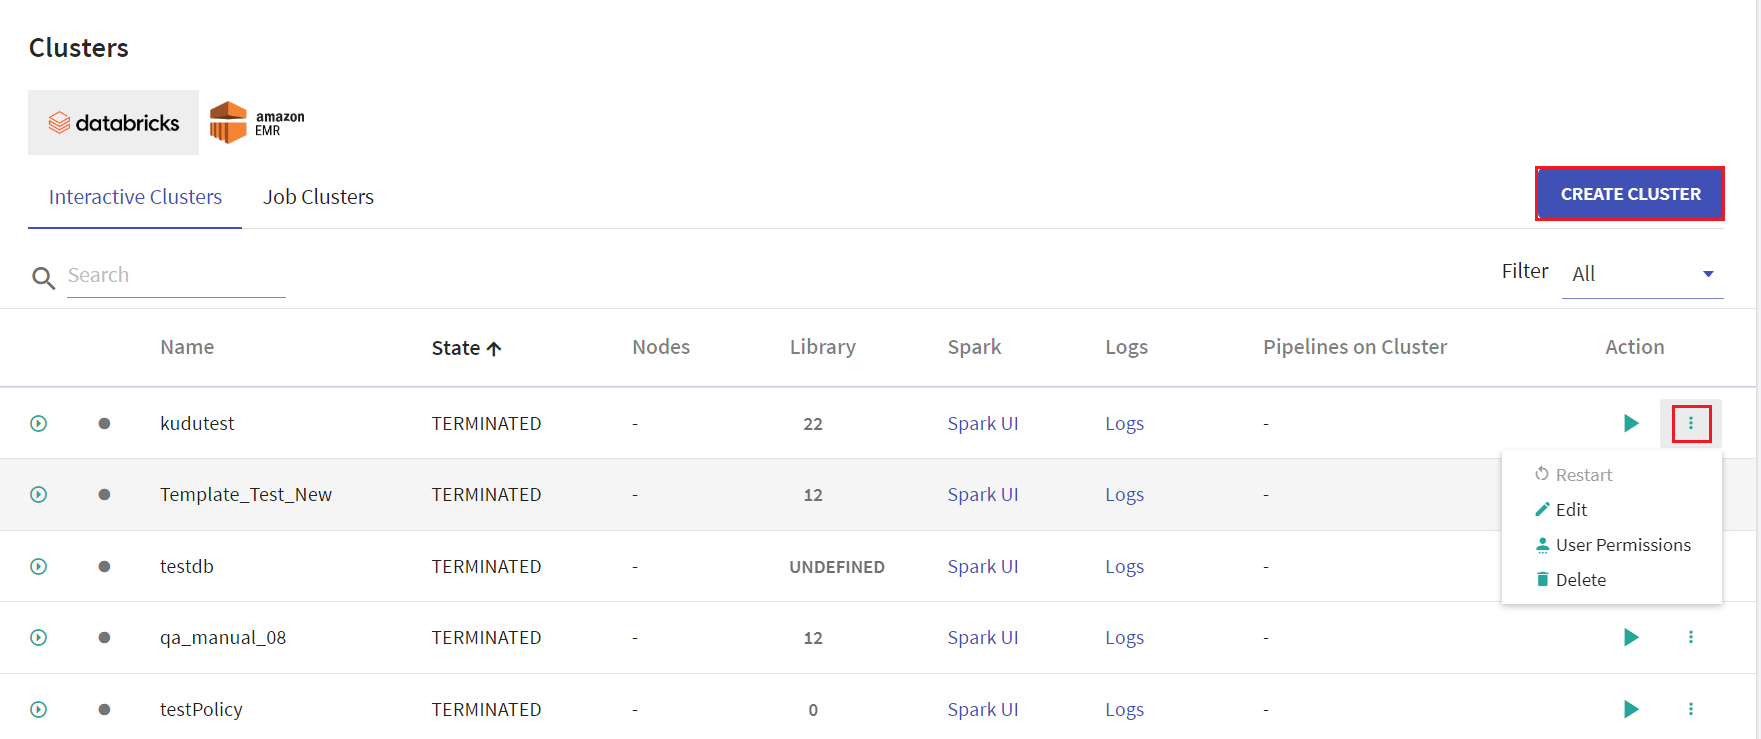
User has options to create interactive clusters, perform actions like start, refresh, edit and delete clusters, view logs and redirect to spark UI.
Given below is an illustration of the Databricks Interactive Clusters page followed by the steps to create a cluster.
On the listing page under Action tab, user has options to start the cluster. Upon clicking the ellipses, under Action tab the available options are: Restart, Edit, User Permissions and Delete.
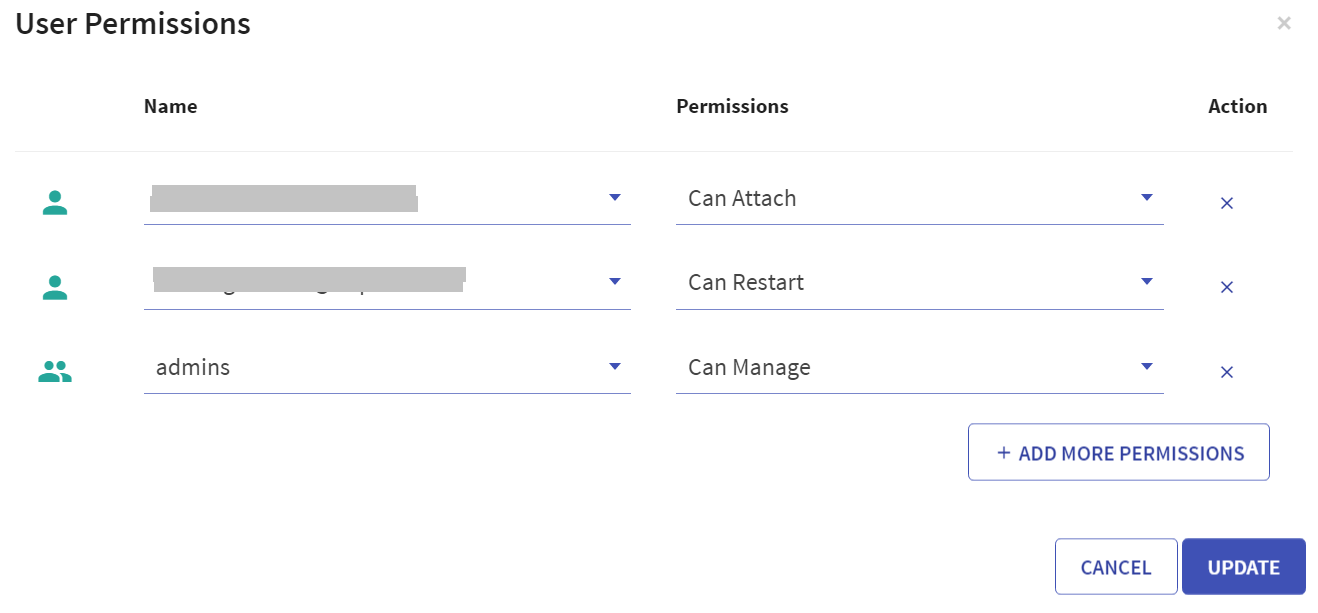
User has option to manage permissions of the existing Databricks clusters. Upon clicking User Permissions, the below screen will open:
There are four permission levels for a cluster: No Permissions, Can Attach To, Can Restart, and Can Manage thereby enabling the cluster to be accessed by a set of users with specific permissions.
Note: User must comply with the below mentioned prerequisites for User Permissions in Databricks account:
Admin to enable below mentioned toggles for the workspace in its settings:
Under Access Control, ‘Control Jobs, and pools Access Control’ toggle must be enabled.
Under Access Control, ‘Cluster Visibility Control’ option must be enabled to allow listing of only those clusters to the user for which it has any permission.
Access control is available only in the Premium plan. To see the plans, refer to AWS Pricing.
Databricks Interactive Clusters
On the listing page, click CREATE CLUSTER to create Databricks cluster. Provide the below fields:
| Field | Description |
|---|---|
| Cluster Policy | A cluster policy defines limit on attributes available during cluster creations. Option to select the cluster policy created in Databricks to configure cluster that defines limits on the attributes available during the cluster creation. Default value is unrestricted. User have an option to download the cluster policy in the local system. |
| Cluster Name | Provide a unique name for the cluster. |
| Cluster Mode | Select Cluster node from the below options available: -Standard -Single Node The Cluster Mode option is not editable on Databricks interactive cluster. |
The below option will be available upon selecting Single Node as Cluster Mode:
| Databricks Runtime Version | Provide the Databricks runtime version for the core components that run on the clusters managed by Databricks. |
| Terminate After | Provide value in minutes to terminate the cluster due to inativity. |
| Minutes of inactivity | Provide value for minutes of inactivity upon selecting Terminate After option. |
The below options will be visible upon selecting Standard as Cluster Mode
| Databricks Runtime Version | Provide the Databricks runtime version for the core components that run on the clusters managed by Databricks. |
| Driver Type | Select the driver type from the drop down list. The available options are: - Same as worker - Pool - Memory Optimized If the Driver Type option is selected as Pool, then the Worker Type must also be Pool. Once the created cluster is associated with the pool and the cluster is created successfully, the pool can be utilized in configuring a job. |
| Worker Type | Select the worker type from the drop down list. |
| Enable Auto-scaling | This option is unchecked by default. Check the checkbox to enable auto-scaling the cluster between minimum and maximum number of nodes. |
Provide value for below fields if auto scaling is enabled:
| Min Workers | Provide value for minimum workers. |
| Max Workers | Provide value for maximum workers. |
| Workers | If auto scaling is unchecked, then provide value for workers. |
| On-demand/Spot Composition | Provide the value for on-demand number of nodes. |
| Spot fall back to On-demand | Check the option to use the Spot fall back to On-demand option. If the EC2 spot price exceeds the bid, use On-demand instances instead of spot instances. |
| Terminate After | Provide value in minutes to terminate the cluster due to inativity. |
| Minutes of inactivity | Provide value for minutes of inactivity upon selecting Terminate After option. |
Databricks Interactive Clusters
Given below is an illustration of the Databricks Interactive Clusters page followed by the steps to create a cluster.
Instances
Under Instances tab the below fields are avaialble:
| Field | Description |
|---|---|
| Availability Zone | Cluster availability zones where the desired machine type may only be available in certain availability zones. Spot Pricing: The cost of spot instances may vary between available zones Reserved Instance: Select an availability zone to use reserved instances you may have. |
| Spot Bid Price | AWS spot instances are charged on the spot prices. The spot prices are determined by AWS marketplace. If the spot prices go above your bid price, then AWS will terminate your instances. The default spot bid price is set to the on-demand pricing. |
| EBS Volume Type | Databricks provisions EBS volumes by default for efficient functioning of the cluster. |
| # Volumes | The number of volumes to provision for each instance. You can choose upto 10 volumes per instance. |
| Size in GB | The size of each EBS volumes (in GB) launched for each instance. For general purpose SSD, this value must be within the range 100-4096. For throughput optimized HDD, this value must be within the range 500-4096. |
| IAM Role | IAM roles allow you to access the data from Databricks clusters without the need to manage, deploy or rotate AWS keys. |
Spark
Under Spark tab the below fields are avaialble:
| Field | Description |
|---|---|
| Spark Config | If you have used the following components in pipeline then make the respective settings: S3: Select IAM Role with the necessary S3 permissions. HDFS: Set HADOOP_USER_NAME=hadoop in spark onfigurations. Hive: spark.sql.hive.metastore.version 2.3 spark.sql.hive.metastore.jars maven hive.metastore.uris thrift://HiveMetastoreIP:9083 spark.hadoop.hive.metastore.uris thrift://HiveMetastoreIP:9083 If you want to use hive components make sure the hive properties are configured at the time of cluster creation or modification under Spark > Spark Configuration. |
| Environment Variables | Environment variables or spark config details. |
Tags
The tags are automatically added as key-value pair to clusters for Amazon tracking purposes. For details, click here .
SSH
Under Spark tab the below fields are avaialble:
| Field | Description |
|---|---|
| SSH Public Key | The public key of the SSH key-pair to use in order to login to the driver or worker instances. Example: ssh-rsa public _key email@example.com |
Logging
Under Spark tab the below fields are avaialble:
| Field | Description |
|---|---|
| Destination | All cluster logs will be delivered to cloud storage every 5 minutes on a best effort basis. |
| Cluster Log Path | The cloud storage path where cluster logs should be delivered. Databricks will create sub folders with cluster_id under the destination and deliver logs there. |
Init Scripts
Under the Init Scripts tab you have an option to add scripts by clicking athe the ADD SCRIPTS button.
Provide Type example: S3, Databricks Workspace etc., File Path, Region.
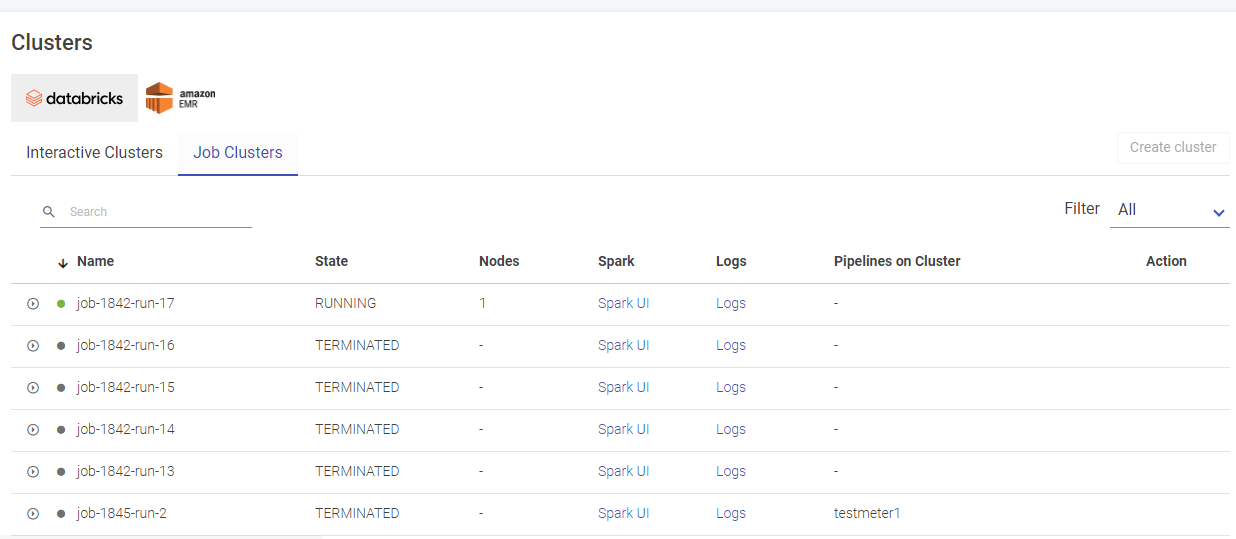
Databricks Job Clusters
Given below is an illustration of the Databricks Job Clusters page.
If you have any feedback on Gathr documentation, please email us!


