Create Template
In the data pipeline listing page, user can create a template by clicking at the Template tab.
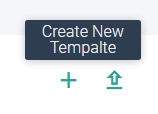
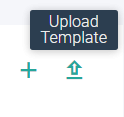
In the template listing page, click the +icon to Create New Template. User can also upload a template by clicking at the Upload Template icon available on the template listing page.
The icon to Create New Template is shown below:
The icon to Upload Template is shown below:
Steps to Create Template
To create a template, user will have to create/use an existing configured data pipeline.
On the canvas, choose the preferred data source from within the Components tab available at the top right side of the canvas.
Configure the selected data source and add the preferred processor(s) to the create the pipeline.
Once the processor(s) in the pipeline are configured, emit the data in a preferred sink/emitter.
For more on pipeline creation, see Data Pipelines → and for Components configuration details refer to Data Sources, Processors and Emitters.
Once all the components are configured, then the user can add parameter(s) to create a template.
Under the Parameters tab, click +Add Parameter.

Create the parameter by providing the below fields:
| Field | Description |
|---|---|
| Name | Provide a name to create the new parameter. |
| Value | Provide the parameter value. To create parameter, ensure that the value to be provided here is same as provided in the configuration of the existing pipeline in order to create a template. |
| Default Value | Provide the default value for the new parameter. |
Click Create to complete the parameter creation. Once the parameter is created, it can be used in configured components.
Right-click the component and select the Parameterize option. In the parameterize table, select the variable from the drop-down option available under the parameterize column of the table.
Validate the applied parameter. The configuration value and the parameter value provided in the parameterize column must be same. Click Apply to confirm the changes.
Once the parameterization is done, click Save to save the Template.
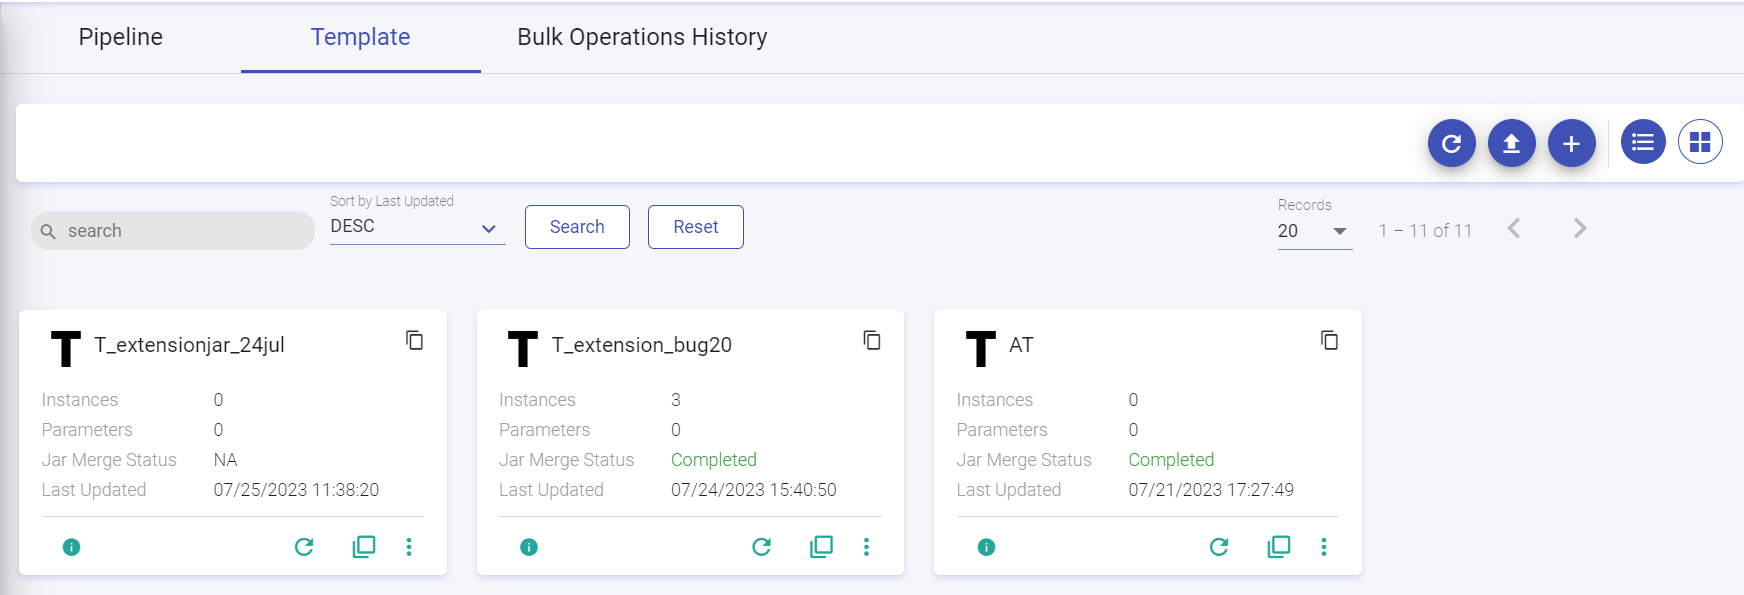
On the Template listing page, you get the following options: Refresh Data, Upload Template, Create New Template, List View, Grid View.
You can search for existing template by providing the template’s name in the search bar. You can also Sort by selecting available options from the drop-down list: ASC or DESC.
The template records can be search upto 500 pages from the Records drop-down option. Arrow button options are available to navigate to previous page and next page respectively.
Actions on Template
Once the template is created, user can perform various actions by clicking the ellipses of the template tile as explained below:
| Field | Description |
|---|---|
| Edit | Click this option to edit the template. |
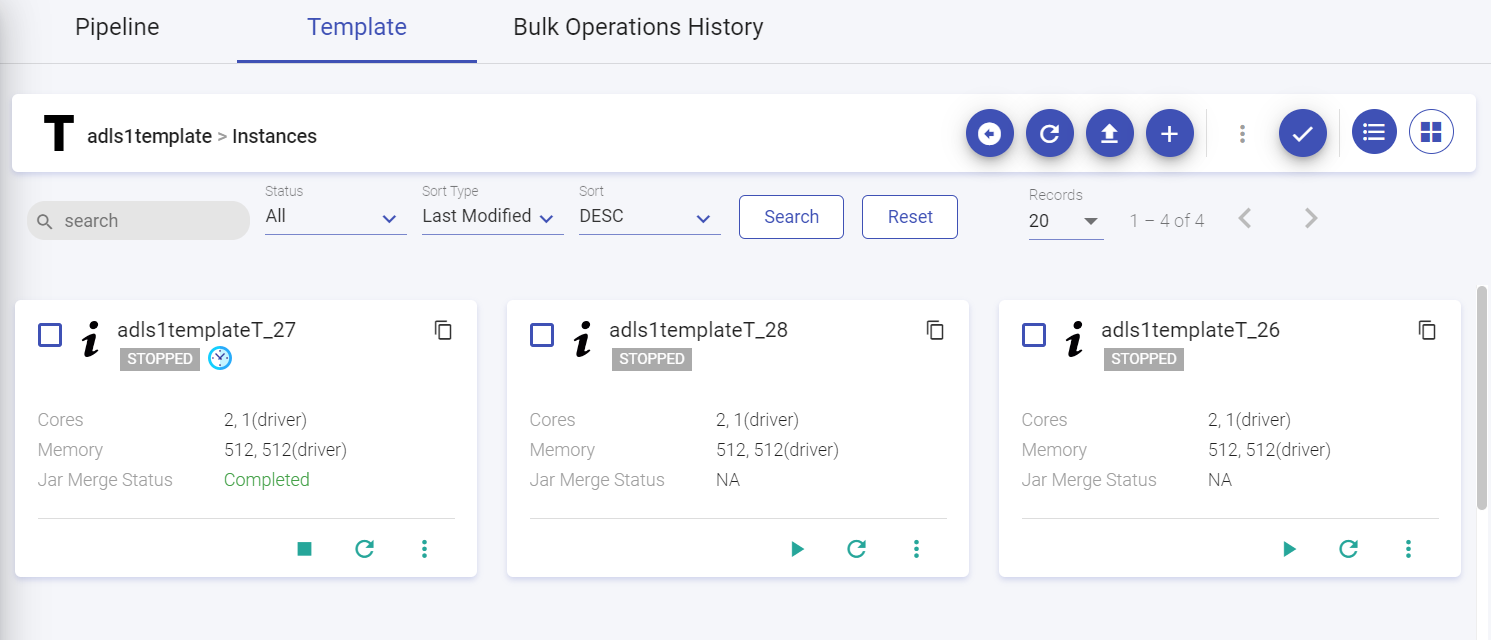
| View Instance | Click this option to view all the instance(s) that are created within the template. User can create or upload an instance from the Instance(s) listing page. Enter the instance listing page by clicking the View Instance option available upon clicking the ellipses of the template tile. Click Create New Instance. Similarly, option to upload an instance is available. |
Create Instance: Click this option to create an instance within the template. Provide the below details for instance creation:
| Name | Provide a Unique name of the instance to be create. The template name will be prefixed before the instance name. |
| Parameter Details | Provide value(s) of the parameter for which the instance has to be created. Note: Under the Component Using column, the variables used in the listed components are mentioned. Click Create to create the instance. |
The other actions available on the template tile are given below:
| Download | Click this option to download the template. |
| Delete All Instances | Option to delete all the instances of the template. |
| Schedule All Instances | Option to schedule all the instance of the template. |
| Normal Scheduler | |
| Schedule | Option to periodically schedule the pipeline run at fixed intervals of day(s), hour(s), minutes(s). |
| Number of days | The time interval in number of day(s), hour(s), or minute(s) should be specified for pipeline scheduling. |
| Repeat Count | Option to limit the number of times that the pipeline should run as per schedule. |
| Cron Scheduler | |
| Schedule | Option to periodically schedule the entire run at fixed times, dates, or intervals. For custom scheduling any valid cron expression should be provided. Example: 000/31/1*?* This is an expression for scheduling an entity to run every three hours. You can Validate and Schedule the instance. |
| Update Instances Parameters | Option to update all the instances of template. On the Bulk Update Instance Parameter window you can select the instances and Download Json for Selected Instance’s Parameters and Upload Modify Json. |
Instances of a template can also be created by clicking the ellipes of the template tile and by clicking the Create Instances option. A window opens to create the instance where you can provide the specific details of instance(s) that needs to be created.
Below are the details of the Create Instance window:
| Field | Description |
|---|---|
| Template Name | Name of the template for which the instance is to be created. |
| Instance Type | Options available to choose between creating single or multiple instances. |
| Name | Upon choosing Single option you will be required to provide the name of instance that needs to be created. |
| Instance Count | Upon selecting muliple instance type as an option, provide Instance count which is the count of new instances for the bulk creation method. |
The parameter details include key value pair, Default Value and Component Used details. Click Create to create instance(s).
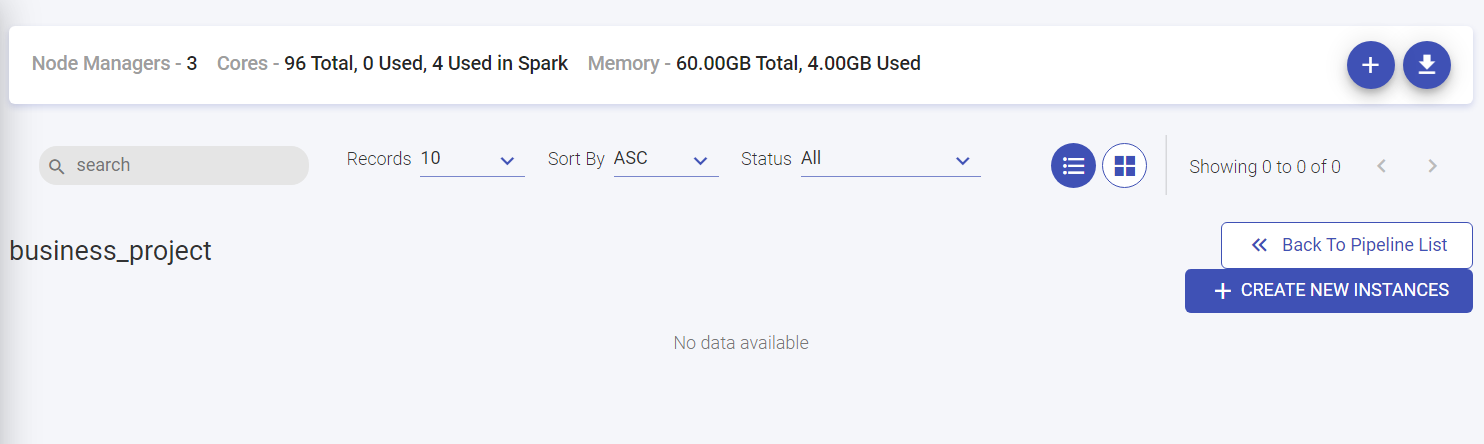
On the Instances listing page, you get the following options: Back to Templates, Refresh Data, Upload Instance, Create New Instance, Bulk Actions, Select all for bulk actions, List View and Grid View.
From the template tile, upon creating ellipses you can select View Instances option to view the existing instances of a particular template.
On the Instances listing page of the particular template, you can search for existing instance by providing the instance’s name in the search bar.
Instances can be seached by status from the drop-down menu. The available options are: All, Active, Error, Starting, Stopped.
Option to Sort Type instances are: Last Modified and Name. You can also Sort by selecting available options from the drop-down list: ASC or DESC.
The records can be searched upto 500 pages from the Records drop-down option. Arrow button options are available to navigate to previous page and next page respectively.
Upon selecting Select all for bulk actions you will get the below options.
You can bulk Start the selected instances. Click on the instance(s) tile checkbox (top left). Select the Bulk Actions ellipses option available on the listing page (top-right). Options available are:
Bulk Start
Option to start all the selected instances. You can Bulk Start the selected pipeline by clicking on the instance tile checkbox (top left).
Bulk Stop
Option to stop all the selected instances. You can Bulk Stop the selected instances by clicking on the instance(s) tile checkbox (top left).
Bulk Delete
Option to delete all the selected instances. You can bulk Delete the selected instances by clicking on the instances tile checkbox (top left). The delete option will not work if pipeline is in active state and used in a Workflow.
You also have an option to select/de-select all for bulk actions next to ellipses option for Bulk Actions.
Actions on Instance
Once the instance is created, user can perform various actions by clicking the ellipses of the instance tile as explained below:
| Field | Description |
|---|---|
| Edit | Click this option to edit the instance. |
| Inspect | Click this option to inspect the instance. The data source(s) with configuration details will be listed which can be updated as per requirement. |
| Download | Click this option to download/export the instance. |
| Delete | Click this option to delete the instance. |
| Schedule | Click this option to schedule the instance. |
| Monitor | Click this option to monitor the instance. |
| Run | Click this option to run the instance. |
Externalize
User has the option to configure the component(s) externally and parameterize the values set during configuration.
The configuration details are mentioned below:
| Field | Description |
|---|---|
| Configure | Option to configure the component. |
Externalize
The user can add configuration and schema to the components of the pipelines externally. The External configurations and schema will be fetched from a service deployed externally and these pipelines will be able to inspect and run on the bases of external configurations and schema.
The option to External Configuration are explained below:
| External Configuration | Select the check box for enabling External Configuration option. |
| Store | The external configuration of components can be done using the below types of store: - File System - Database (RDS) - S3 The user can add external configuration to the components of the pipelines. Externally configured pipelines will be able to inspect and run on the bases of the external configurations. The External configurations will be fetched from a service, deployed externally. |
| Keys | Select the relevant key of the selected store from the drop-down list. This is a dynamic field as the user can create a customized key as per requirement. The keys contain the configuration and schema of the component. |
| External Schema | Select the check box for enabling External Schema option. |
| Store | The external schema of components can be configured using the below types of store: - File System - Database (RDS) - S3 The user can add external schema to the components of the pipelines. The External schema will be fetched from a service, deployed externally. |
| Keys | Select the relevant key of the selected store from the drop-down list. This is a dynamic field as the user can create a customized key as per requirement. The keys contain the configuration and schema of the component. |
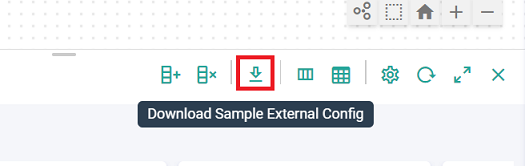
The downloaded file can be updated as per the user’s requirement and the updated file can be further placed as external service. For more details on how to configure external service, read the README file available on the external service.
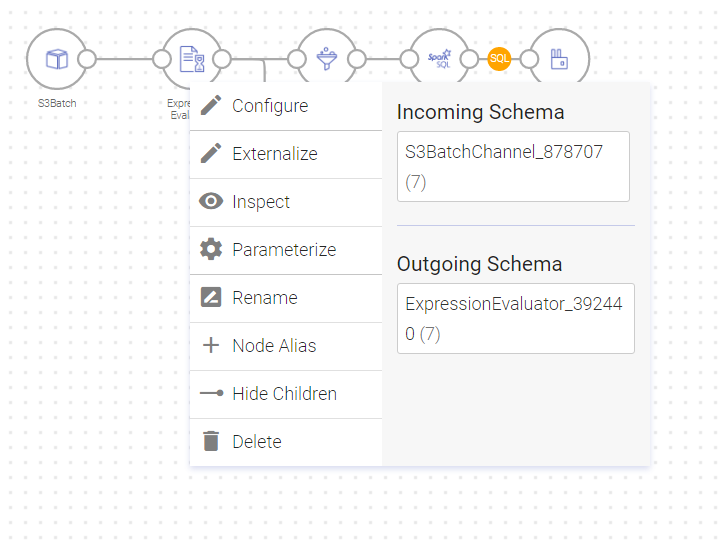
Other options available on the component upon right-clicking it are explained below:
| Inspect | Option to inspect the component. |
| Parameterize | The Parameterize option can be used to change the value(s) with new parameter(s). Provide the parameterize value. User can Validate/Reset the value. |
| Rename | Option to rename the component. |
| Node Alias | An alias can be assigned to a template component. If a pipeline uses the template with this component as a connecting point, its alias will be preferred over the component name. If this template component is deleted, an option will be available while saving the template to substitute the alias point with a different template component, which will be considered as a new connecting point in the pipeline. This feature is further explained in Template as Component in a pipeline below. For details, refer to Node Alias. |
| Delete | Option to delete the component from the pipeline. |
If you have any feedback on Gathr documentation, please email us!